
DIY Valentine’s Day Garland: A Charming Decoration
 Shop This Post

Learn how to make a charming DIY Valentine’s Day garland with free printable pennants and easy step-by-step instructions.

Do you decorate for Valentine’s Day?
I definitely used to add quite a bit more Valentine’s Day decorations to our home when the kids were younger.
It was a fun way to celebrate the season of love, especially after the holiday season when everything can feel a little quiet and just not as colorful.
Valentine’s Day gave us a chance to fill the house with pops of reds & pinks, creativity, and little reminders of the people we care about.
From heart wreaths to homemade treat mixes, it was a time to show love in simple, heartfelt ways.
These days being the only one in the house that looks forward to Valentine’s Day (Mr. ERH is a scrooge!), I still enjoy decorating for the holiday, but I’ve pared it down to just a few cozy touches.
And that includes this DIY garland.
Instead of buying one, I challenged myself to create my own…and I’m loving the result!
It’s a fun, simple craft that will add a festive touch to your home decor, and the best part is that it’s something that can be made in just a few easy steps using the banner template I created.
Plus, with the kids being older, it’s a craft I can enjoy doing solo while still filling our home with a little touch of love.
What You’ll Love About This DIY:
Materials You’ll Need for This Valentine Garland
You’ll need these supplies to create your very own Valentine’s Day DIY garland.
You probably have most of these items in your home already, if not you can easily find them at your local craft store like Micheal’s or Hobby Lobby.

supplies you’ll need
*If you make a purchase using one of these links, I may receive a small commission. This does not add any cost to you, but helps me to continue to create & share meaningful content. Thank you for supporting my small business!
I’m Heidi, the heart and hands behind Eleanor Rose Home.

I’ll show you that your home can become a place of warmth, comfort, and style with practical tips, creative ideas, and my own journey to help you create a space that feels like you…welcoming, personal, and full of charm.
Step-by-Step Guide to Make an Easy Valentines Day Garland
Creating a paper pennant garland is a fun and easy way to add a charming touch to your Valentine’s Day decor.
Here’s how!

Download our free Valentine banner template…
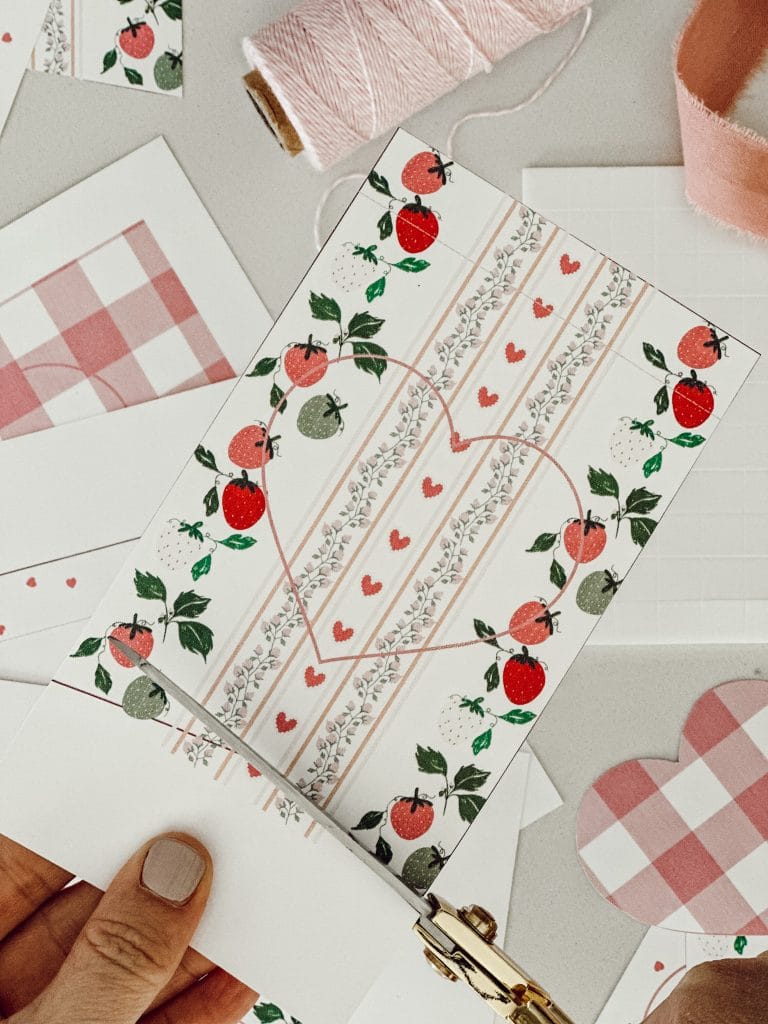
Step One: Print & Cut Out the Pennants
The first step is to download and print the Valentine’s Day pennant template.
I’ve included two different pennant templates that you can choose to either use both designs for more of a eclectic looking garland (which is what I did), or stick to one for a more cohesive feel.
Once you’ve printed the templates on cardstock, carefully cut out each individual pennant with sharp scissors.
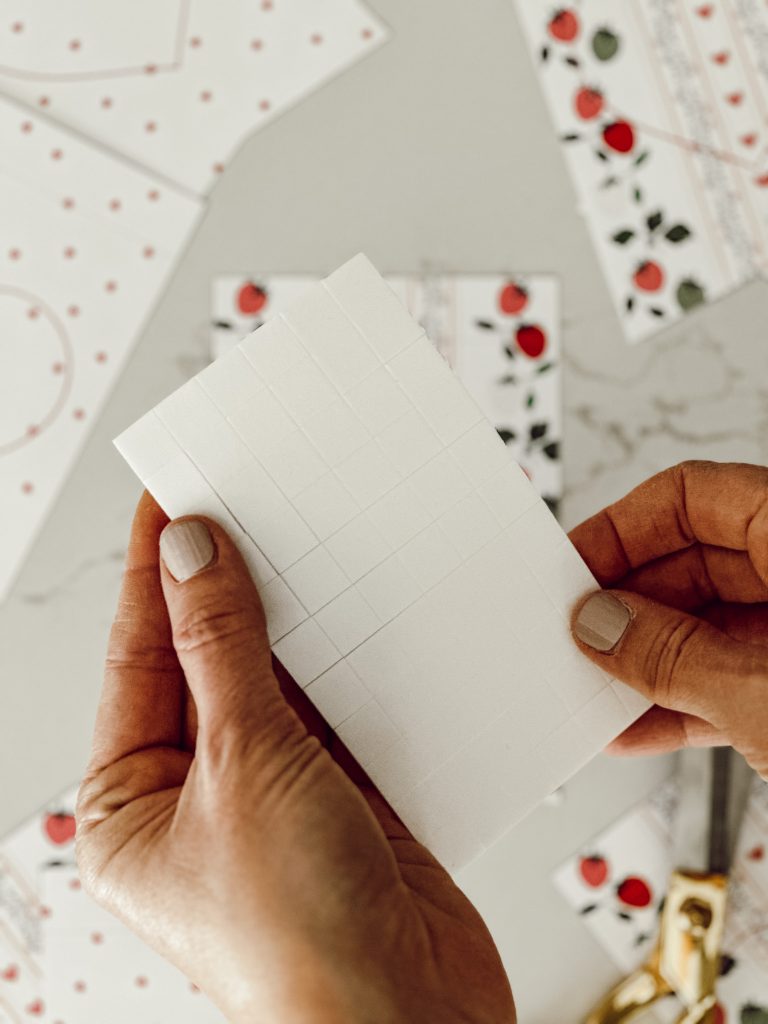
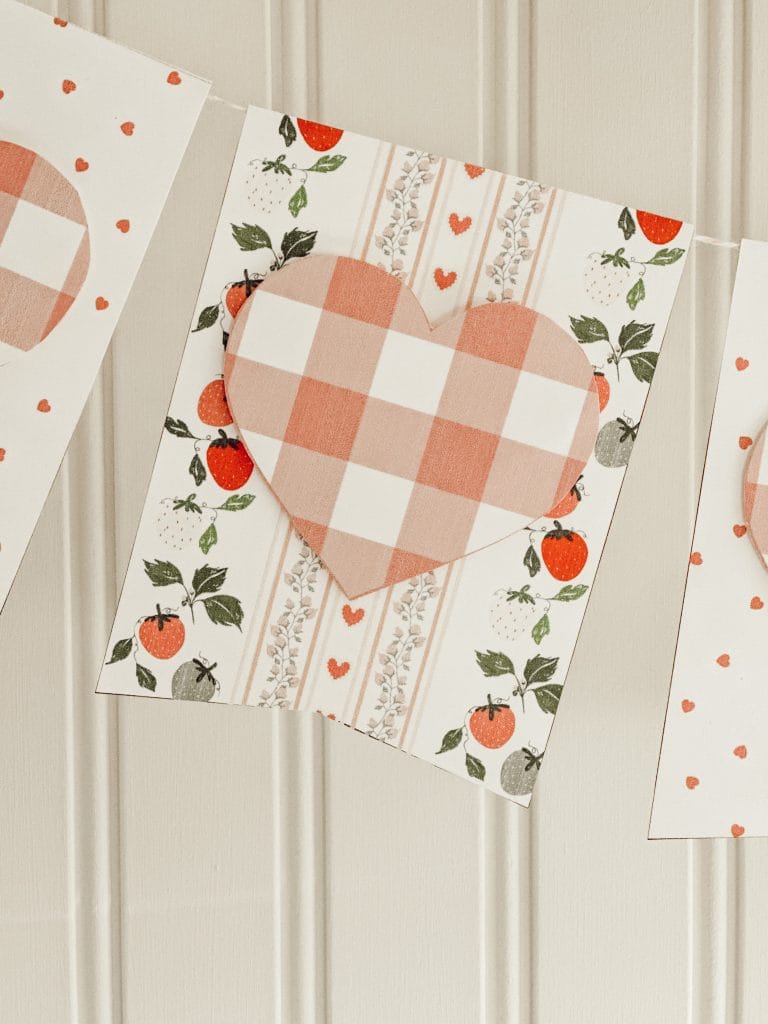
Step Two: Add Heart Embellishments
Next, you’ll be adding heart shapes to each pennant to make them stand out.
Print and cut out the gingham heart templates from the download onto card stock.
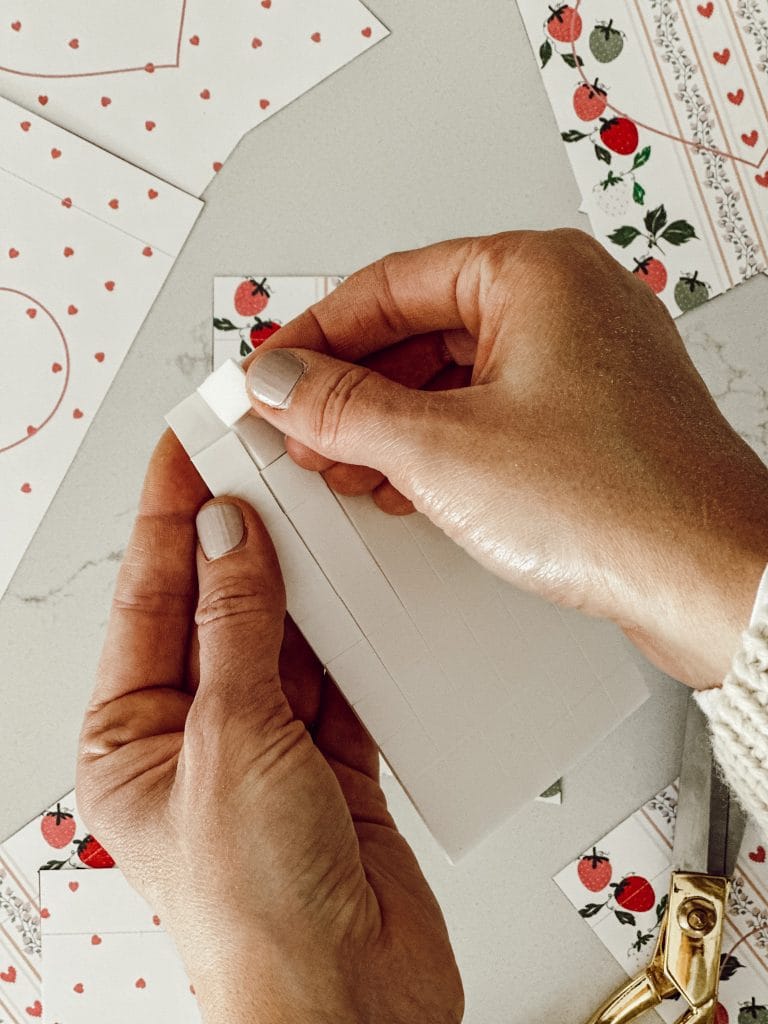
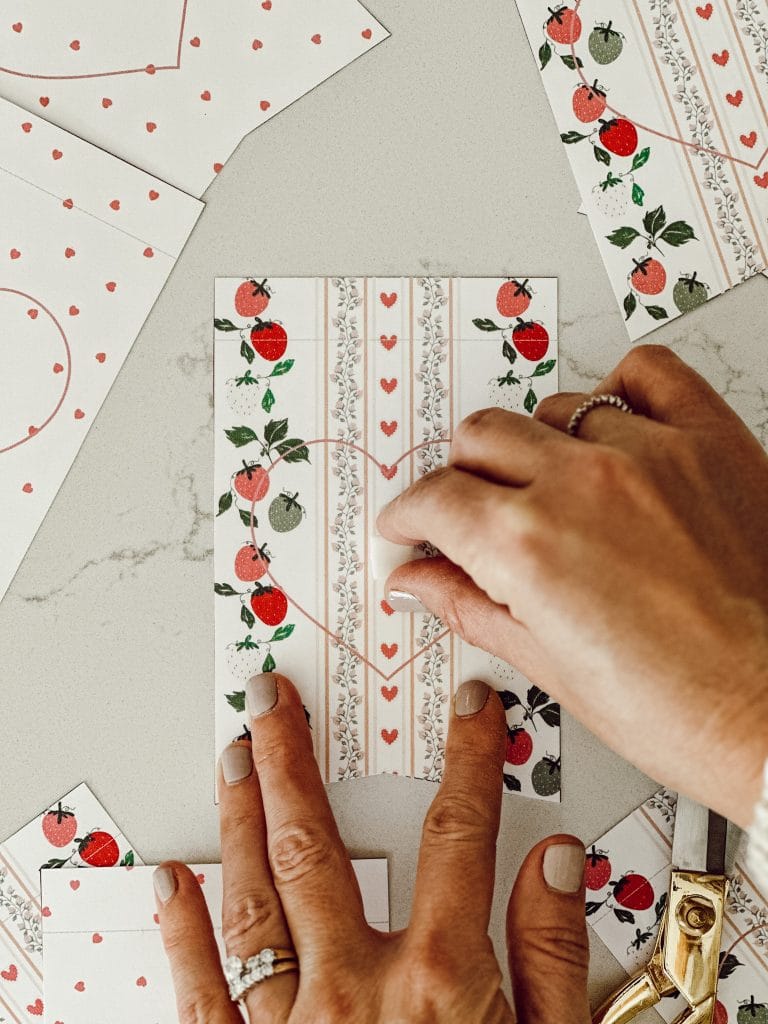
Now, take a square foam sticker and attach it to center of the heart outline on the front of the pennant.
Take one of the heart cutouts, center it on the heart outline on the pennant, and press it down lightly to ensure the heart sticks securely.


Step Three: Assemble the Garland
Now it’s time to assemble your garland!
Take a piece of string or bakers twine (the length will depend on how long you want your garland to be) and lay it out flat.
Make sure to leave about 12″ on other end of the string for tying a small loop for hanging.
Before attaching the pennants, cut out two small triangles at the top of each one. This will help ensure that when you fold over the top flap, no part of the back of the pennant will show from the front.
Next, create a fold along the dotted line at the top of each pennant. This fold will help secure the pennant to the string and give it a clean, finished look.
After folding, attach each pennant to the string by taping the folded flap over the string.
You’ll want to leave some space between each pennant to allow them to hang freely.
Continue folding and attaching all your pennants along the string until you’ve reached your desired length.


cozy ideas delivered to your inbox
When you join our newsletter!
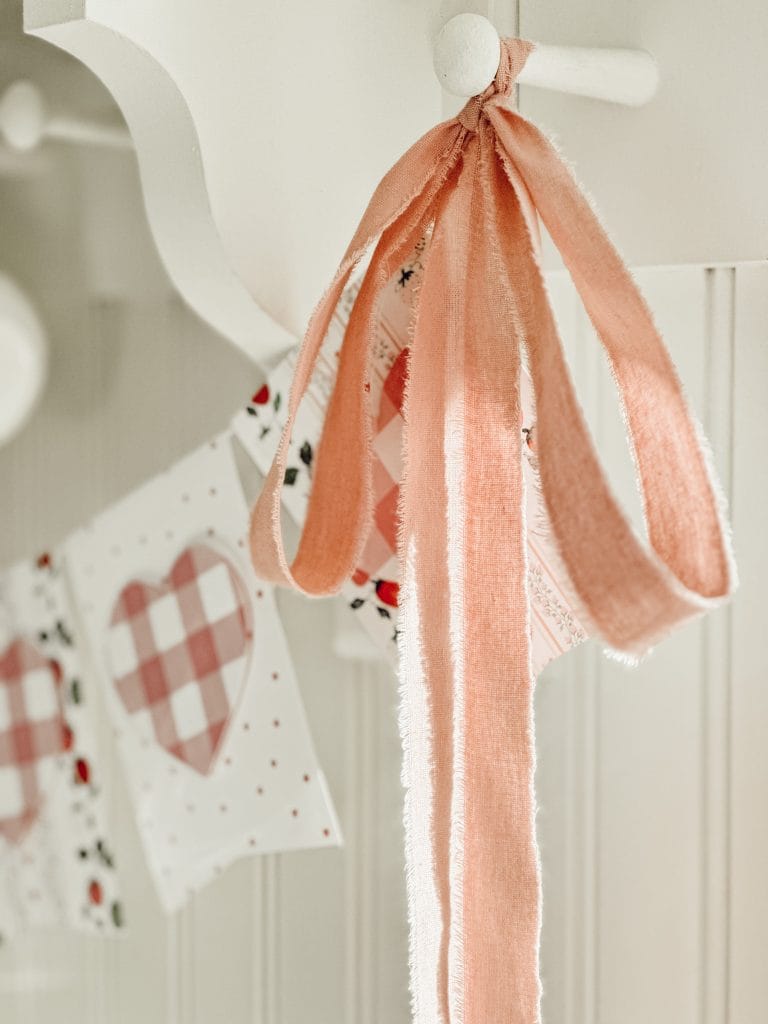
Step Four: Finish the Heart Garland & Tie Ribbon on Both Ends
Once all of your pennants are attached, it’s time to finish your garland.
Take the twine and tie it into a loop on either end, creating a secure space for hanging.
For an extra bit of charm, I tied a pink frayed edge cotton ribbon around both ends of the garland but feel free to use whatever ribbon you like or that matches your Valentine’s color scheme.
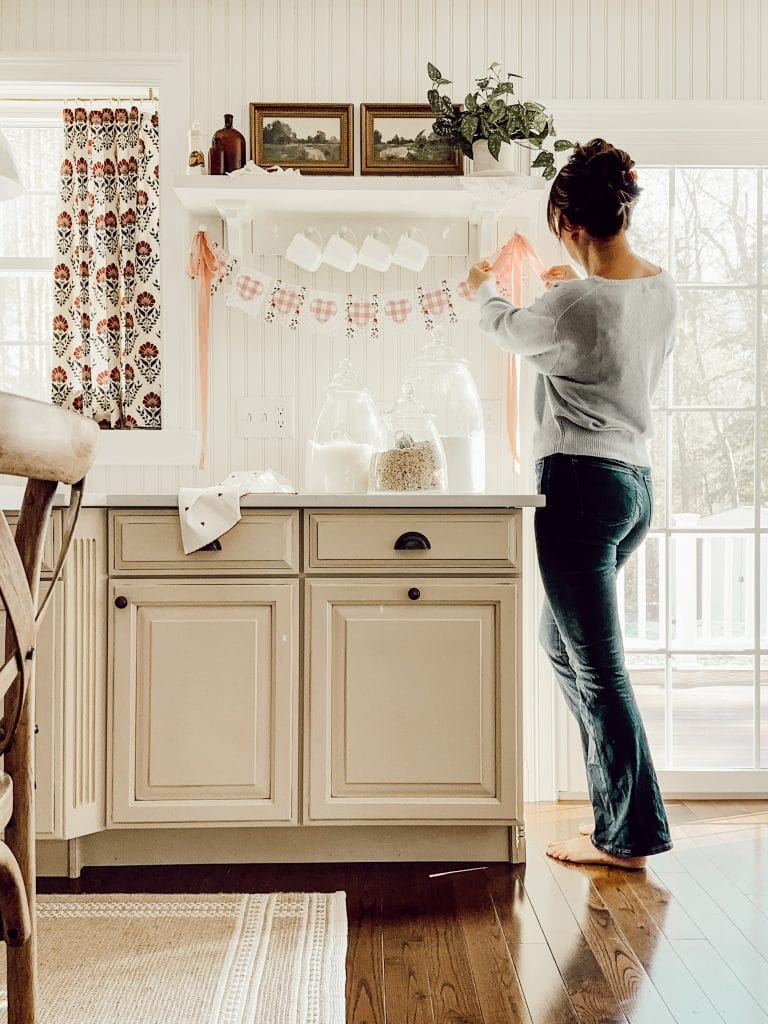

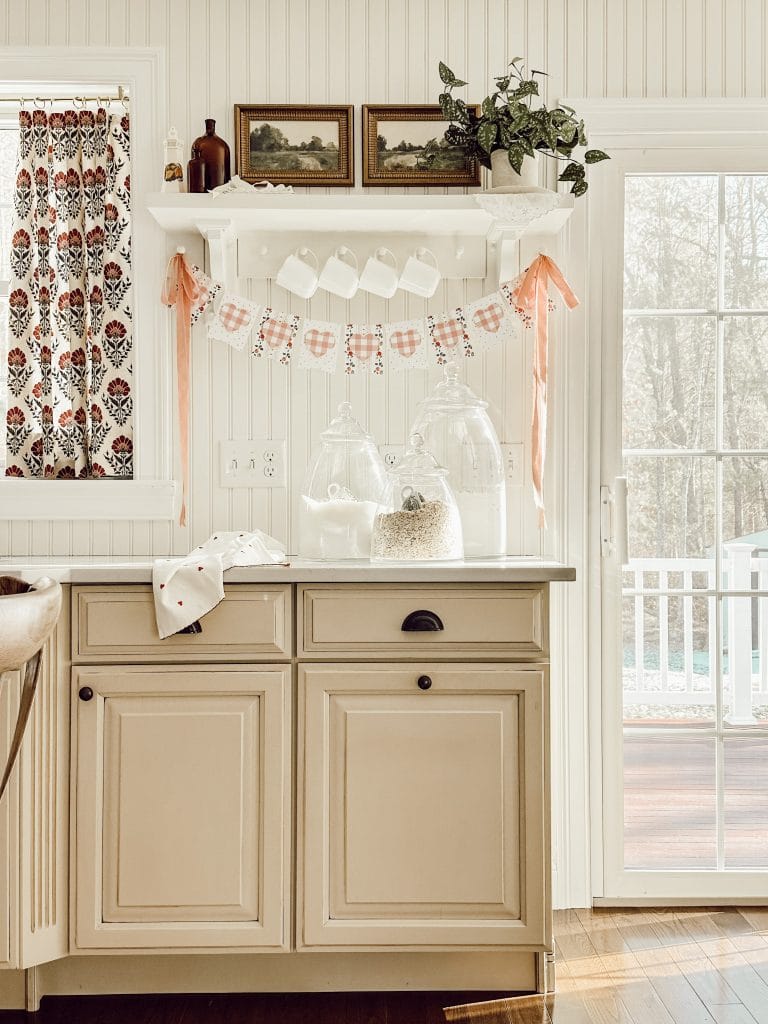
Step Five: Hang & Enjoy
Now for the fun part of this DIY…hanging your simple Valentine’s Day paper garland!
You can drape it across a mantel, on top of a dining room hutch, on pegs you might have in an entryway or kitchen, or even hang it on a wall as a backdrop for a Valentine’s Day party.
I love how cozy this garland looks hanging in our kitchen!
Helpful Tips
- For clean and precise cuts, make sure to use a sharp pair of scissors. This will help you avoid jagged edges and will give your garland a neat, professional look.
- Don’t be afraid to get creative by mixing and matching the two different pennant designs. Combining different patterns and colors will give your garland more depth and visual interest.
- Experiment with the spacing between the pennants for different effects. Closer spacing will give you a fuller look, while wider spacing creates a more airy feel.
How long will it take to make this Valentine’s Day garland?
The project is a fairly quick one!
Depending on your skill level and how detailed you want to get, it should take about one hour to complete, and that includes cutting, assembling, and decorating.
Do I need to use the foam stickers?
No, you don’t have to use the foam stickers if you don’t want to.
The foam stickers are simply a way to add dimension and make the hearts stand out a little more on the pennants.
If you want a simpler look or don’t have foam stickers on hand, you can always glue or tape the hearts directly onto the pennants.
Hey friend! What can I help you find?
Search our entire site!
How long should my garland be?
The length of your garland depends on where you plan to hang it and how much space you want to fill.
To get the exact length you want, measure the area where you plan to hang the garland and add about 12″ of extra length on both ends to create loops in the string for hanging.
Did you make this craft?
Mention us @eleanorrosehome or tag us using #eleanorrosehome so we can see your creations. You can also leave a comment below!
You Might Also Enjoy
-
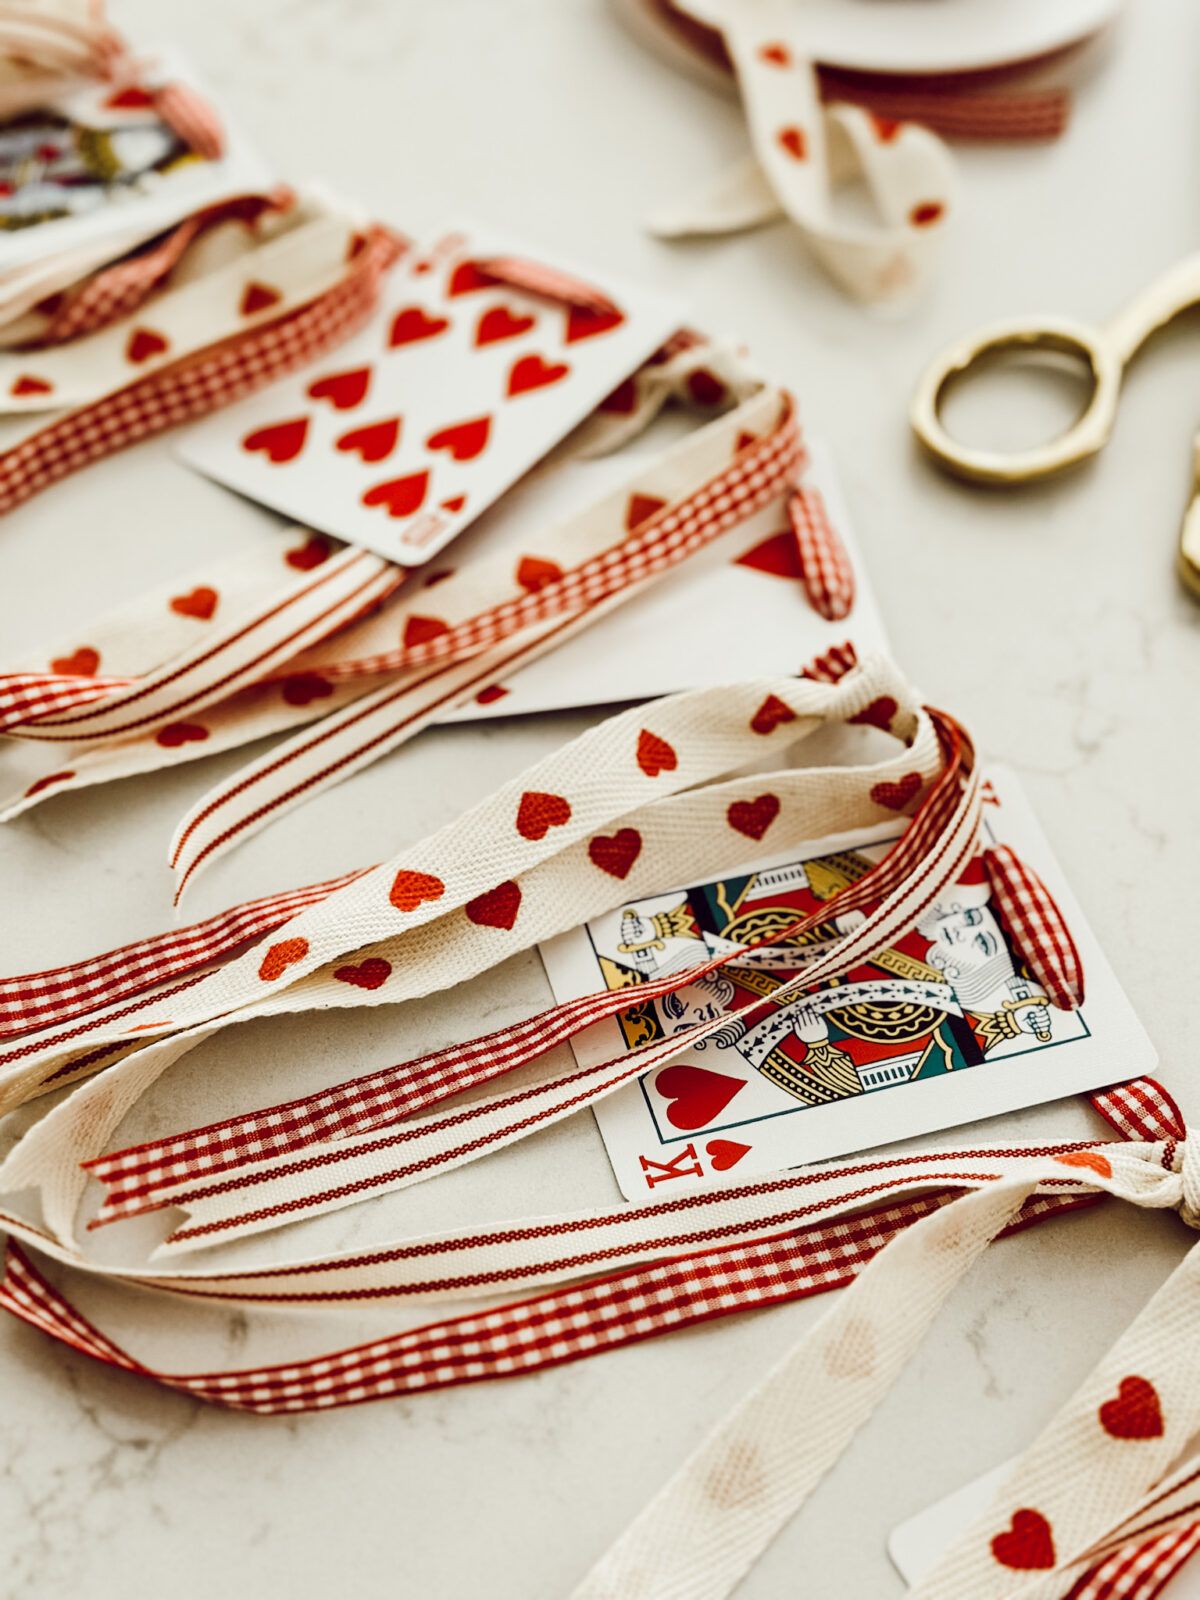
DIY Valentine Heart Playing Card Garland With Ribbon
This DIY valentine heart playing card garland is an easy way to decorate for Valentine’s Day using ribbon and heart…
-
Easy Valentine DIY and Recipe Ideas for a Cozy Valentine’s Day
A roundup of easy Valentine DIY and recipe ideas that include simple crafts, home decor, and sweet recipes for Valentine’s…
-
How to Make an Easy DIY Dried Flower Valentine Wreath
Follow this step by step guide on how to make an easy DIY dried flower valentine wreath with dried straw…


Shop My Favorite Products
Shop my favorite home decor & lifestyle products, my LTK sources, and my Amazon Storefront.
By making a purchase with one of my affiliate links, I earn a small commission which helps me continue to create meaningful content for you!
I look forward to sharing more of my home with you and inspiring you to have a well loved home!
Follow me on Facebook, Instagram, Pinterest, and LIKEtoKNOW.it.
xoxo, Heidi


Don’t forget to pin this for later!

Shop this post


I’m glad you love the banner Lilian!
Gostei muito da ideia e agradeço o PDF para fazer uma guirlanda para mim! Mto Obg!