
DIY Christmas Bell Decoration With Fresh Greenery
Learn how to create a stunning DIY Christmas bell decoration in less than 30 minutes using affordable finds from Target along with fresh greenery and festive striped ribbon. Discover the joy of crafting with this step by step tutorial to the perfect Christmas decoration.

I’m always on the hunt for festive DIY’s that will add a little Christmas spirit to our home. However, I do have a couple of prerequisites when it comes to holiday crafts.
They must be easy to make and affordable too. This Christmas DIY project checks both of those boxes.
When I saw these white Christmas bells in the Target Dollar Spot on a recent shopping trip, I knew I could make them look a little more festive by changing the color along with the addition of fresh greenery and striped ribbon.
These Christmas decorations are an easy way to add a small touch of elegance to your home without spending too much money.
Let me show you the process of turning inexpensive, ordinary bells into extraordinary holiday decorations!
I’m joining a group of bloggers today to bring you fun, easy, and festive 30 minute Christmas craft ideas. Continue reading to the end of this post for all the amazing Christmas inspiration.
What you’ll love about this DIY:

Materials You’ll Need for this DIY Christmas Decoration
Gather these supplies to begin crafting this DIY bell decoration.
SUPPLIES YOU’LL NEED

Step by Step Tutorial on How to Make a Christmas Bell Decoration
Let’s dive into the magic of crafting and create a set of DIY Christmas bells that are sure to become one of your favorite holiday decorations for this Christmas season.

Step 1: Gild the Christmas Bells
Apply the Rub ‘n Buff wax over the white bells using a paint brush or soft cloth.
A small amount of Rub ‘n Buff goes a long way, so start with a small amount on the paint brush. Rub any access wax off of the bell with a paper towel or cloth.

Remove any twine or or string that might be tied to the top of the bell so you can add your own ribbon later.
Allow the Rub ‘n Buff to dry before moving on to the next step (which should only take a few minutes).
Note: As you update the bells with the gold Rub ‘n Buff, you’ll notice an antique vibe. The gold wax not only makes them look elegant, but lets a bit of the original white show through, giving them a classy vintage feel.
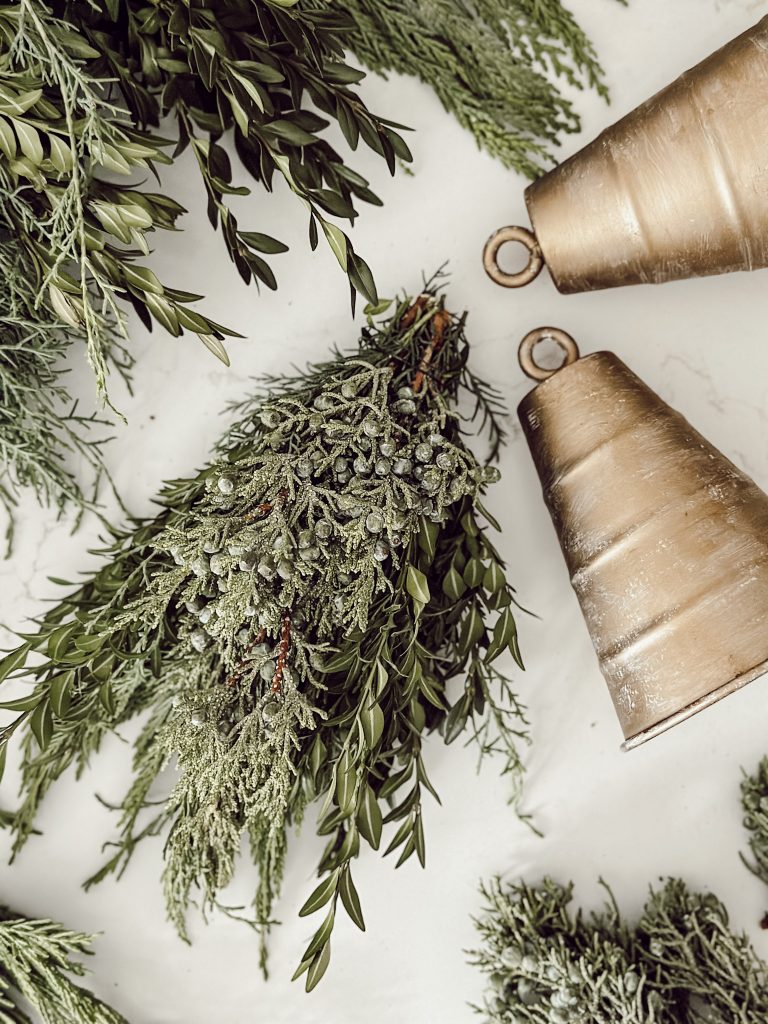
Step 2: Create Bundles With the Fresh Greenery
Snip pieces of greenery and create a bundle of greenery using your hand.
I cut the greenery into about 10″ lengths based on the size of the bells I used. The length of the greenery will depend on the bell you use and how long you want your greenery to hang outside of the bell.

Continue snipping greenery with the pliers until you have a bundle of greenery that is full and will fill the inside of the bell.
Once you have your bundle of greenery, wrap the floral wire tightly around the bundle about 1″ down from the end of the stems.
Using the pliers, cut the stems so that they are all the same length (if they are not already).
Download Your Free Homemade Christmas Gifts eBook
Step 3: Add the Greenery to the Bells
Carefully place a generous amount of hot glue to the ends of the bundles of fresh greenery, then push that up & inside the bell.
Hold in place for about 10-20 seconds until the hot glue sets.
With the hot glue set, fluff the greenery coming out of the bell.
Step 4: Hang your Christmas Decoration
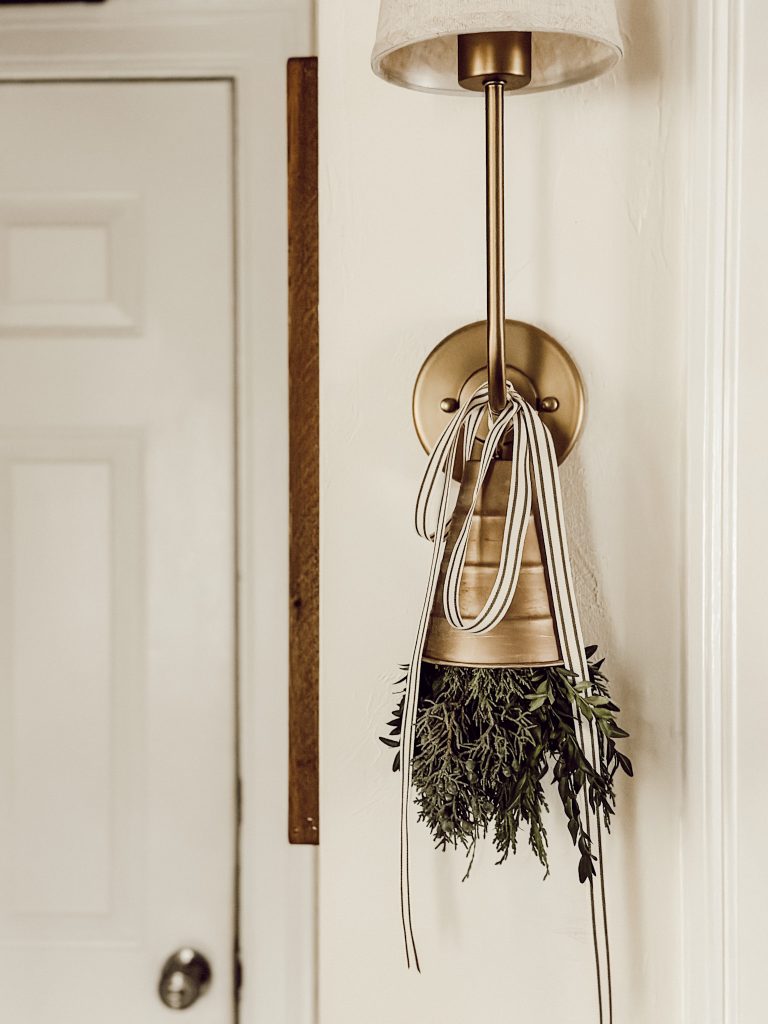
Now, your DIY Christmas bells are ready for hanging!
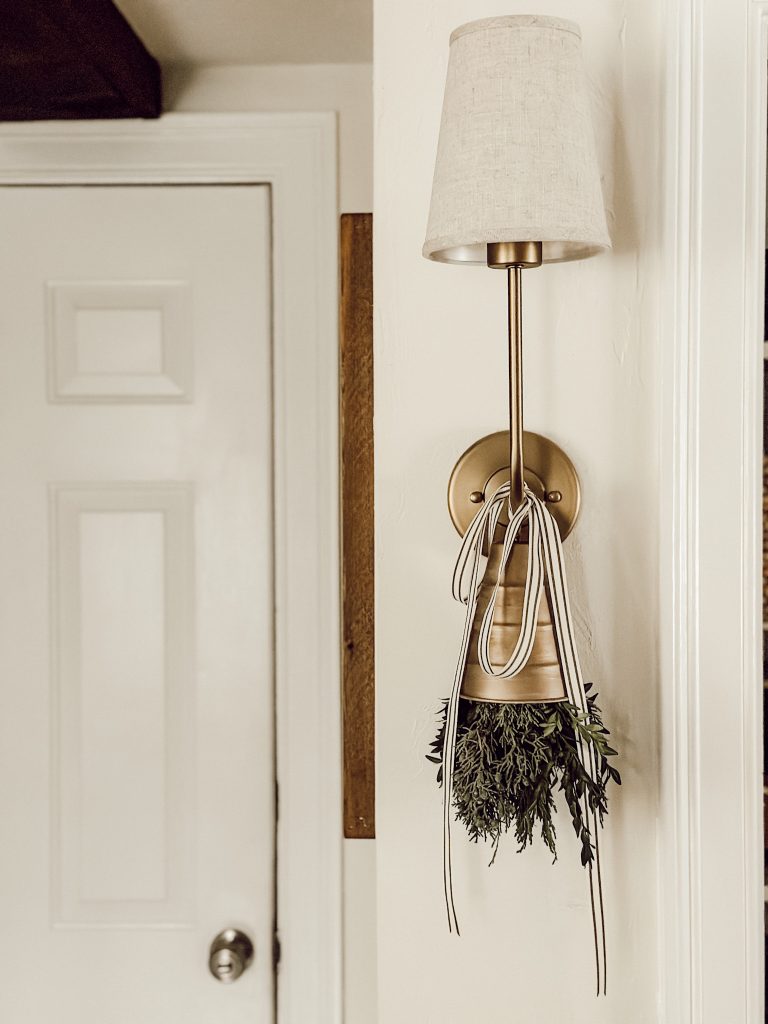
I chose to hang our bells from the sconces in our sitting room.
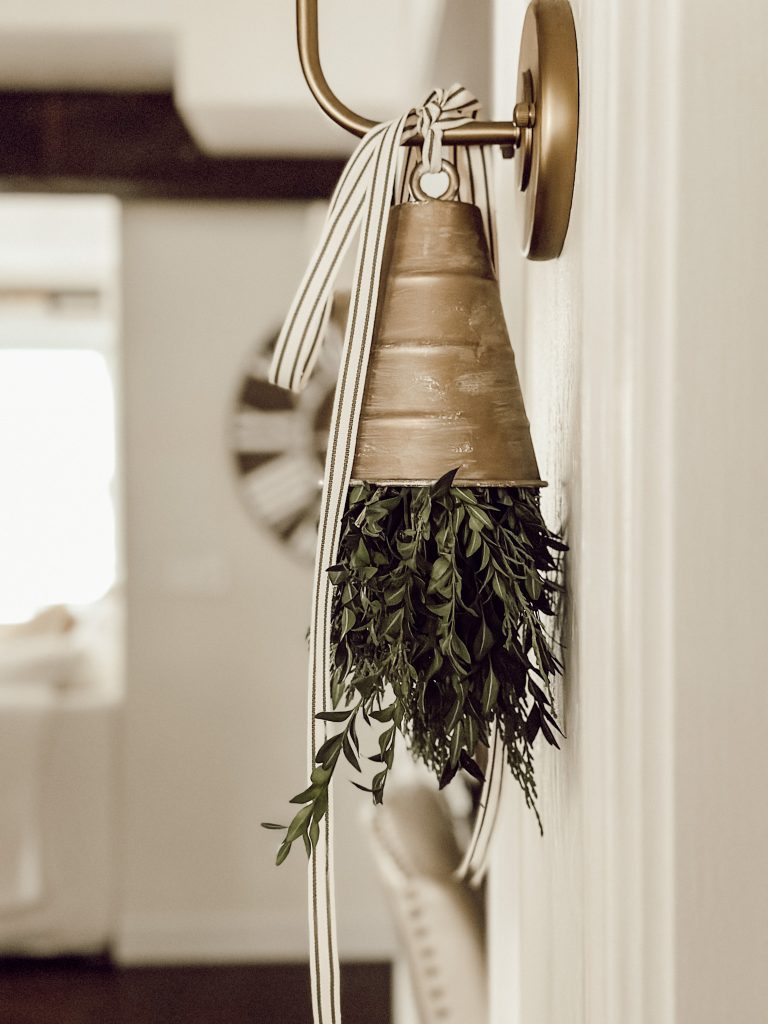
Using the ribbon, I looped that through the top of the bell, around the sconce, and then tied in a knot & bow.
Cut the ribbon tails to your desired length, and there you have it…your easy Christmas decoration is complete!
FAQs About This Christmas DIY
Types of Greenery You Can Use for this Christmas Bell Project
The choice is yours when it comes to the greenery you use for your DIY Christmas bell project.

Here are several types of greenery you can consider all with different textures and scents:
- Pine: Pine is a classic choice, offering a traditional holiday scent and a lush, evergreen look. The dark green needles create a timeless appearance.
- Cedar: Cedar branches have a distinctive aroma and an elegant, feathery texture. They add a touch of rustic charm to your Christmas bells.
- Eucalyptus Sprigs: Eucalyptus offers a refreshing and herbal scent.
- Boxwood: Known for its small, densely packed leaves and vibrant green color. It gives a more formal and structured look.
- Juniper Berries: Incorporating juniper berries with their blue-gray hue adds a unique touch to your greenery bundles. They complement other greenery and add a more textured appearance.
- Rosemary Sprigs: Rosemary adds a subtle fragrance and brings a delicate texture to your decorations.
- Holly Branches: Holly is a classic Christmas greenery with glossy, deep green leaves and bright red berries. While it may not have a strong scent, it adds a festive pop of color and traditional holiday charm.
- Magnolia Leaves: Magnolia leaves are large, glossy, and have a beautiful two-tone effect. They can add a touch of Southern elegance to your Christmas bells and work well in rustic decor.
- Fir: Similar to pine, fir branches have short, soft needles and a robust fragrance.
- Cypress: Features vibrant green foliage and offers a unique and unexpected element to your Christmas bell decorations.
Remember to mix and match different types of greenery to create a visually interesting display.
Experiment with combinations that align with your own personal style and the overall look of your holiday decor.
Hey friend! What can I help you find?
Search our entire site!
Can I use faux greenery for this DIY bell decoration?
Absolutely! Using faux greenery for your DIY Christmas bell project is a great option.

Faux greenery offers several advantages:
- Longevity: Unlike fresh greenery, faux won’t dry out or shed over time. This ensures that your DIY Christmas bells will maintain their appearance throughout the entire holiday season and beyond.
- Reusable: Faux greenery can be stored and reused, making it a great choice for your holiday decorations.
- Allergen-Free: For those with allergies, using faux greenery eliminates the risk of allergic reactions that can be associated with real greenery.
When using faux greenery, choose high-quality options that closely resemble the appearance of real greenery. That way your DIY Christmas bells not only look beautiful but also maintain a lifelike appearance.
What if I don’t have sconces, where else can I hang these Christmas bells?
You don’t need sconces to hang these DIY bells from!
They can be hung or used in your holiday decor in a bunch of other ways.
- Attach your DIY bells in the middle of a festive Christmas wreath.
- String the bells together with coordinating ribbon to create a charming garland that you could drape along a staircase railing or mantel.
- Suspend the bells from the arms of a chandelier for a unique and eye-catching display in the dining room or living room.
- Place the bells in the center of your dining or coffee table, either individually or as a cluster for a stunning table centerpiece.
you might also
Enjoy These Posts
Shop My Favorite Products
Shop my favorite home decor & lifestyle products, my LTK sources, and my Amazon Storefront. By making a purchase with one of my affiliate links, I earn a small commission which helps me continue to create meaningful content for you!
I look forward to sharing more of my home with you and inspiring you to have a well loved home! Follow me on Facebook, Instagram, Pinterest, and LIKEtoKNOW.it.
xoxo, heidi
Bloggers’ Best 30-Minute Holiday Craft
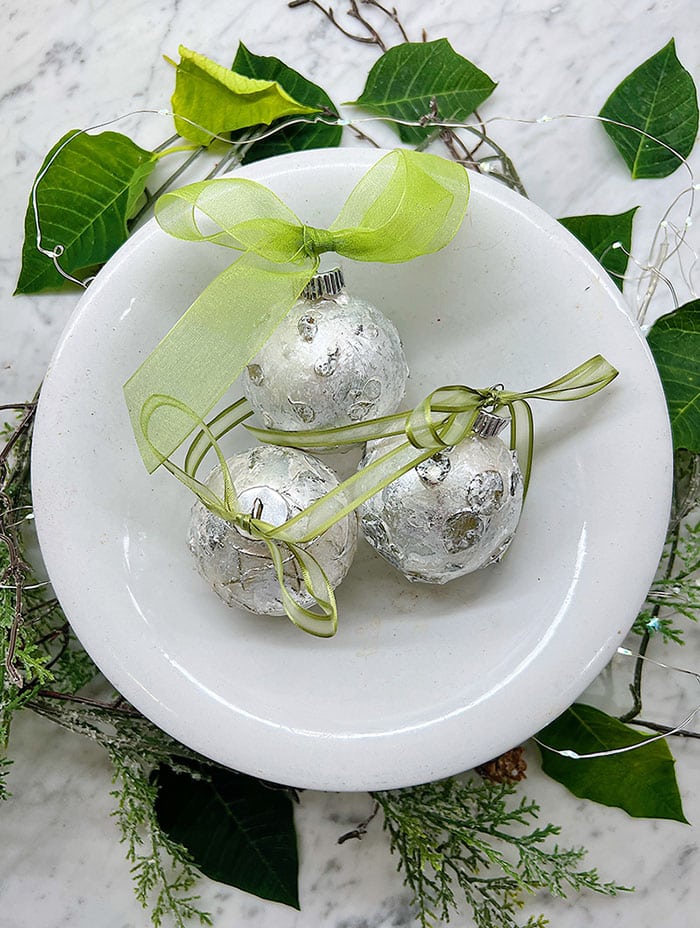
DIY Metallic Glass Christmas Ornaments | My 100 Year Old Home
These DIY metallic glass ornaments are made with plants and metallic paint. You will love making these easy yet gorgeous ornaments for your holiday decor.
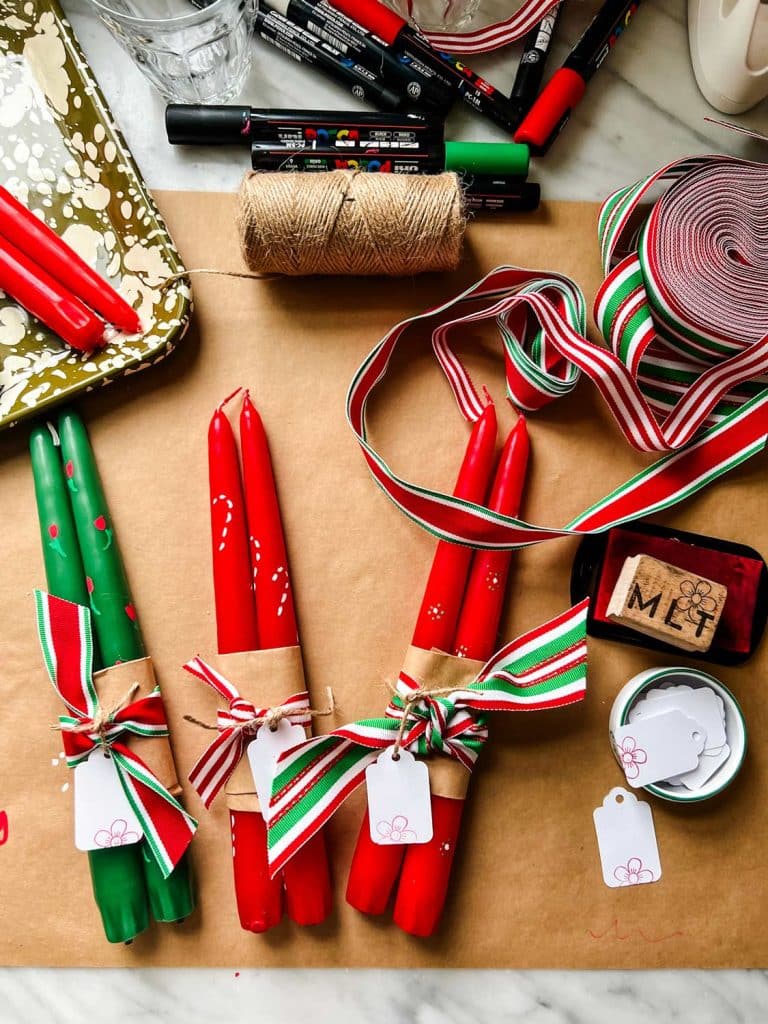
Hand Painted Candles | Most Lovely Things
Do you know those painted candles you see in gift shops for about $30 a pair that are too pretty to burn? These are not that kind. They take only minutes to make, and it’s fun! Wrap them with a little ribbon and slip them into your bag to give at your next coffee date or wherever you meet with friends.

How to Make a Gingerbread Man Christmas Cracker | Craftberry Bush
Make these adorable gingerbread Christmas crackers with these simple steps. They are perfect to share around the table. Fill them with any small prize you want.
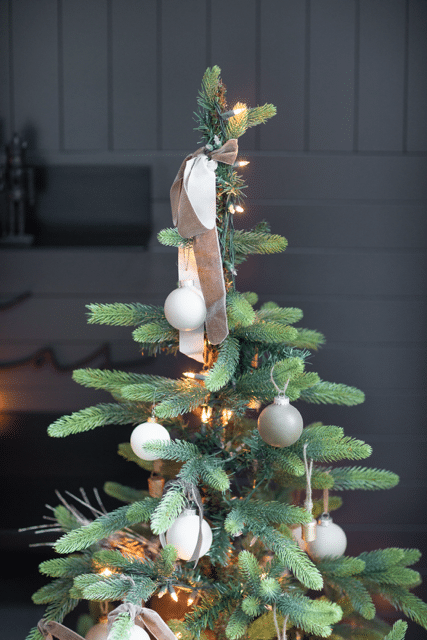
DIY Ornaments | My Sweet Savannah
Can you believe these high end looking ornaments are made out of Dollar Store plastic ornaments and balloons? This project is so easy and you can customize them to match your decor.
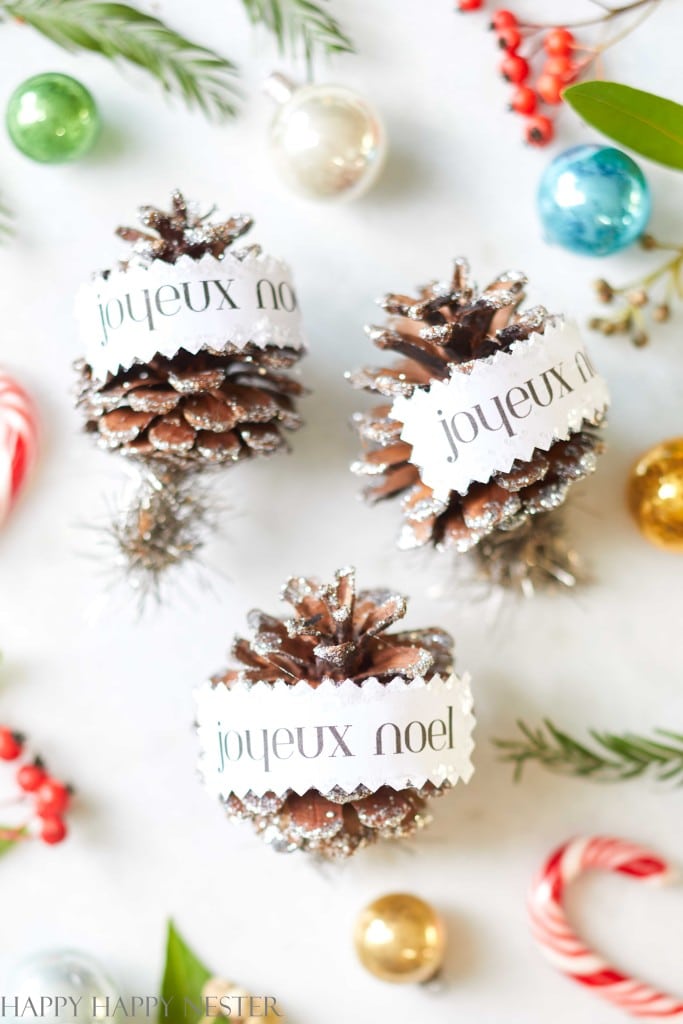
DIY Pinecone Ornaments | Happy Happy Nester
Let’s create unique holiday decorations with DIY pinecone ornaments. You’ll see how these little natural gems can bring a natural charm to your holiday. This craft project includes an easy free printable.
Don’t forget to pin this for later…
shop the post


Thank you Melaine!
This is beyond creative! I love it!