
DIY Personalized Cosmetic Bag with Iron-On Patches
Create a cozy, cottage inspired DIY personalized cosmetic bag with pretty iron-on patches to customize quilted pouches.

With Mother’s Day right around the corner, I was brainstorming easy DIY gift ideas to give to the special moms in my life.
I wanted to gift something that felt personal, thoughtful, and handmade…but in true ERH fashion, it also needed to be simple enough to create in an afternoon.
That’s when I thought of these personalized makeup bags.
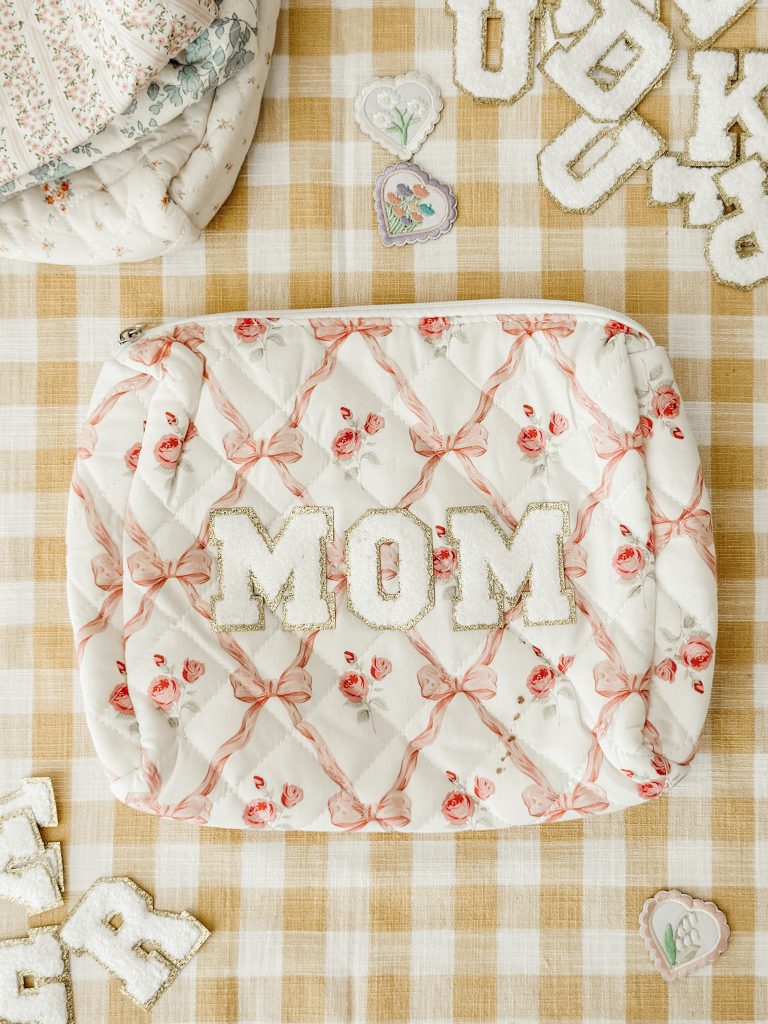
They’re the perfect blend of sweet and practical, and honestly, they look just like the pricey Stoney Clover Lane bags you can customize online (except without the $100+ price tag…yikes).
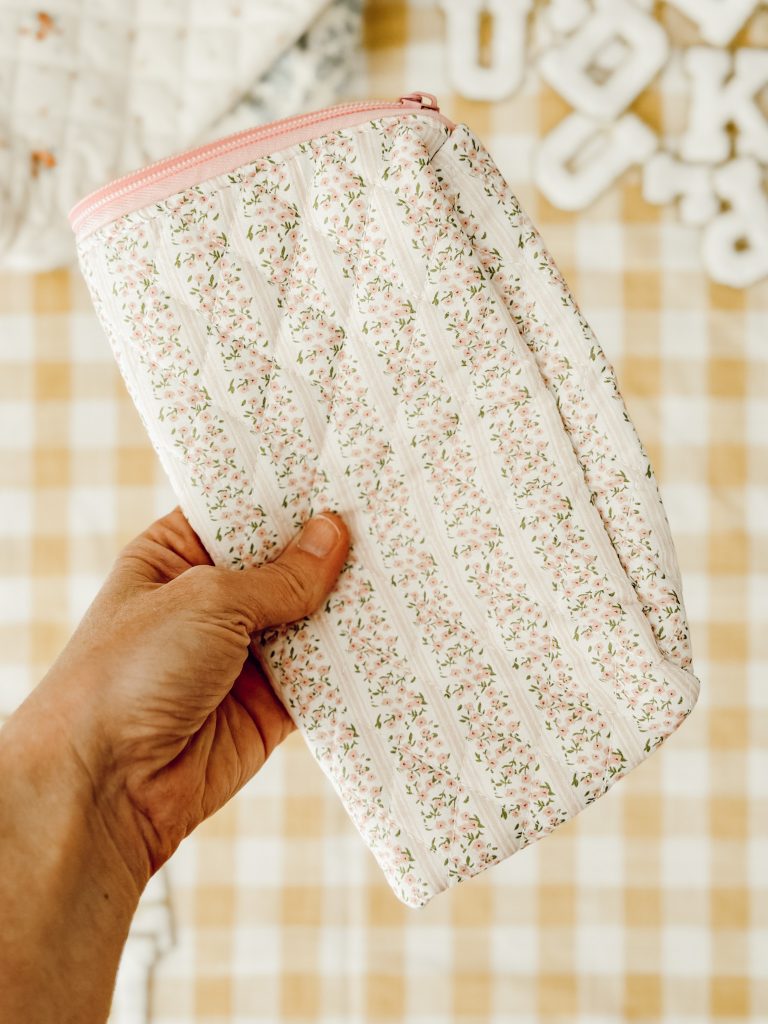
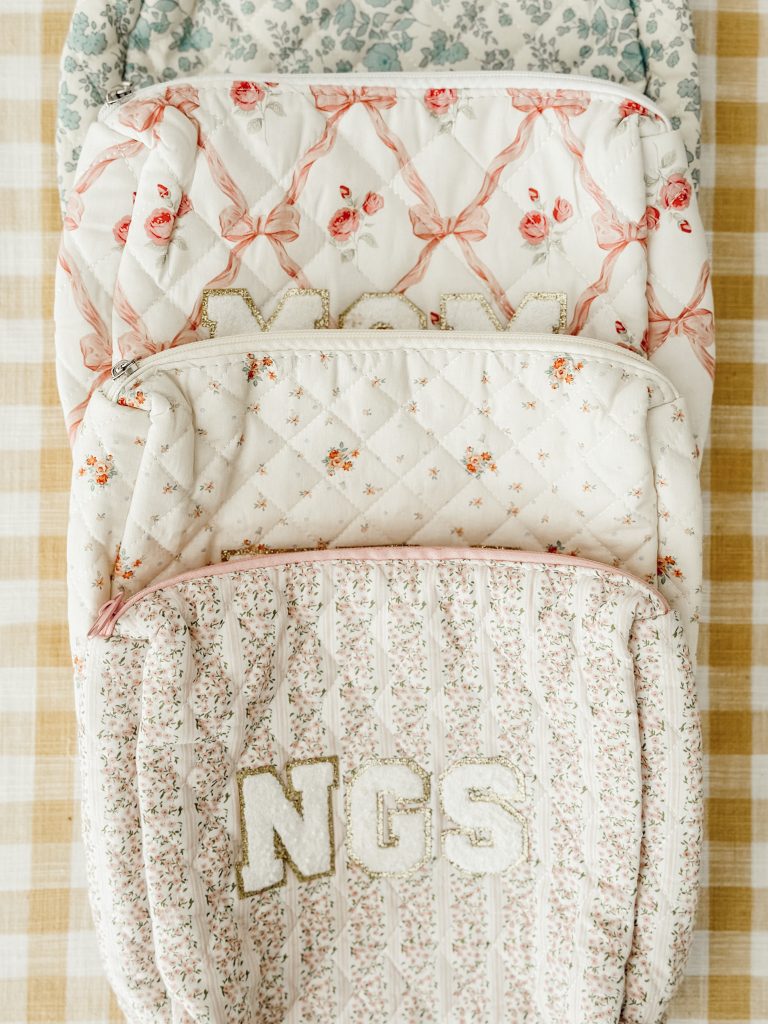
All you need are a few simple supplies like a cotton quilted pouch, iron-on patches, and you can create a meaningful, one-of-a-kind gift that any mom, grandmother, sister, aunt, or daughter would love.
Each bag feels completely personal and heartfelt whether you add initials, flowers, or heart patches.
And the best part?
There is no sewing required.
Let me show you how easy it is to make the cutest personalized pouches in minutes.
(P.S. You might want to grab an extra quilted bag…trust me, you’re going to want to keep one for yourself!)
What you’ll love about this DIY:
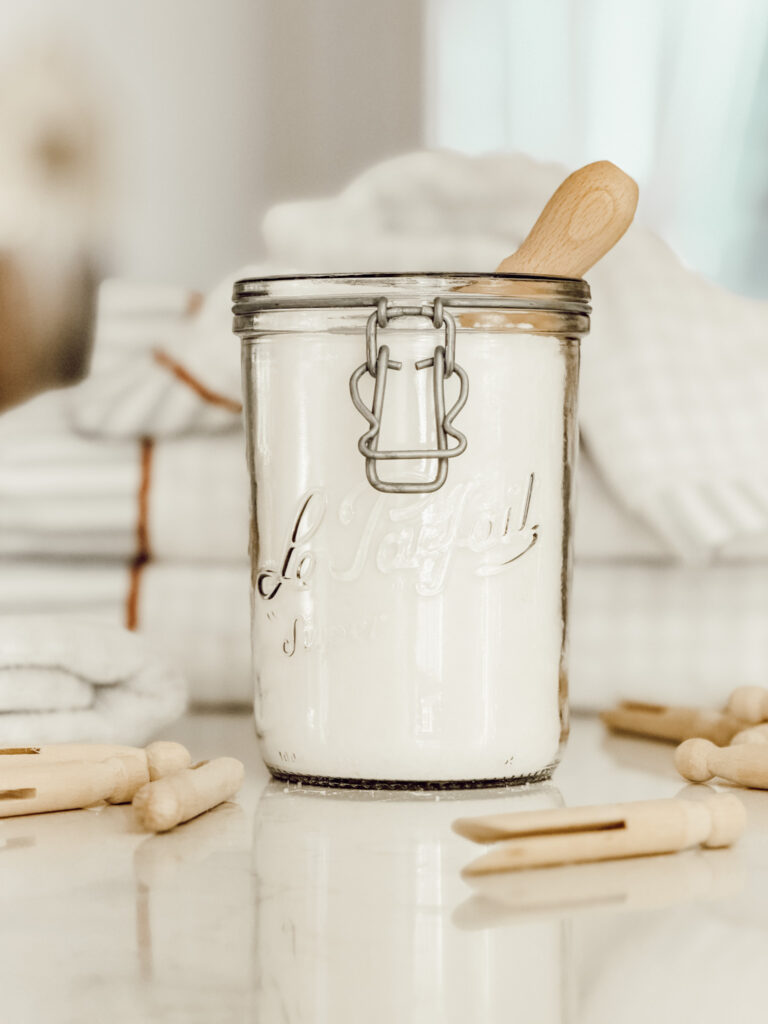
Supplies You’ll Need
Here’s everything you’ll need to create your own DIY cosmetic bag. There’s nothing fancy, just a few simple supplies you probably have in your home already!
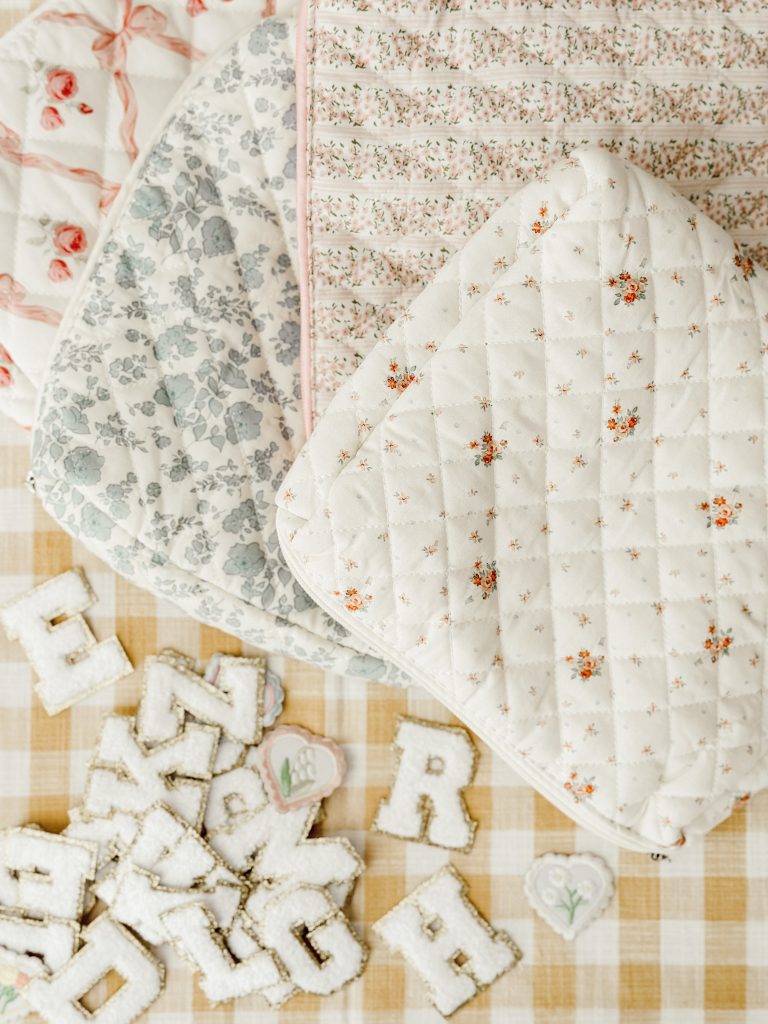
materials you’ll need

*If you make a purchase using one of these links, I may receive a small commission. This does not add any cost to you, but helps me to continue to create & share meaningful content. Thank you for supporting my small business!
I’m Heidi, the heart and hands behind Eleanor Rose Home.

I’ll show you that your home can become a place of warmth, comfort, and style with practical tips, creative ideas, and my own journey to help you create a space that feels like you…welcoming, personal, and full of charm.
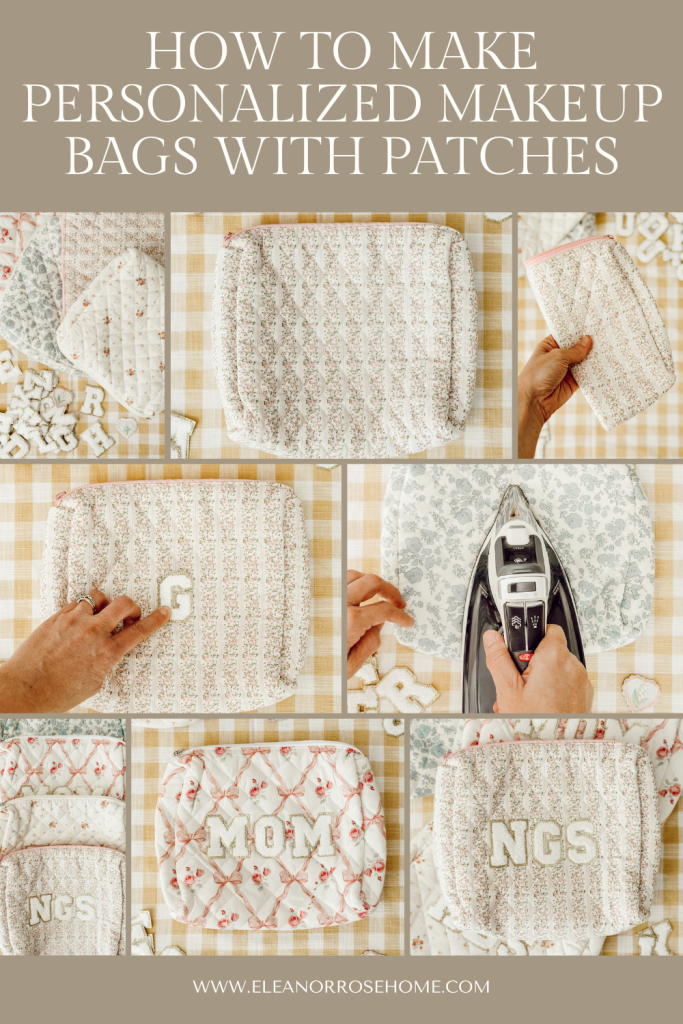
How to Make a Personalized Makeup Bag
Follow this easy step-by-step tutorial and you’ll have the coziest makeup bag (for you or someone else) in just a couple of minutes…
simple cozy living
Want more inspiration to make your home feel cozy and inviting?
Check out our collection of home decor ideas for creative tips and stylish touches you’ll love!
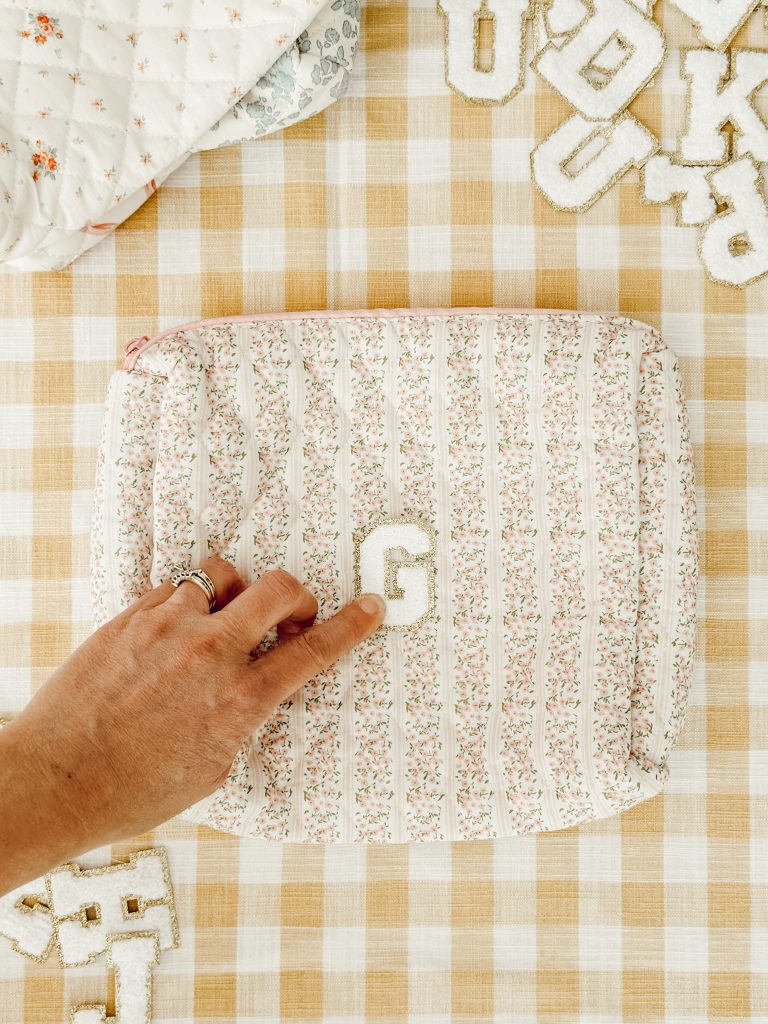
01
Plan Your Design
Lay out your patches on the bag first without ironing to get a feel for the placement.
You can spell out a name, initials, or words like “Makeup,” “Supplies,” or “Travel.”

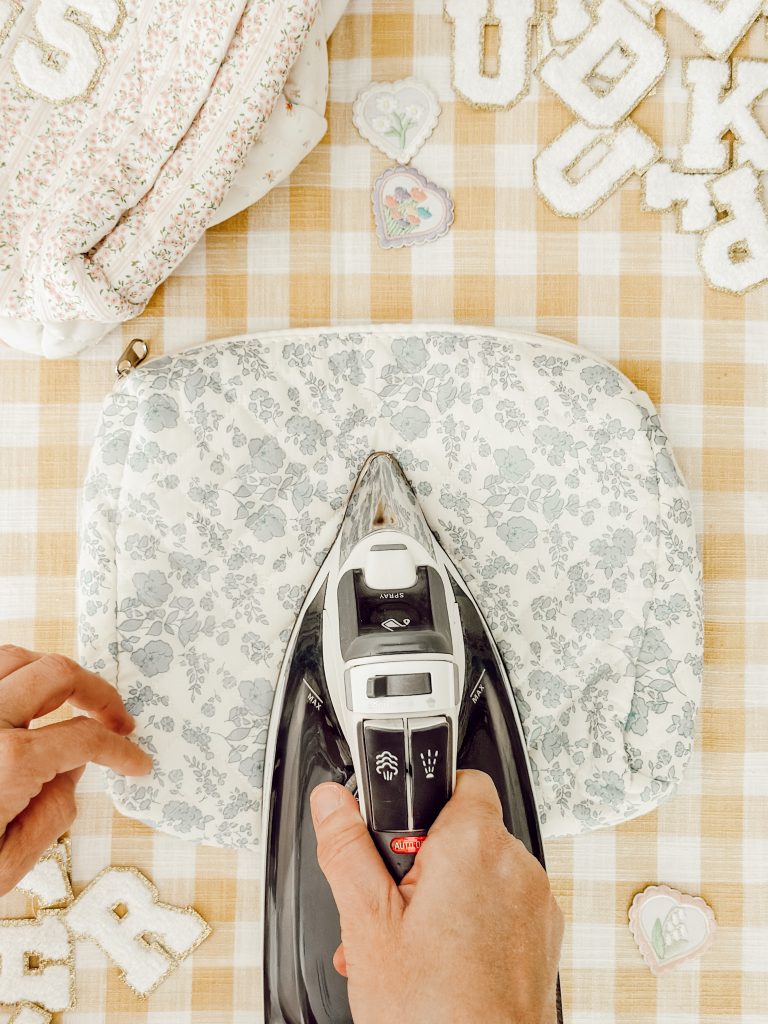
02
Heat Your Iron
Set your iron to the cotton setting (usually medium to high heat) with NO steam.
Preheat the area of the bag where your patch will go by pressing it with the iron for about 5 seconds.
03
Attach the Patches
Place your patch where you want it.
Press the iron firmly on top for 10–15 seconds. Let it cool slightly, then gently check if the edges are secure.
If not, repeat.
04
Let it Set
Once all your patches are attached, let the bag sit for a few minutes to cool and set the adhesive completely.
Then it’s ready to use!
They make amazing gifts for birthdays, holidays, bridal showers, or Mother’s Day.
Helpful Tips
- Use a ruler or fold the bag in half to find the center. This makes it super easy to line up your patches so everything looks straight.
- Run your iron over the fabric for a few seconds before placing the patch to get the adhesive to bond better.
- Hold the iron down firmly on each patch instead of moving it around for even heating and to prevent the patch from shifting.
- Give your toiletry bag a few minutes to fully cool down so the iron on patches have time to set.
Can I use any quilted bag for this project?
Yes, any cotton quilted bag or pouch will work.
Just make sure the fabric is cotton so the patches adhere properly.
Thicker, more textured quilting is a great way to achieve that extra cozy look!
Hey friend! What can I help you find?
Search our entire site!
What kind of patches should I use?
Look for patches labeled “iron-on”.
They have a special adhesive backing that activates with heat.
FAQs
Final Thoughts on DIY Cosmetic Bags
If you’re looking for a simple, cozy project that blends creativity and charm, this is the perfect place to start whether you’re making one for yourself or for someone you love.
Grab a cup of tea, a floral quilted bag, and a handful of iron-on patches…and get crafting!
You May Also Like
-
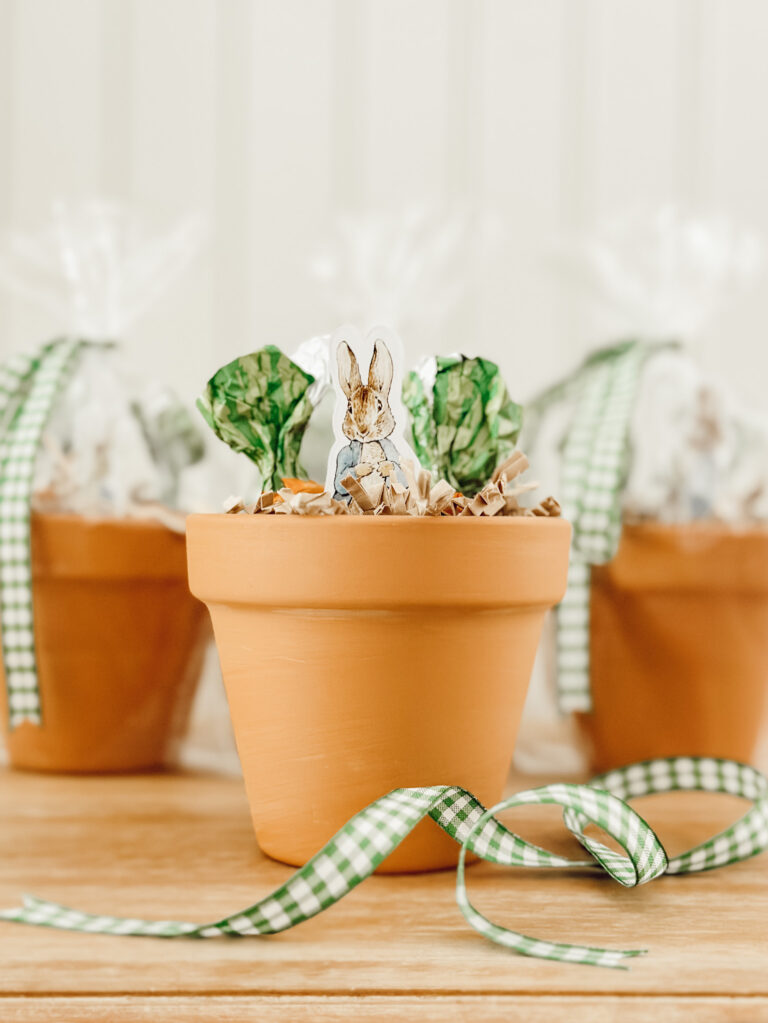
DIY Easter Gift: Peter Rabbit Chocolate Carrots in Terracotta Pots
Make a simple DIY Easter gift using Peter Rabbit cutouts and chocolate carrots placed inside small terracotta pots. If you’re…
-
Easy DIY Woven Potholders: Cozy Christmas Gift Idea
Learn how to make easy DIY woven potholders with a loom and loops. A cozy, nostalgic Christmas gift with free…
-
Easy Copycat Williams Sonoma Peppermint Bark Recipe
Save money with this easy copycat Williams Sonoma peppermint bark recipe made with simple ingredients like semi-sweet chocolate, white chocolate,…


Shop My Favorite Products
Shop my favorite home decor & lifestyle products, my LTK sources, and my Amazon Storefront.
By making a purchase with one of my affiliate links, I earn a small commission which helps me continue to create meaningful content for you!
I look forward to sharing more of my home with you and inspiring you to enjoy simple cozy living!
Follow me on Facebook, Instagram, Pinterest, and LIKEtoKNOW.it.
xoxo, heidi

Don’t forget to pin this for later!
shop the post


