
How to Make Decoupage Pumpkins With Paper Napkins
Transform plain pumpkins into vibrant fall masterpieces using the art of decoupage. Learn how to decoupage pumpkins with paper napkins using this step by step guide to create stunning, personalized autumn decor.

If you’re looking for fall decor that is simple to put together, budget friendly, and completely customizable, I have the perfect craft for you!
Decoupage pumpkins using paper napkins is the perfect way to add personalized, cozy fall decor to your home in no time at all with only a few supplies.
Decoupage is the art of decorating an object by gluing paper cut outs onto it. It’s a fun craft with limitless options on what you can create.
With a little imagination, you can create something that is completely unique & special just for your home.
I love that I created a classic, elegant, and unique piece of fall decor for our home with a foam pumpkin, decorative napkin, and glue!
Fall Decor on a Budget Blog Hop
Today, 9 blogger friends and I are challenging ourselves to bring you fall decor on a budget…a $25 budget to be exact!
Do you think we were all able to stay within budget?! Continue reading to the end of this post to see what each blogger created and for links to their fall DIY craft. There are some amazing inexpensive fall decor ideas!
If you are coming here from Jennifer at A Cottage on Bunkerhill, welcome! I love how Jennifer created her own faux terracotta beaded garland for this fall decor on a budget challenge. It’s a beautiful and inexpensive way to decorate for fall!
What is decoupage?
Decoupage is an ancient art form that originated in France during the 17th century.
It involves decorating objects by adhering cutouts of paper or fabric onto surfaces and then sealing them to create a smooth and seamless appearance.
Today, decoupage remains a popular crafting technique, and it’s the easiest way to add a personalized touch to your pumpkins.
Why you’ll love this craft…
How to Decoupage Pumpkins With Paper Napkins
The great thing about this DIY is that you can decoupage your pumpkins with whatever paper napkins you like. This fall craft is completely customizable based on your tastes and personal style, so have fun being creative!
I spent a total of about $11 on this craft (well under my $25 budget!). We had most of the supplies that I needed already in our home.
Here’s everything you’ll need to decoupage pumpkins using paper napkins.
Materials You’ll Need to Decoupage Pumpkins
Just a Few Supplies

These items contain affiliate links for your convenience. You can read my privacy policy here.
Step by Step Guide to Decoupaging Pumpkins
Before You Begin to Decoupage Pumpkins
Before you begin to decoupage your pumpkins, there are a few things you’ll need to do to get started.
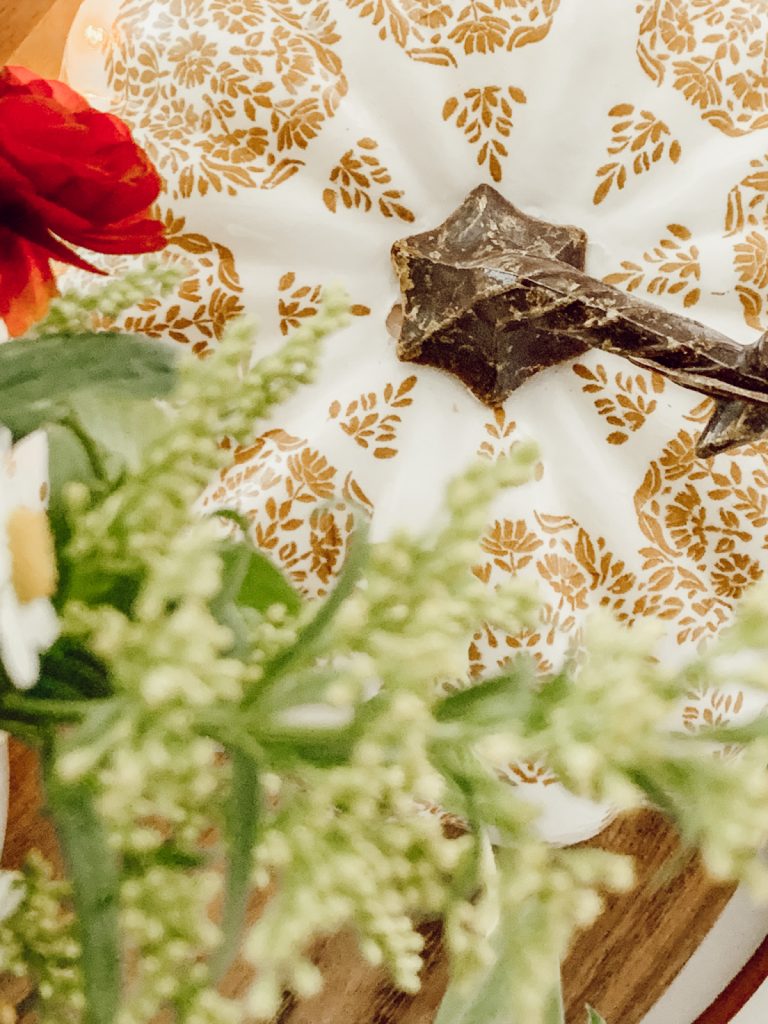
- Remove Pumpkin Stem: You’ll want to remove the stem from the pumpkin in order to easily decoupage. Gently turn & twist the stem until the glue releases and you are able to pull it out. Don’t discard the stem, you will need it later.
- Paint the Pumpkin: If your pumpkin is colored you will want to paint it white so the color doesn’t bleed through the napkin.
- Get Napkins Ready for Decoupage: Open your decorative napkin on a flat surface and then separate the paper back away from the printed front. Cut the individual prints out of the napkin to create a block print. However, you can take the entire napkin and decoupage the pumpkin that way. I prefer to work with smaller pieces when decoupaging because I am able to control the overall design of the piece I am crafting, a little easier.
Note: You can take the entire napkin and decoupage the pumpkin that way. I prefer to work with smaller pieces when decoupaging because I am able to control the overall design of the piece I am crafting, a little easier.
The Easy Way to Decoupage Pumpkins With Paper Napkins
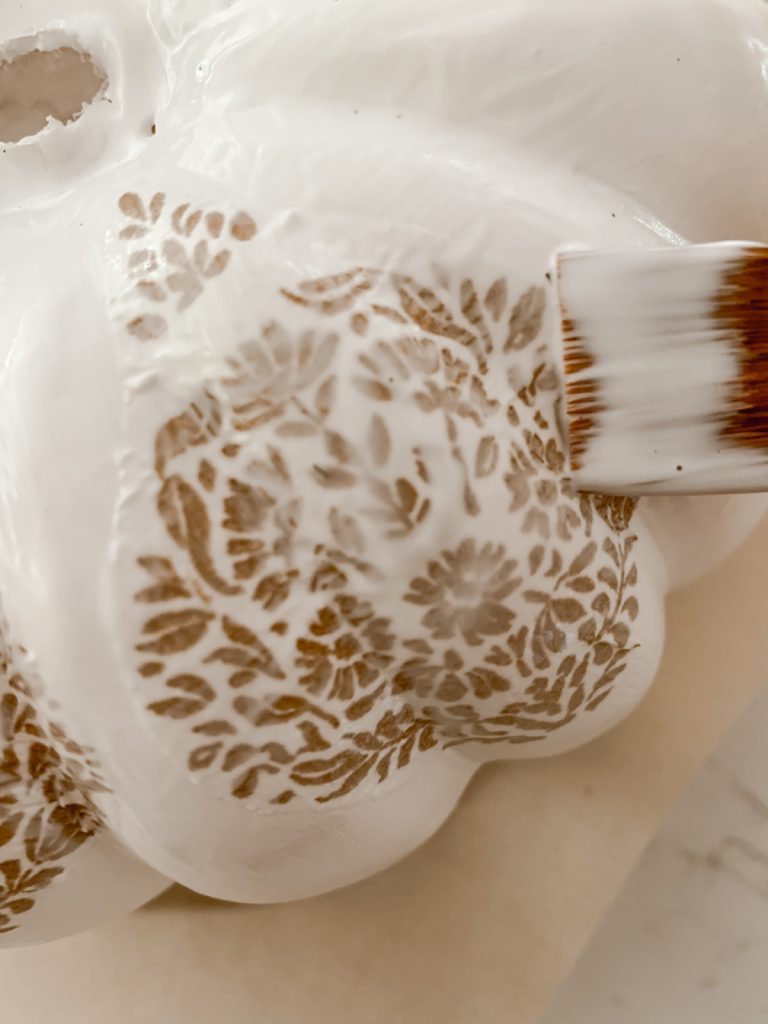
On a parchment paper lined surface, starting at the top of the pumpkin, apply a thin coat of Mod Podge with a paint brush to one of the pumpkin ribs.
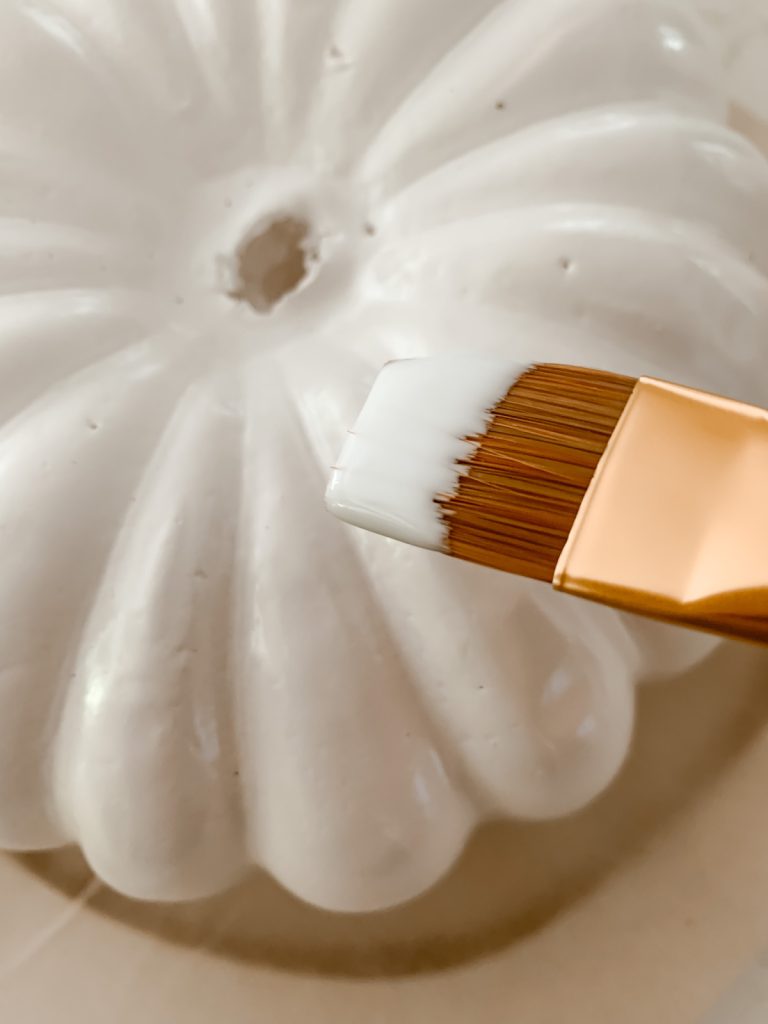
Work in small sections so that the glue does not dry too quickly.
Decoupage the Napkin to the Pumpkin
Carefully add your napkin cut out on top of the thin coat of glue. Gently press the napkin down with the paint brush to remove any air pockets
Add more glue to the top of the napkin as you work to ensure napkin adheres fully to pumpkin.
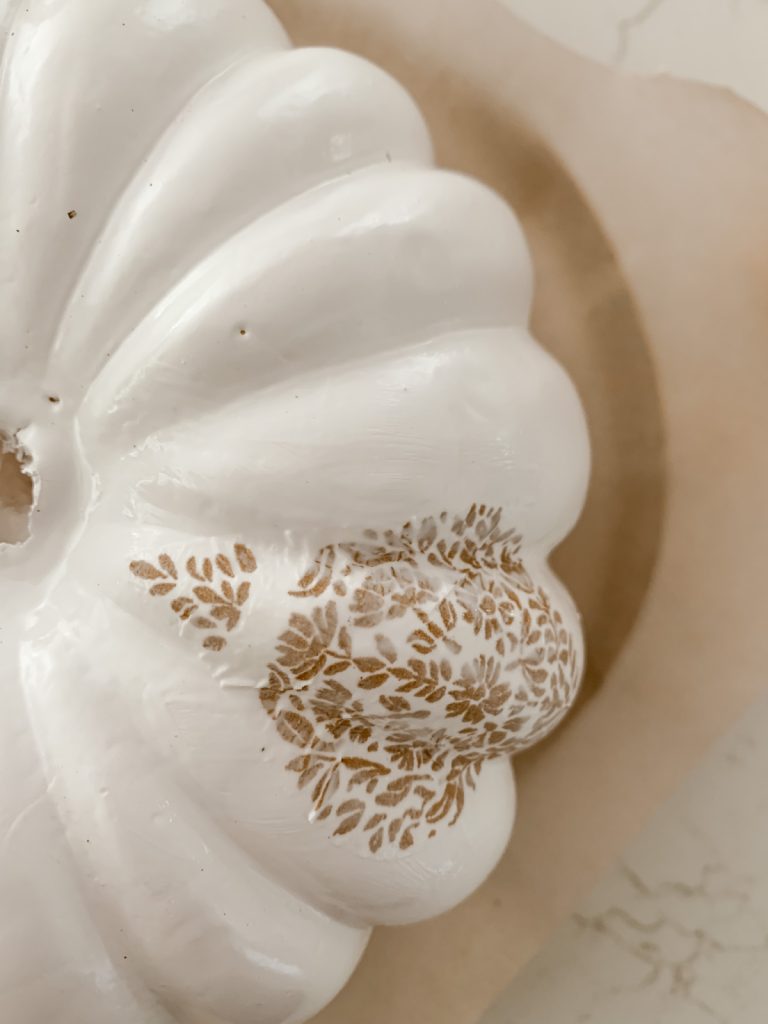
You may have a few wrinkles in the napkin cut out and that is ok. It adds character to the pumpkin!
Decoupage the Entire Pumpkin
Continue adding the napkin cut outs around the top of the pumpkin, alternating every other rib.
Once you have completed adding all of your napkin pieces to the top of the pumpkin, stop. Allow the Mod Podge to dry before moving onto the next section of pumpkin. This may take about an hour or so.
After the Mod Podge has dried, I then placed the next section of napkin cut outs about 3/4 of the way down from the top of the napkins I already decoupaged.
Again, alternating ribs on the pumpkin. In this section, I added the napkin cut outs to the ribs that were not decoupaged in the first section.
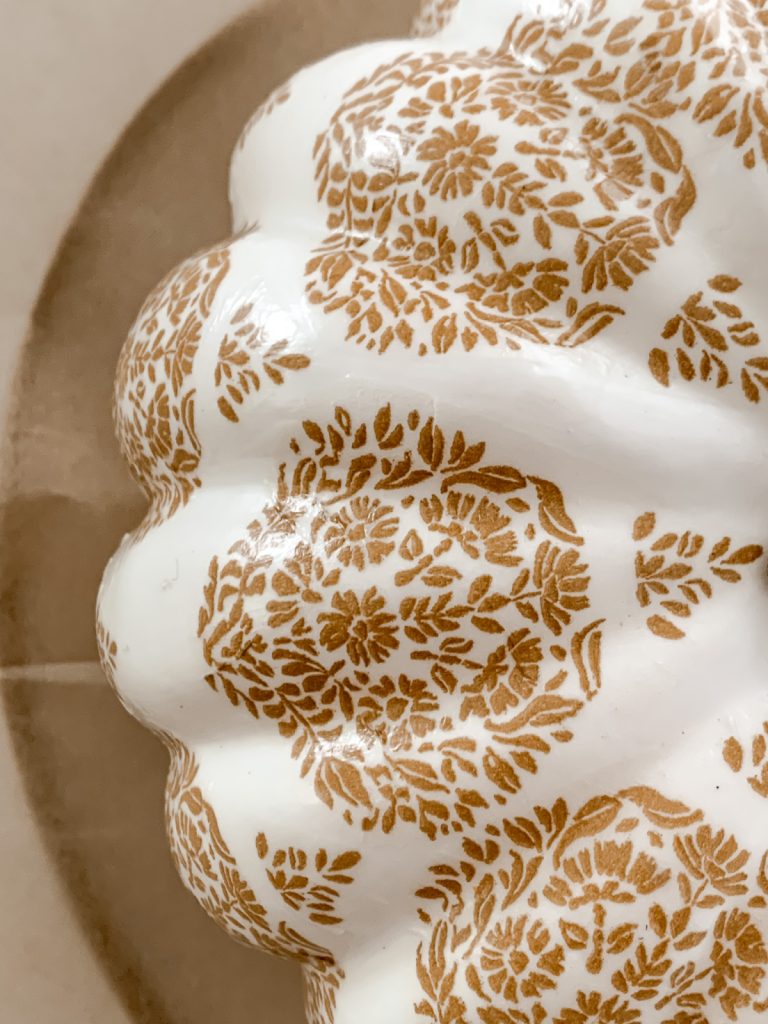
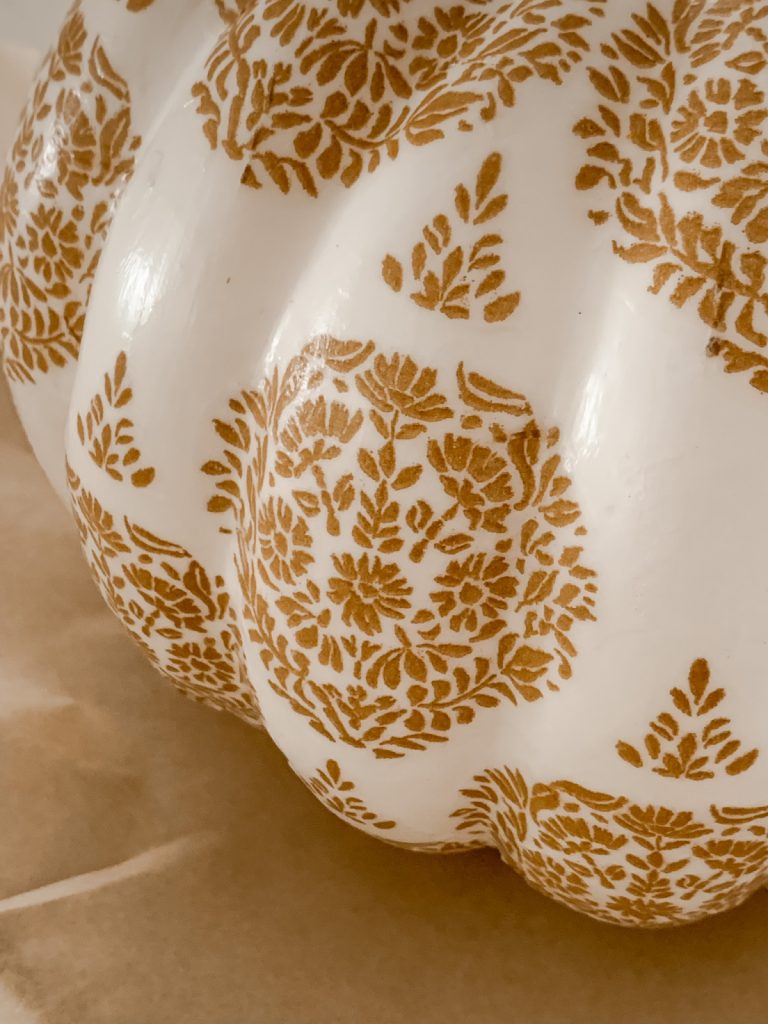
Continue this process all the way down to the bottom of the pumpkin so that your pumpkin is covered in a block print. Make sure to flip & tip the pumpkin so that the area you decoupaged is able to fully dry.
Seal the Pumpkin & Allow to Dry
Apply a thin coat of Mod Podge over the entire pumpkin, working in stages so that the Mod Podge does not stick to any surfaces.
Sealing the pumpkins will prevent any edges of the napkin from popping up.
I let our pumpkin sit for about 24 hours after this step, to make sure it was fully sealed.
Final Step to Decoupage Pumpkins
The final step…attach the pumpkin stem!
Place a small dab of hot glue to the end of the pumpkin stem and place back into the hole at the top of pumpkin.
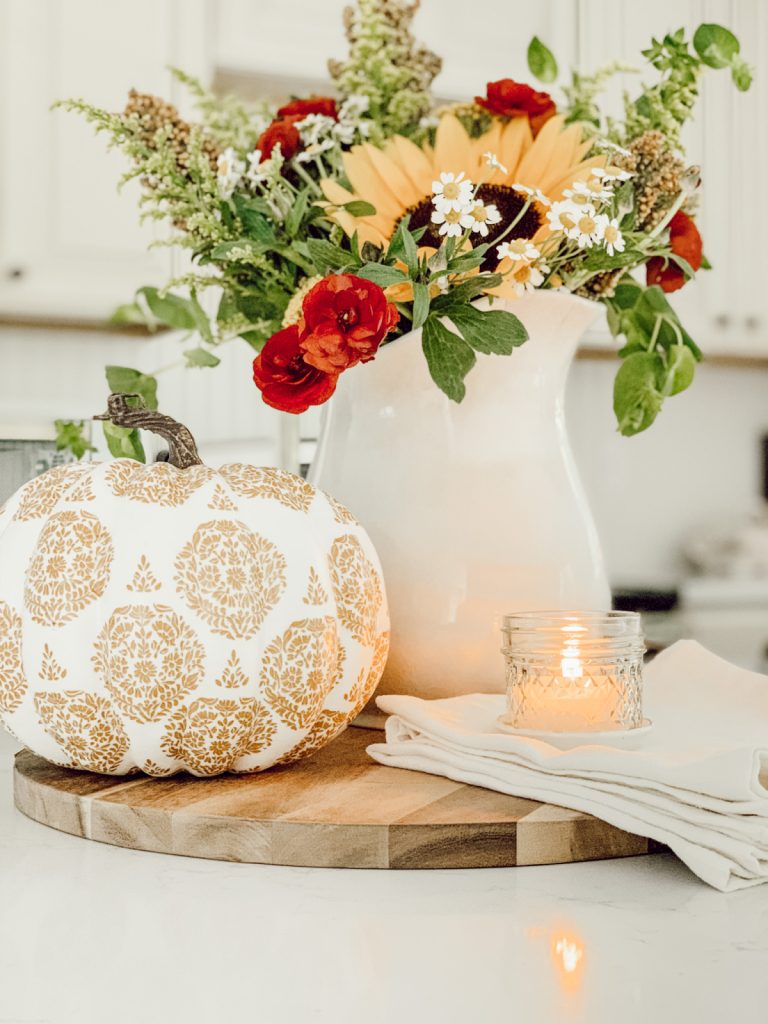
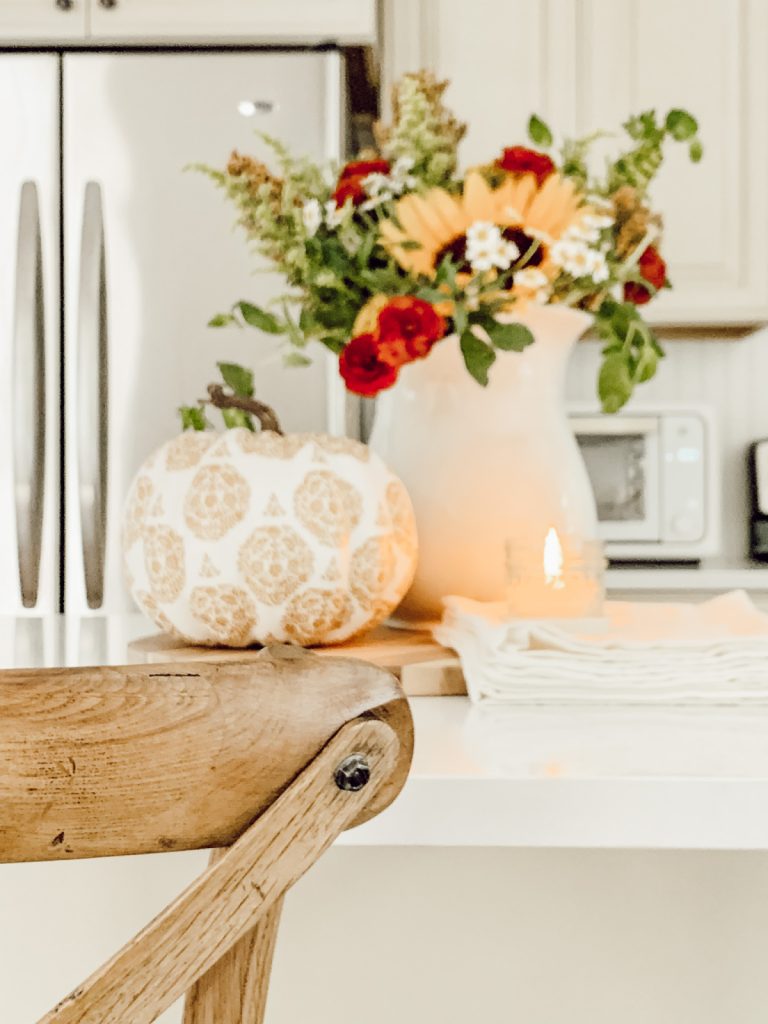
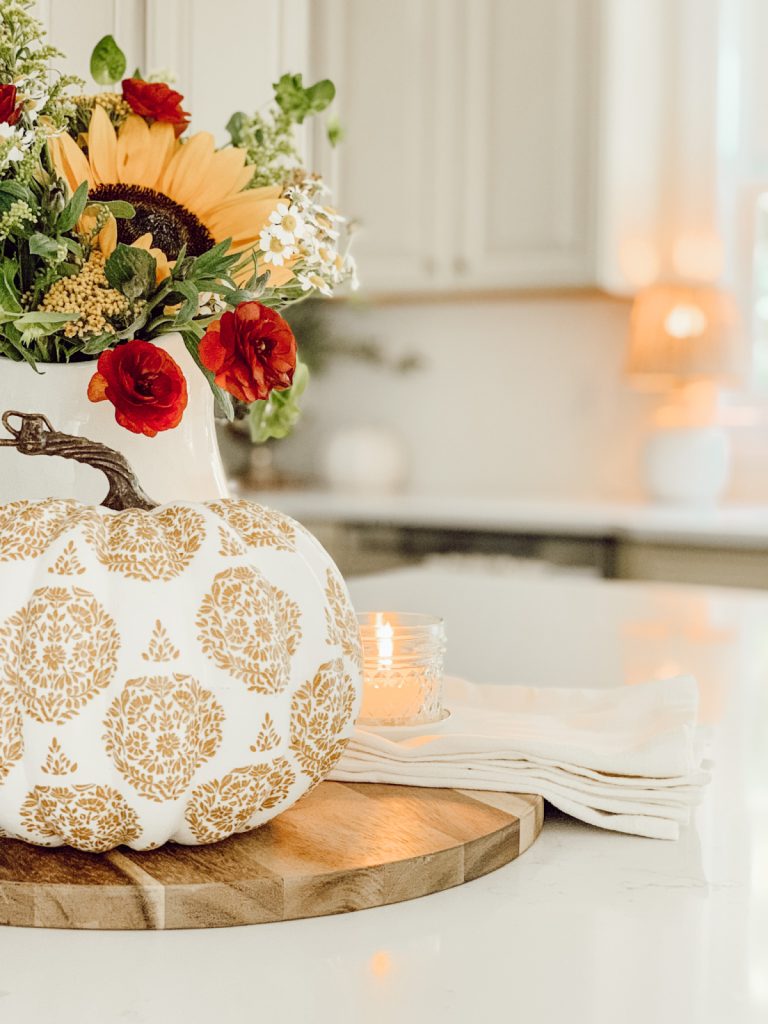
How to Style a Decoupage Pumpkin
I styled our decoupaged pumpkin on our kitchen island with a pitcher of fall flowers along with a candle.
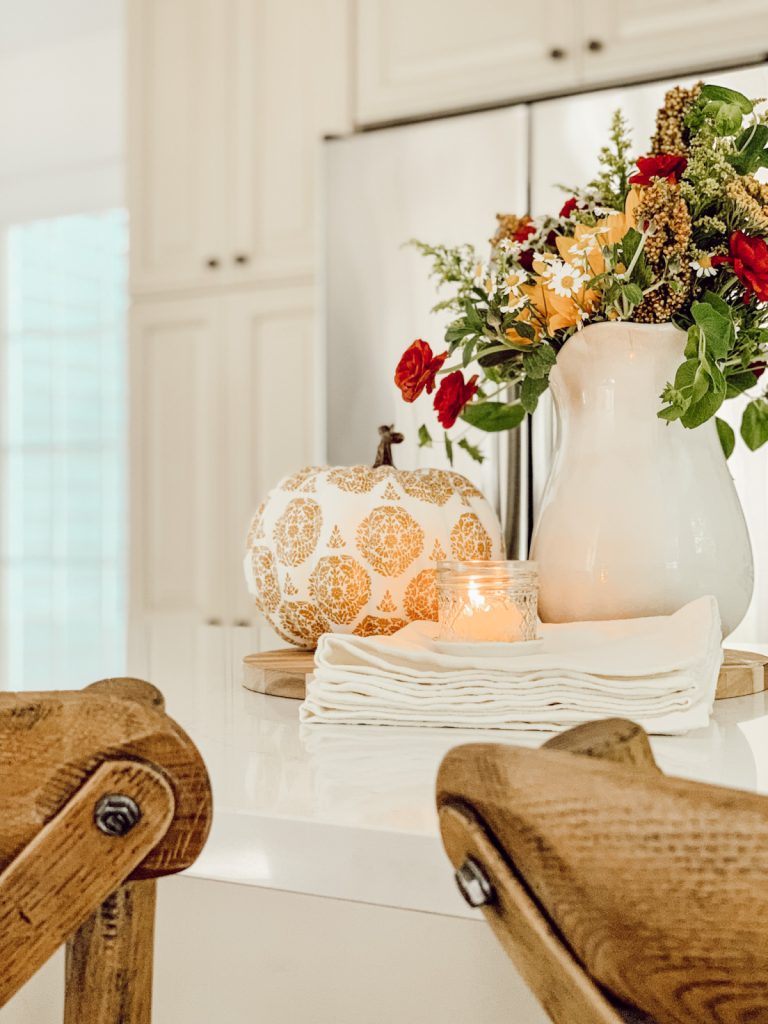
I loved the pattern of the pumpkin with the vintage brown transferware I have in our kitchen for fall.
Decoupage pumpkins can be added to fall decor in the kitchen, on a fall tablescape, in a bookcase, or on a console table styled for fall.
More Fall Decor Ideas
Now be sure to head over to Elizabeth from Country Peony. She created a beautiful dried lavender wreath that I can’t wait to recreate in our home with the lavender from our kitchen window box.

you might also
Enjoy These Posts
Shop My Favorite Products
Shop my favorite home decor & lifestyle products here, my LTK sources here, and my Amazon Storefront here. By making a purchase with one of my links, I earn a small commission which helps me continue to create meaningful content for you!
I look forward to sharing more of my home with you and inspiring you to have a well loved home! Follow me on Facebook, Instagram, Pinterest, and LIKEtoKNOW.it.
xoxo, heidi
More Fall Decor on a Budget Inspiration


Eleanor Rose Home | The Country Peony | Green Valley Gable | Stilettos & Shiplap | Cottage In The Mitten


Le Cultivateur | Midwest Life & Style | Robyn’s French Nest | The Tattered Pew | Cottage on Bunkerhill
Don’t forget to pin this for later…
SHOP THE POST


Hi Lee, Thank you for your feedback. I will look into the font!
Hi there, love your blog. Great ideas and info. Just one thing. The font is really light and small and hard to read. Just an FYI. There are several blogs that have the same issue. Thank you though, for all you do
Thank you Stacy!
Wow this DIY is so cute!
Thank you Jennifer!
Thank you AnnMarie!
I loved this project last year…and I still do! The color is so on trend!
These came out so stinking cute! Love this fun idea!
Thank you for having me Rachel!
Heidi, What a cute pumpkin. I love napkin decoupage. Thanks for sharing on today’s round up.
Thank you so much Cindy!
This pumpkin is so pretty and elegant. Love it Pinned!
Thank you Donna! Inspiration can really come from anywhere! Happy Fall!
Such a beautiful project. I needed the reminder to really look at napkins the next time I need inspiration for a project. Pinned and thanks for sharing it.
Thank you Stacey! I love block print too, it’s just so beautiful!
Thank you so much! It was such a fun project to do!!!
Thank you Elizabeth, that means so much coming from you!
This pumpkin is stunningly beautiful! The napkins have such a pretty design, and it was perfect for this project.
This block print pattern is so good and your application is perfect! Great job!
I love this fresh take on pumpkins, Heidi! And the napkin pattern was perfection. It reminds me of block print- which I LOVE! Pinning this for later!
Thank you Robyn! I always love a good block print!!!
Thank you Tara! I’ve been obsessed with the color mustard this fall so when I saw these napkins, I knew I had to use them!
Thank you Kelly! Thank you for joining me, it was fun to create something within a budget!
Thank you Jen! It was a fun hop, glad you joined!!!
This looks beautiful, Heidi! I love the pattern you chose!
These pumpkins are so cute. I have done decoupage before but haven’t tried cutting pieces from paper napkins before and I definitely what to do some like this now. I love the mustard color in your pattern. Thanks for sharing.
Heidi this turned out so good! It’s just beautiful and I love the napkins you chose. You styled it beautifully too! Thanks for hosting this hop.
Oh my gosh, Heidi. It is stunning! I love the color and the print of napkin you chose to use. Perfect for fall. Thanks so much for all of your work to coordiante today’s hop. Always fun to join you. Pinned!
Thank you Jennifer! This DIY was fun and so easy to do. Thank you for joining me!
Thank you Kim! I loved the challenge of trying to put together fall décor for under $25, so fun!
This is one DIY I’ve never tried!! It looks so pretty with how you cut out the shapes! Thanks for putting this together today, I appreciate it!
Heidi, your pumpkin looks so pretty! I love that you cut your pieces out. The design is beautiful and you styled it so well! Thanks so much for including me in this hop!!????
Thank you Renae! It was fun to make this decoupage pumpkin. Happy fall to you too!
So pretty! I love the extra time that you took to make the design. I love it. Happy Fall!