
DIY Rosemary Wreath With Fresh Herbs From the Garden
Add rustic, natural beauty to your home with this quick & easy DIY rosemary wreath using herbs snipped right from your garden. You’ll not only love the charm of this wreath but also it’s fresh, earthy fragrance that will permeate your home.

It’s no secret here at Eleanor Rose Home who much I love fresh herbs.
Fresh herbs are such a versatile plant because they can enhance the flavors of the recipes we make and bring a touch of nature to our indoor decor. They possess an incredible power to transform ordinary experiences into extraordinary ones.
The vibrant colors of herbs, their fragrant aromas, and health benefits make them a plant that we should not ignore. Whether it’s the invigorating scent of rosemary, the soothing embrace of lavender, or the zesty kick of basil, incorporating fresh herbs into your home can bring a sense of joy, well-being, and natural beauty that is simply unmatched.
For this blog post, I thought I would share a unique way to incorporate herbs into your home without cooking with them, or adding them to a recipe…instead, decorating with them!
A DIY rosemary wreath is a fun & easy way to use rosemary snipped right from your garden (check out my window box herb garden). It’s quick to assemble and you’ll be amazed at the charm & character this fresh rosemary wreath adds to your home.

With just a few supplies and a couple of steps you’ll have a beautiful fresh herb wreath hanging in your home for all to enjoy.
How to Make a DIY Rosemary Wreath With Fresh Herbs
How much rosemary you will need for this DIY will depend on the size of your wreath form and how full you want your wreath to look.
The wreath I created is small, rustic, and organic, but you can make your wreath as big or as small as you want, and as full or sparse as you like.
Use your imagination & creativity to create a DIY rosemary wreath that you love and will enjoy hanging in your home.

DIY Rosemary Wreath Supplies
- 5 Extra Long Fresh Rosemary Sprigs: My sprigs of rosemary were fairly long. If yours are shorter, you will need more sprigs.
- 12″ Grapevine Wreath: This is the wreath I purchased for this project. I liked how the grapevine on this wreath was smaller, which I thought would work well for the rustic vibes I was going for. This wreath is advertised as a moss wreath, however there was no moss on the wreath I purchased (lol!).
- 24 Gauge Green Florist Wire: This gauge wire is easy to work with and holds the rosemary perfectly in place.
- Pliers: To cut the florist wire.
- Ribbon (optional): I used this ribbon to hang my wreath, but that is completely optional and you can use whatever pattern or color ribbon you enjoy.

How to Make the Fresh Rosemary Wreath
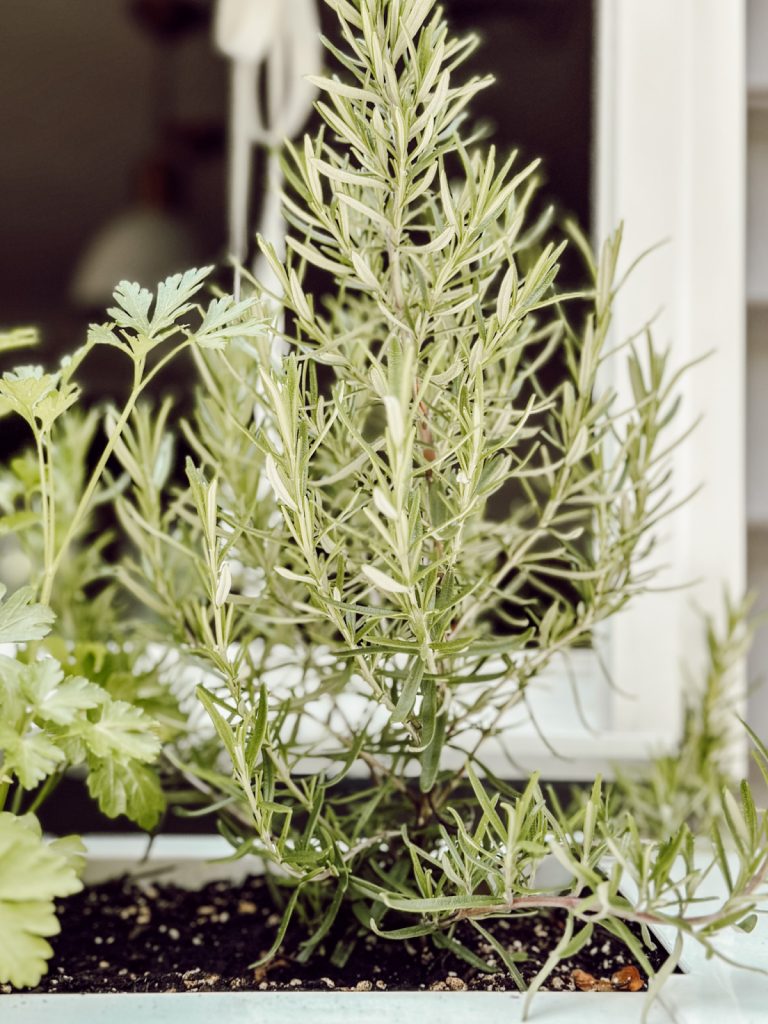
Step 1
Cut the rosemary stems from the rosemary plant (I cut the longest stems because those are the most mature). Loosely arrange the cut rosemary stems on the wreath to determine how many you will need to fill your wreath.
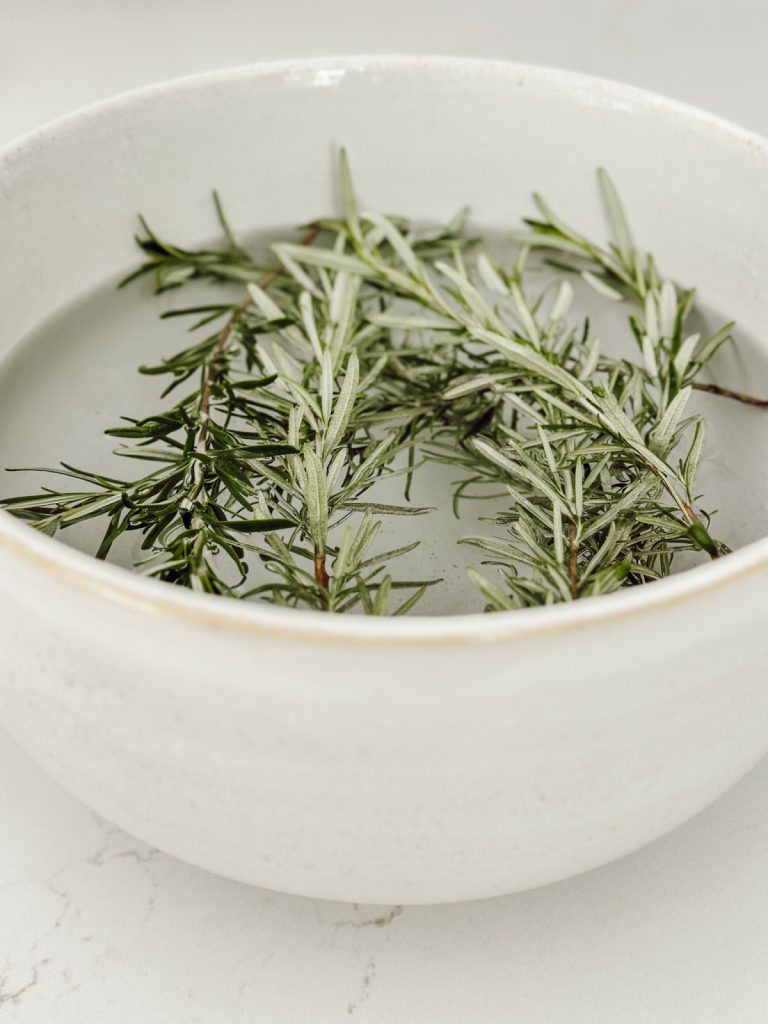
Add those stems to a bowl of cold water for about 30 minutes to 1 hour to give them a drink, and to remove any dirt, bugs, etc.
Soaking the rosemary stems will also make them more pliable, which will help when adding them to the wreath form.
Step 2
After the stems have soaked for 30 minutes to 1 hour, remove them from the bowl and place on a paper towel to dry. Once dry the rosemary is ready to be added to the wreath.
Pro Tip: Don’t allow the rosemary to dry for too long. They will become harder to bend & manipulate when adding to the wreath.

Step 3
Cut the florist wire in about 12″ long pieces (however many stems of rosemary you have, will depict how many pieces of wire you will need). I used about 3 pieces of wire for each stem of rosemary.

Step 4
Take a piece of floral wire and wrap it tightly around the end of the first sprig of rosemary. Secure the wire on the backside of the wreath.
Add another piece of wire about halfway up the rosemary stem. Place this wire so it’s hidden among the needles of the rosemary.

Step 5
Take another piece of rosemary, and push the end of the stem down an 1-2″ so that it’s underneath the first piece of rosemary you added to the wreath.
Wrap a piece of wire securely over the end of the first rosemary stem and the end of the 2nd rosemary stem, and secure the wire on the backside of wreath.
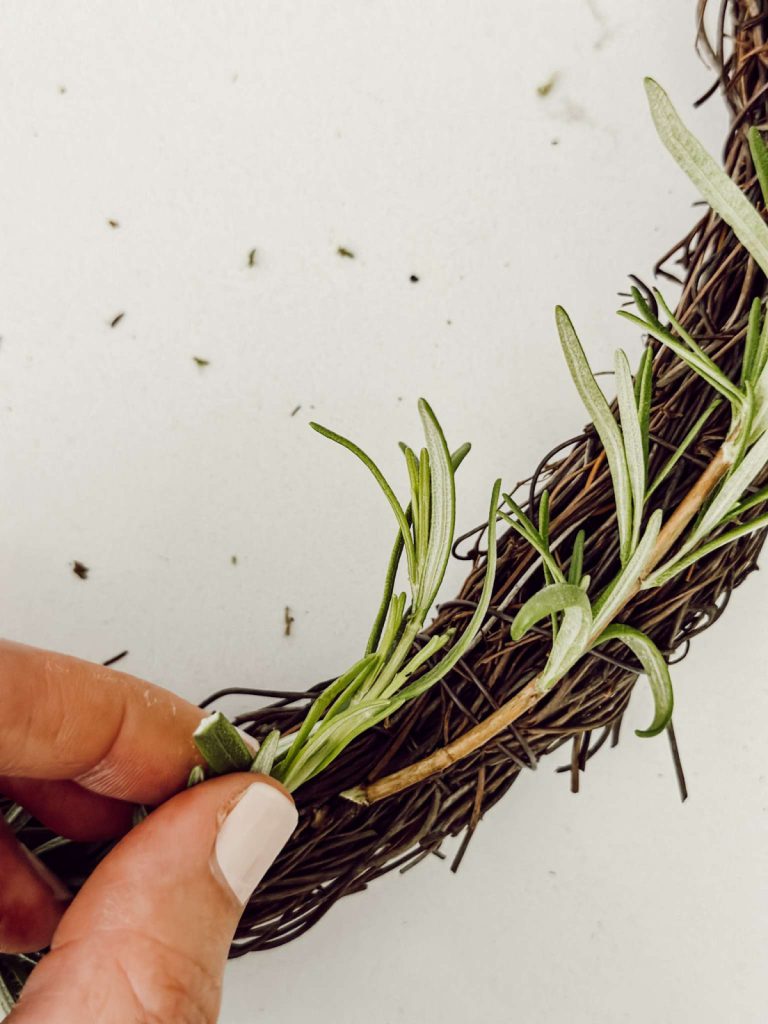
By securing the rosemary stems this way, you won’t see the woody end of the stem, and the rosemary will continue around the wreath looking like one continuous circle.

Step 6
Continue adding rosemary all around the wreath in the shape of a circle until the wreath is fully covered with rosemary.
At this point your wreath making is done, unless you want to add ribbon, continue to step 7.

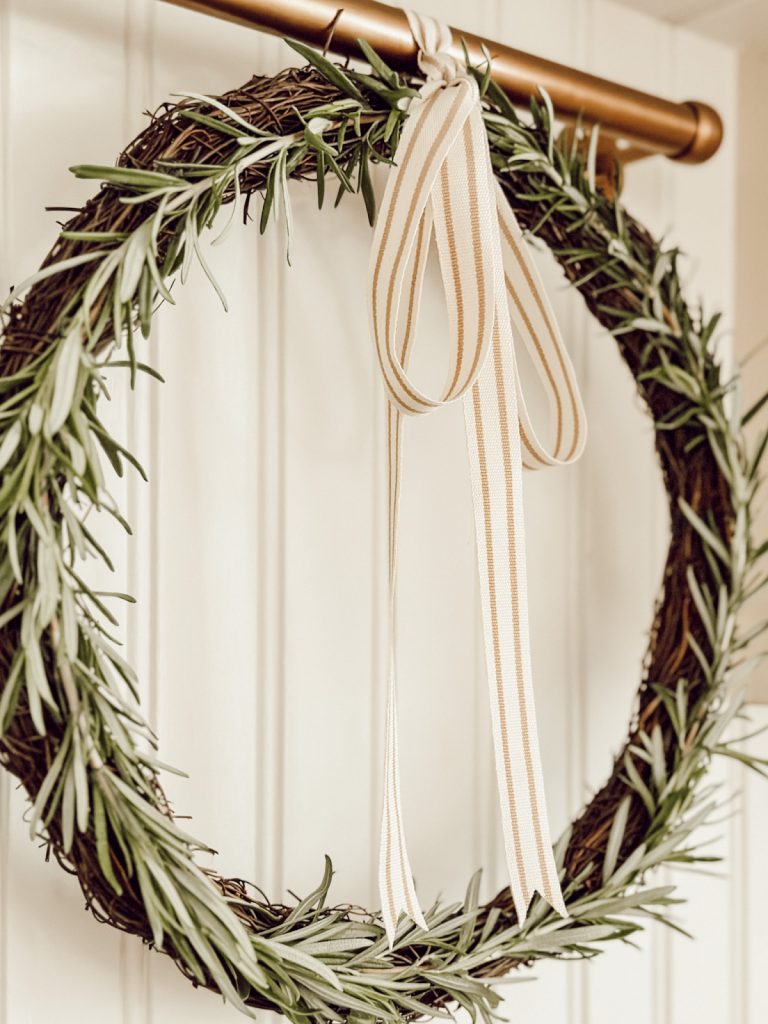
Step 7 (Optional)
Add a ribbon to the wreath for decoration and/or for hanging. You can tie the ribbon on the top, bottom, or side of the rosemary wreath.

Since I kept my own rosemary wreath fairly sparse, I wanted to add a little something extra to the wreath with ribbon tied in a bow.
I tied this ticking stripe ribbon to the top of the wreath for charm & character.

Tips & Tricks for Making a DIY Rosemary Wreath
- Use the longest rosemary sprigs in your garden to create this wreath. They will be easier to attach to the wreath with less wire.
- Create a larger rosemary wreath by using a large wreath base. Or, create small rosemary wreaths by forming the sprig of rosemary into a circle & tying with ribbon or twine. These are really cute used at place settings on a table or for Christmas decoration.
- Want a fuller more voluminous rosemary wreath? Create rosemary bundles, then attach those bundles to the wreath base.
- Soak the rosemary sprigs for at least 30 minutes so that they are pliable when adding them to the wreath.
- A wire frame or embroidery hoop could be used for the wreath base instead of grapevine.
- No rosemary in your garden? Try making other herb wreaths with fresh lavender, thyme, or bay leaf instead.

Where can I hang my fresh rosemary wreath?
I hung our fresh rosemary wreath behind our stove in the kitchen. It adds a nice pop of organic texture to this area of the kitchen, and I love the little pop of green.
This wreath could be hung anywhere in your home (where it won’t be bumped into) on a wall or hanging from a hook. I do no suggest hanging this outside, since it’s organic it will not hold up in the elements.

Will the rosemary dry out?
Yes, and that’s ok! After a few days you will notice the rosemary start to dry out & change color, and that just adds to its natural, rustic style.
You can spritz the wreath with water or soak in the sink to extend the life of the fresh rosemary if you desire.

Can I use the rosemary from the wreath once it dries out?
You sure can. Once your wreath is dried feel free to pluck the leaves to use in recipes, simmer pots, or other crafts.
Will the rosemary change color as it dries?
Yes, dried rosemary will change from vibrant green hues to duller, lighter ones.
Will a fresh rosemary wreath last a long time?
It sure can! Your DIY rosemary wreath will last for years if you hang your wreath in a location where it won’t be bumped into or moved around.
I don’t suggest using the dried rosemary after a year though; it won’t have much flavor and won’t do much to enhance your dishes.
View my google web story, DIY Wreath With Fresh Rosemary From the Garden.
You Might Also Enjoy
If you enjoyed this blog post, here are some more herb inspired posts that you might be interested in!
- Kitchen Window Box Herb Garden
- DIY Plant Labels for the Garden
- Summer Stovetop Potpourri Recipes
- Lemon & Herb Citronella Candles
Shop Our Home
Links to products featured in this post can be found in our Shop Our Home page. I hope this page makes shopping our home a little easier for you! I earn a small commission when you make a purchase from one of our LTK & Amazon Storefront links. Your support helps me continue to create meaningful content for you!
I look forward to sharing more of my home with you and inspiring you to have a well loved home! Follow me on Facebook, Instagram, Pinterest, and LIKEtoKNOW.it.
xoxo, heidi
Did you enjoy this post? PIN it for later!


Hi Kathy, The runners in our kitchen were from Ruggable a few years ago. I don’t think they make that exact run anymore but you might like any one of these vintage rugs from them: https://on.ltk.com/+t02dfcHykYjQGCLTfUm_oA
Thanks for sharing. I can’t wait to try making mine!
Also, where did you find your kitchen rugs? Have been looking for neutral, but not busy ones.
Thanks.
Hi Sandra, I’m glad you like my rosemary wreath idea! I add space between paragraphs because it makes reading the blog post easier for the reader. I felt I added enough instructional photographs, and apologize if there was a step that I did not show enough instructions on. Thank you for visiting the blog and have a great day!
Hello. Love the idea and the instructions, however, there are huge empty spaces that need to be closed up between paragraphs. There also should be photos to demonstrate your instructions.
It does, thank you Renae!
Such a great idea. I bet your kitchen smells amazing!