
Air Dry Clay Coasters: How to Create This Easy DIY
I’ll show you how easy it is to create adorable DIY house shaped air dry clay coasters with this easy step-by-step tutorial.
I have a confession to make.
Before 2024, I had never worked with air-dry clay before.
I’m not sure why, it just wasn’t on my radar.
It could be that clay crafts seemed too intimidating for this perfectionist, or maybe I assumed it required some sort of advanced skills or a lot of clay tools.
Whatever the reason, air dry clay remained unexplored territory for me.
But that all changed last year when I decided to give it a try for handmade flower frogs in the spring and then Christmas tree ornaments for the holiday season.
And let me tell you…once I got started, I was hooked.
Air-dry clay turned out to be so much easier (and more fun!) than I could have ever imagined.
It’s incredibly versatile, inexpensive, and perfect for creating functional items, like these charming house-shaped coasters.
Now, I can’t believe I waited so long to try it. Working with air-dry clay has become one of my favorite crafting methods.
If you’re new to the world of air dry clay, don’t worry!
This project is the perfect introduction.
It’s simple, forgiving, and requires only a few basic supplies.
Let’s dive in, and I’ll walk you through how to make your own no-bake clay coasters step by step.
Trust me, once you try it, you’ll be wondering why you didn’t start sooner!
What you’ll love about this DIY:
Supplies You’ll Need to Make Air Dry Clay Coasters
To get started, gather the following materials…
MATERIALS YOU’LL NEED

*If you make a purchase using one of these links, I may receive a small commission. This does not add any cost to you, but helps me to continue to create & share meaningful content. Thank you for supporting my small business!
How to Make Homemade Coasters Using White Crayola Air Dry Clay
Follow this simple tutorial and you’ll have the most charming coasters for your home or for gifting to friends and family.
SIMPLE COZY LIVING
Want more inspiration to make your home feel cozy and inviting?
Check out our collection of home decor ideas for creative tips and stylish touches you’ll love!
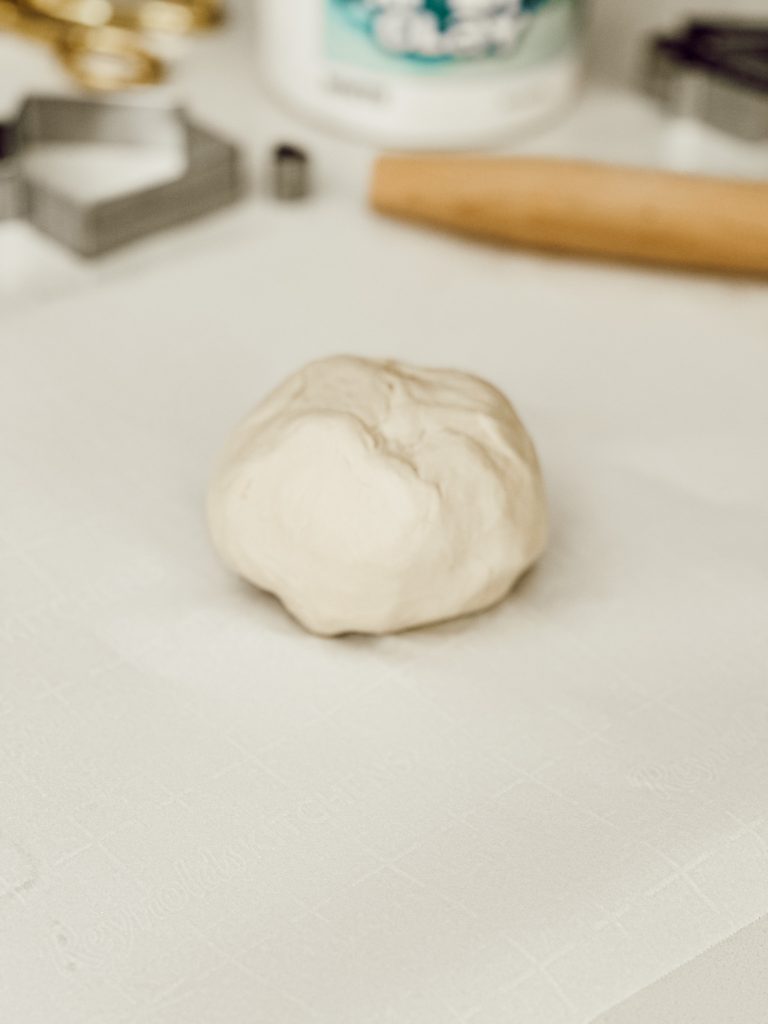
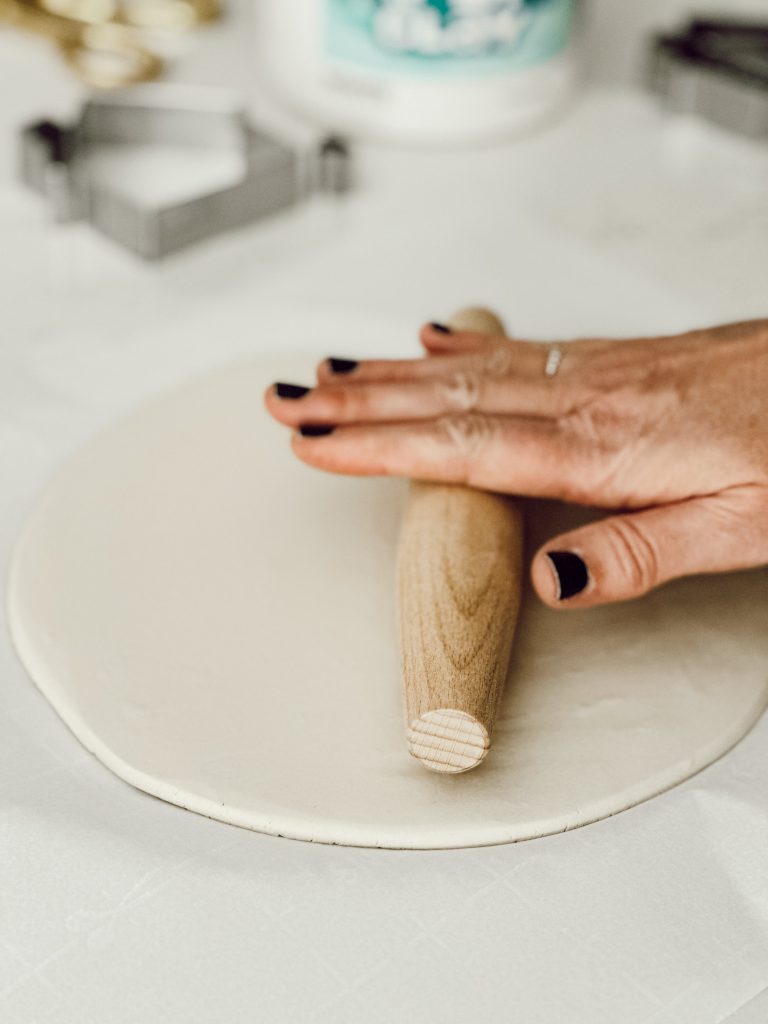
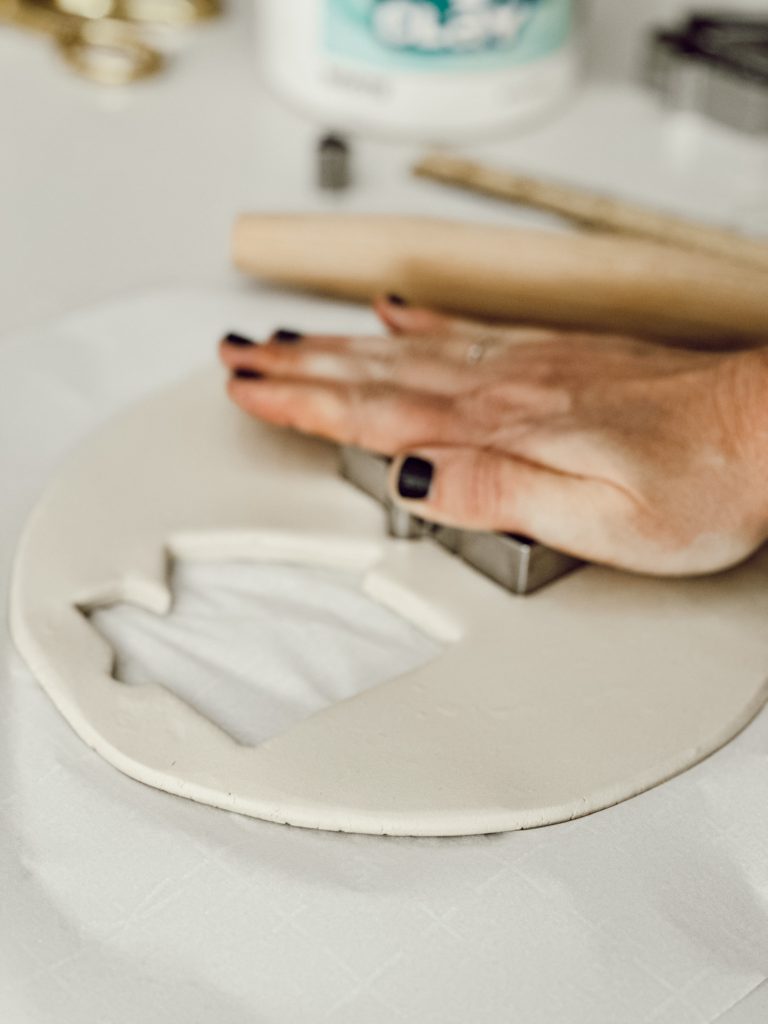
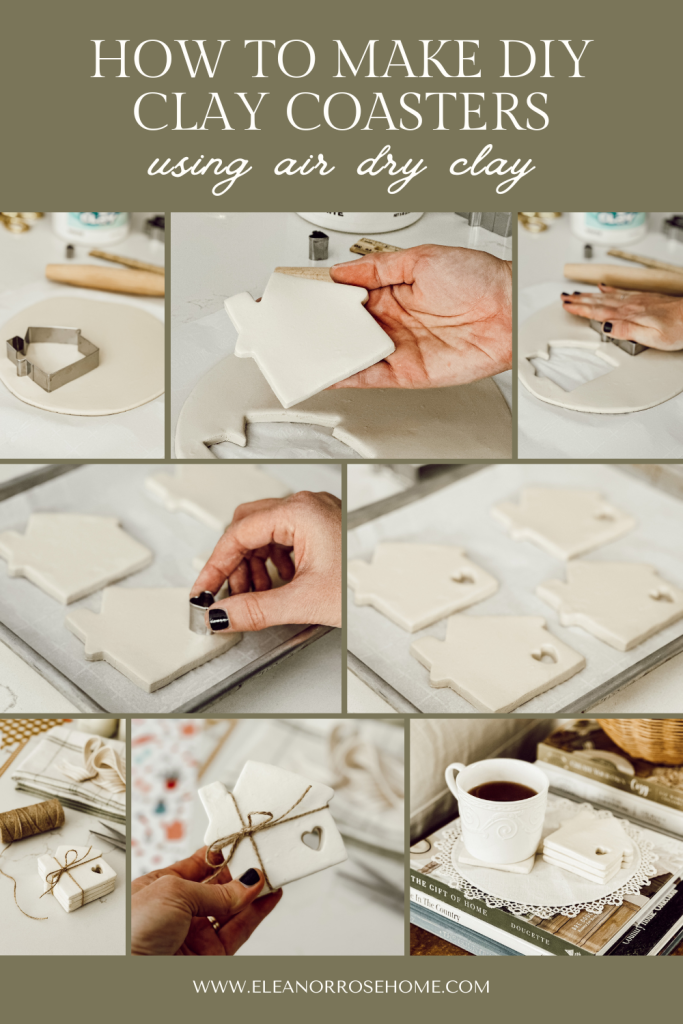
Step One. Roll Out the Clay
Start by placing a sheet of parchment paper (or wax paper) on a clean work surface to prevent the clay from sticking.
Take a handful of Crayola air-dry clay and roll it out to about 1/8″-1/4″ thick using a rolling pin.
The thickness of your coasters is ultimately up to you. You can make them as thin or as thick as you want.
Just remember that the thicker you make the shapes, the longer they will take to air dry.
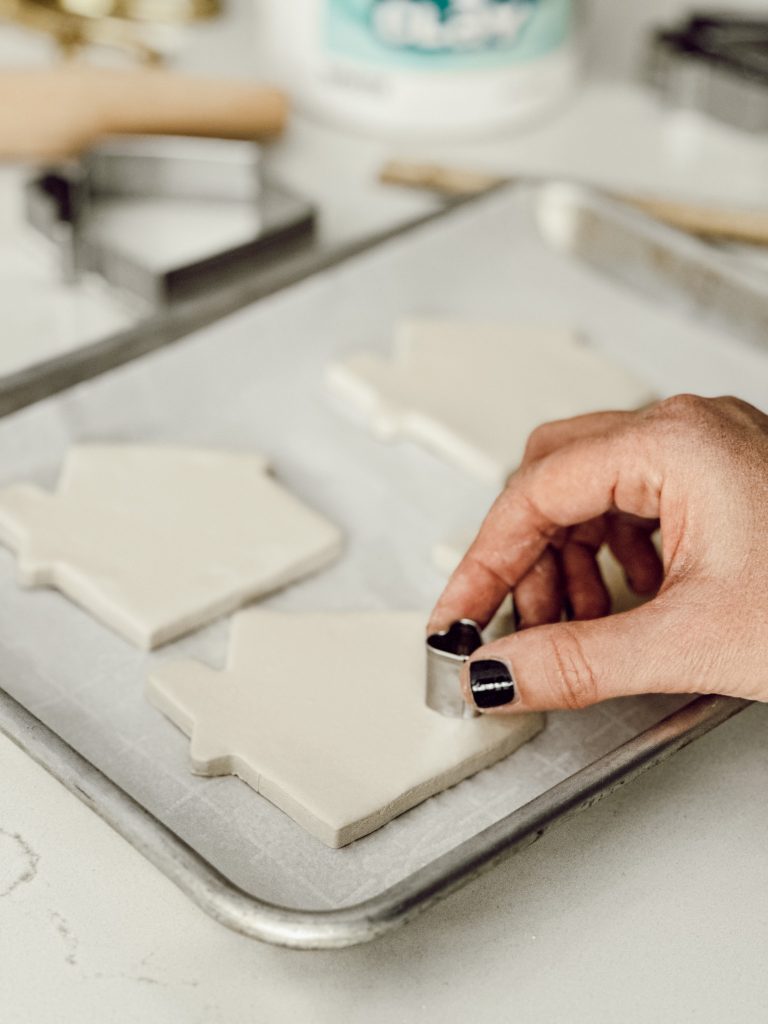
Step Two. Cut Out House Shapes
Using a house shaped cookie cutter, cut out as many houses as you like, and place them on the parchment lined baking sheet.
Then use a small heart shaped cookie cutter to cut out a heart shape on the bottom right side of the house (or anywhere you’d like to add a heart detail).


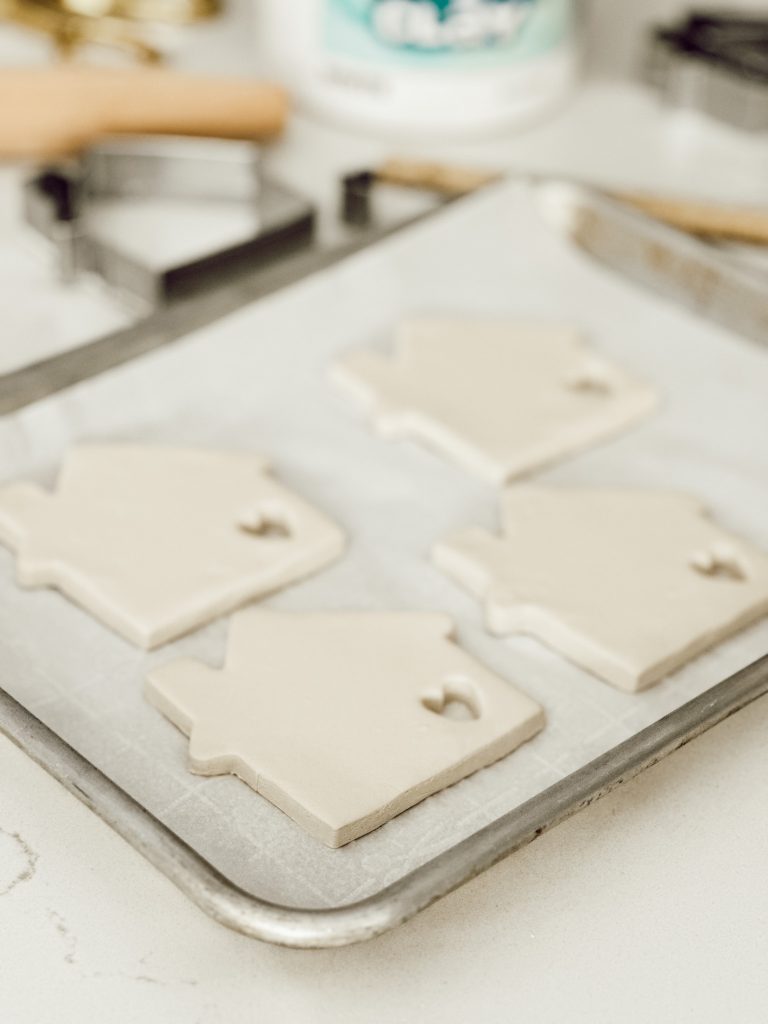
Step Three. Let the Air Dry Clay Coasters Dry
Depending on the thickness of your clay, this can take anywhere from 24-48 hours.
Be sure to flip the houses over halfway through to ensure even drying on both sides and to prevent warping.
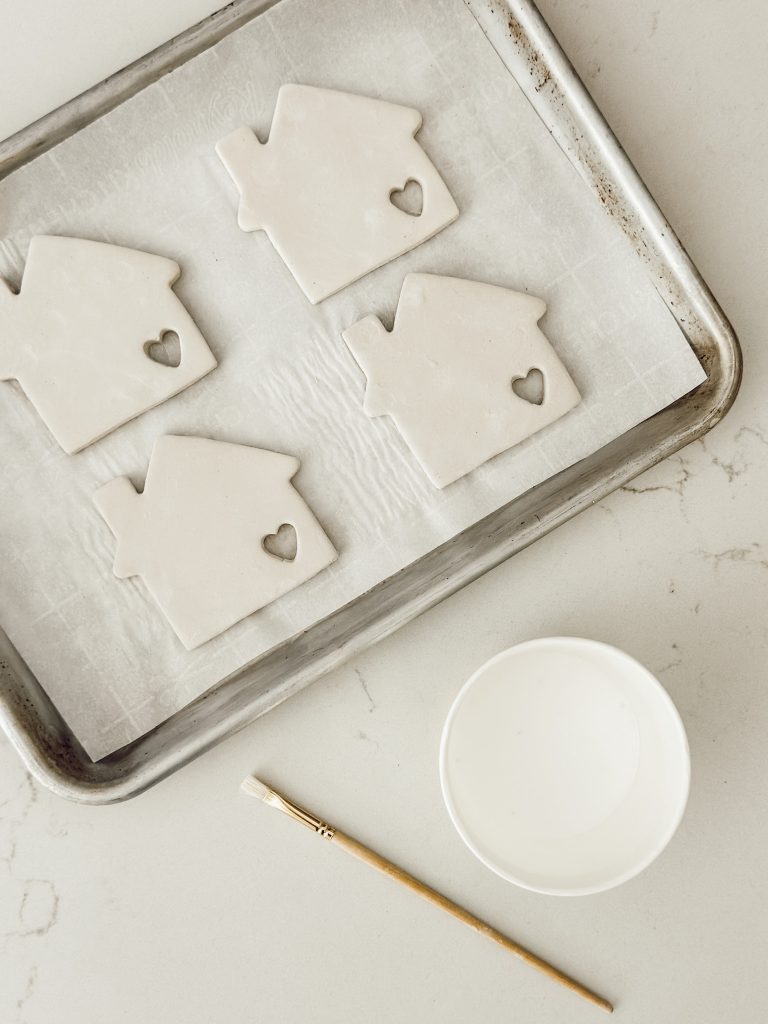
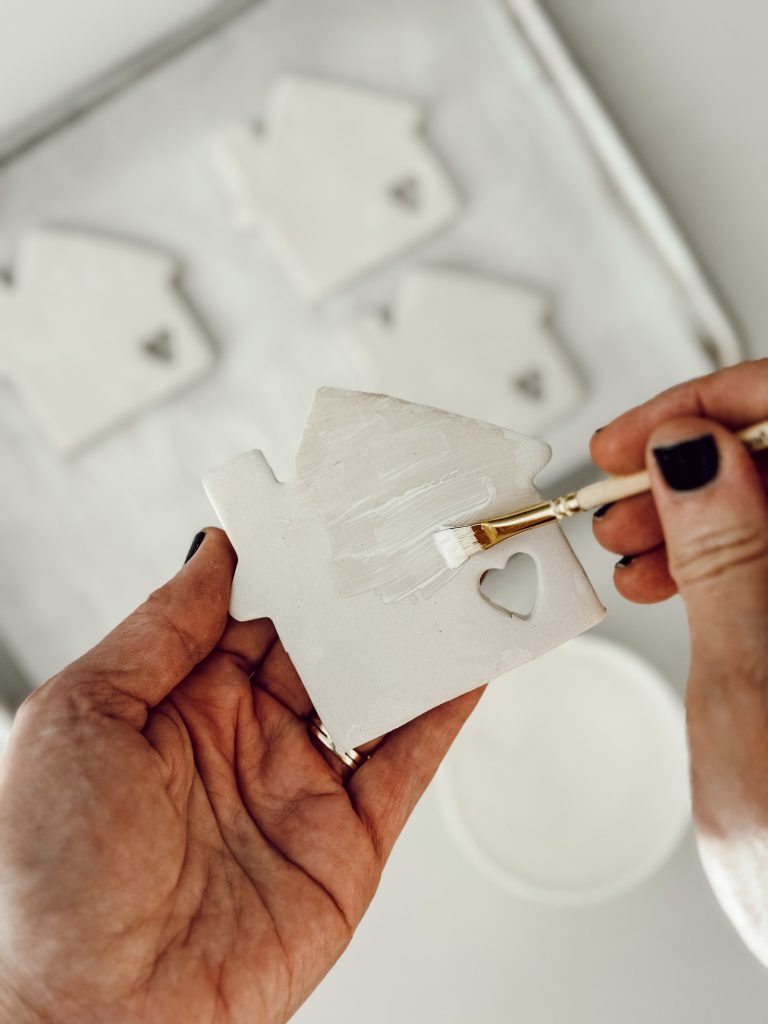
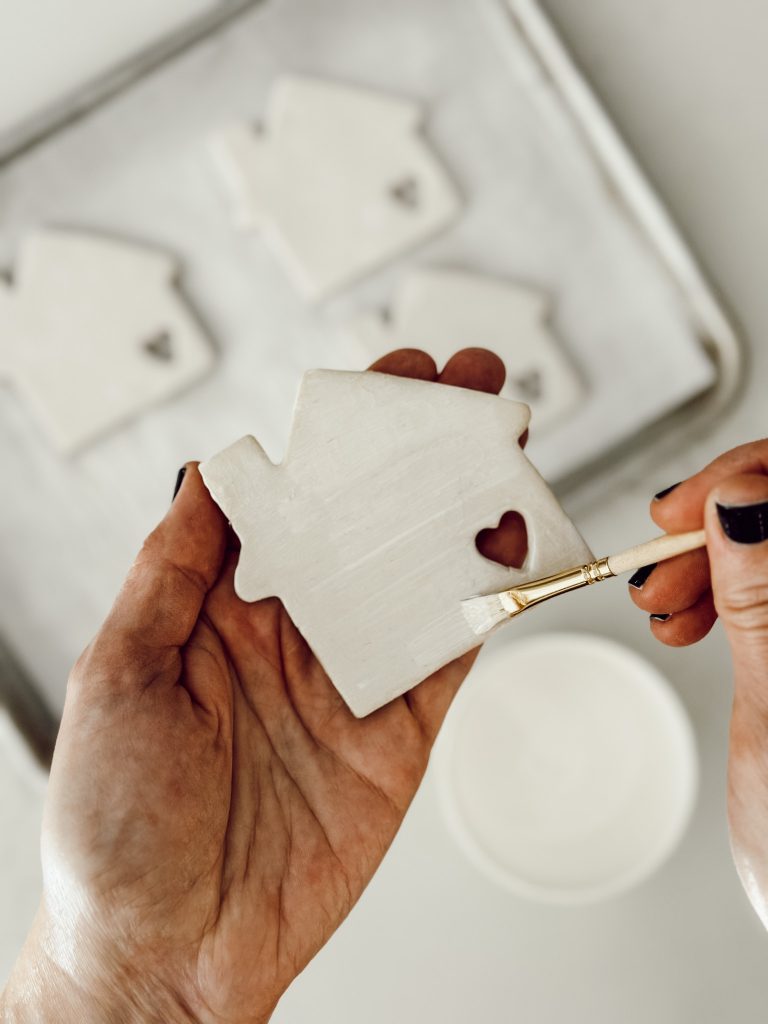
Step Four. Seal With Mod Podge
Using your brush, apply a thin layer of Mod Podge to the front and back of each coaster.
Allow the first coat to dry completely before applying the second and third coats.
Do not skip this step because the Mod Podge is what will protect your DIY coasters from spills and condensation.
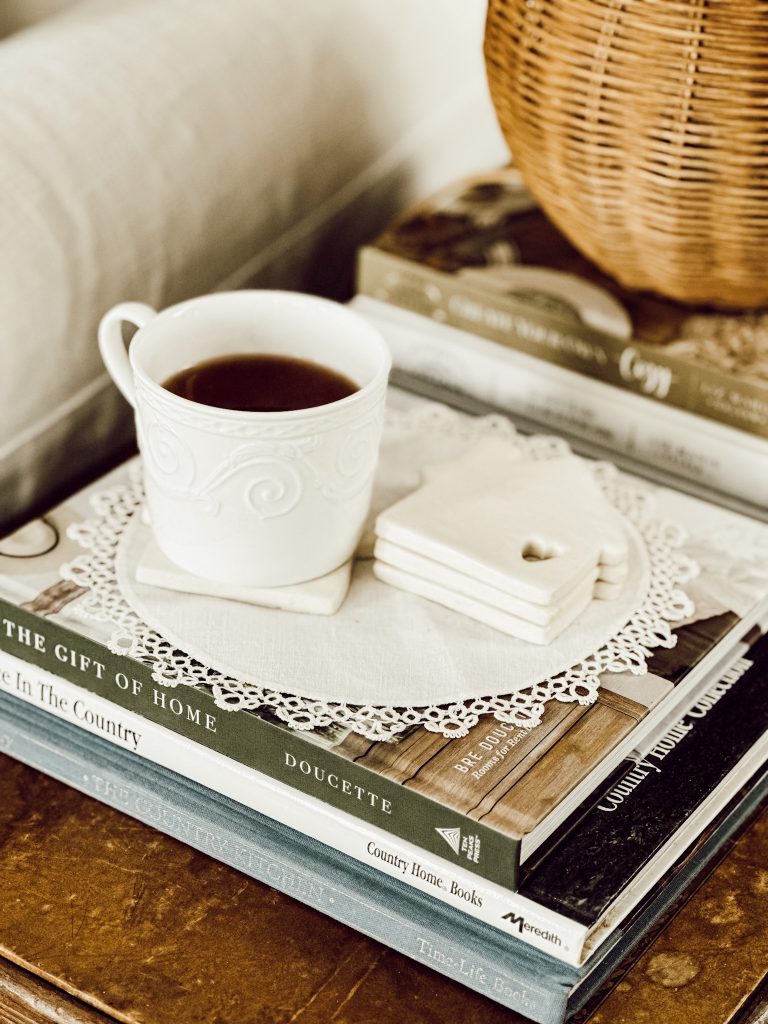
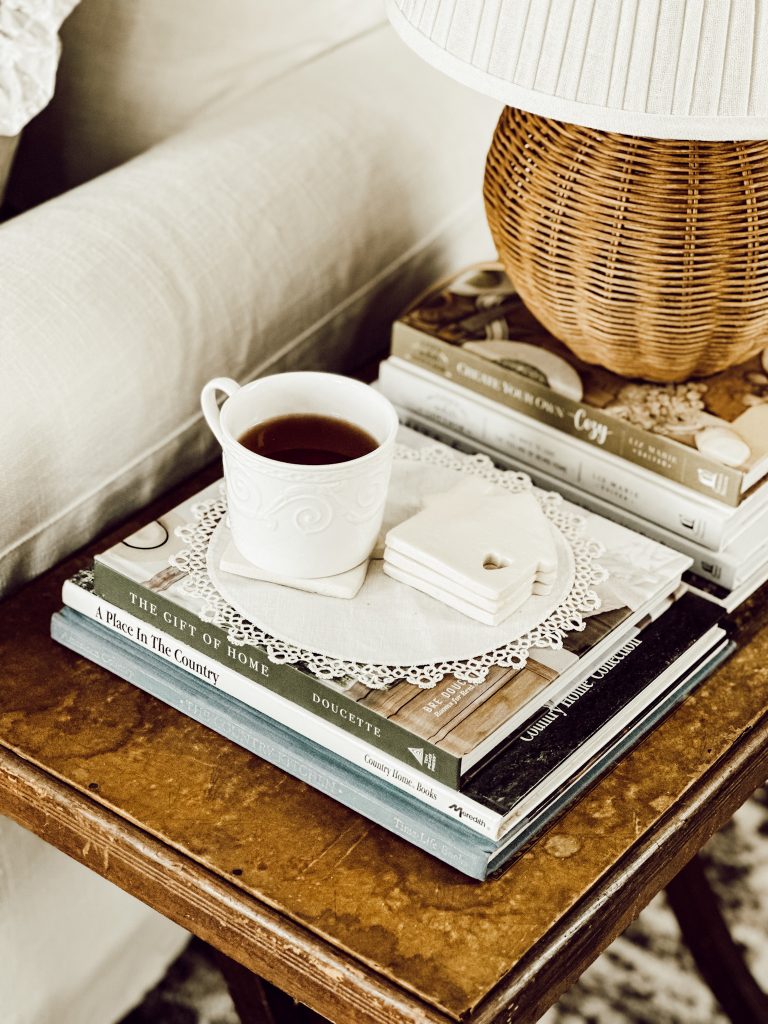
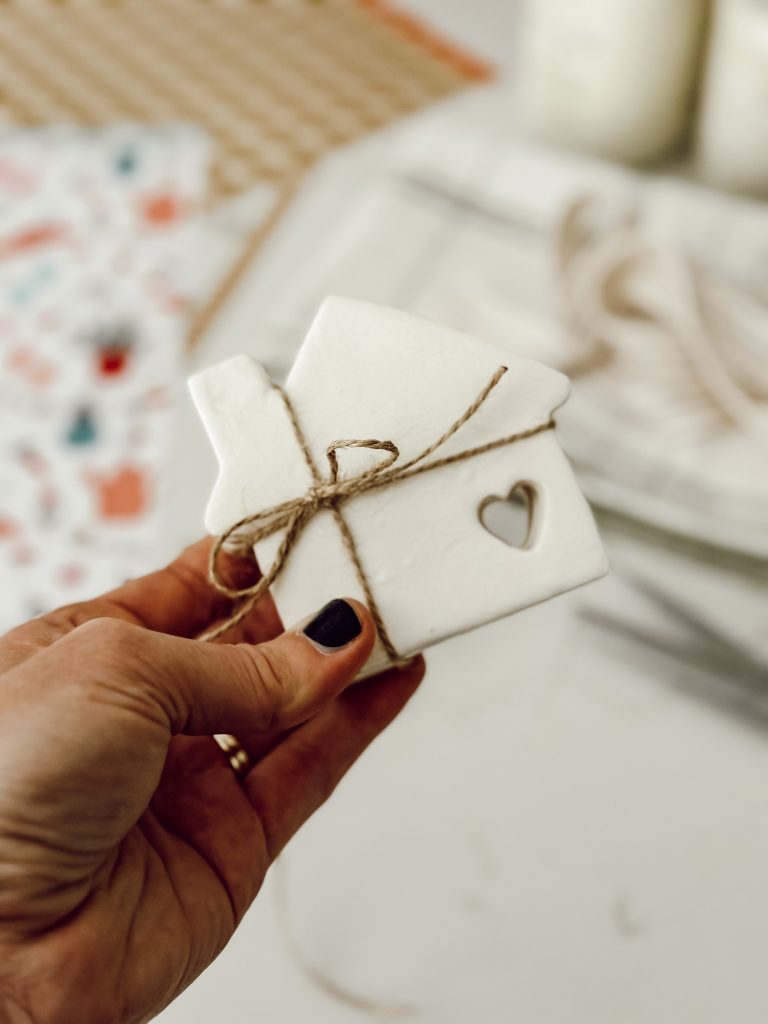
Step Five. Enjoy Your Handmade Coasters
Once the Mod Podge is completely dry, your coasters are ready to use!
Arrange them on your coffee table, or tie a set together with ribbon for a thoughtful gift.

Tips
- Before the clay starts to dry, smooth the edges with a damp fingertip to prevent sharp or rough spots.
- Use stamps, lace, or textured fabrics to create patterns on the clay for an extra decorative touch.
- Place the coasters in a warm, well ventilated area, and flip them halfway through drying to make sure they dry evenly and don’t warp.
- Once the coasters are dry, you can gently sand the edges with fine-grit sandpaper to remove any rough spots.
- Apply a thin coat of Mod Podge or a clear spray sealant to protect the coasters from moisture and stains.
- To prevent scratching surfaces, attach small felt pads to the bottom of the coaster.
What to do With Your DIY Coasters
Now that your clay coasters are complete, they are a great way to add a handmade touch to your home decor.
Place them on a living room coffee table, nightstands, or kitchen counters to protect your surfaces from drinks and condensation.
You can stack them in a decorative tray or mix and match them with other coasters.
They also make practical gifts!
Tie a set of coasters together with a ribbon and pair them with a bottle of wine or a candle for the perfect housewarming or hostess gift.

FAQs: Air Dry Clay Coasters
How do I make waterproof coasters?
To protect your coasters from moisture and stains, apply at least 3 thin coats of Mod Podge or you can also use a clear acrylic sealer spray.
Let each coat dry completely before adding the next layer.
Hey friend! What can I help you find?
Search our entire site!
How do I prevent my clay coasters from scratching surfaces?
Attach small felt pads to the bottom of each coaster to prevent the coasters from sliding and to prevent scratching on delicate surfaces.
YOU MIGHT ALSO
Enjoy These DIY Projects
Shop My Favorite Products
Shop my favorite home decor & lifestyle products, my LTK sources, and my Amazon Storefront.
By making a purchase with one of my affiliate links, I earn a small commission which helps me continue to create meaningful content for you!
I look forward to sharing more of my home with you and inspiring you to have a well loved home!
Follow me on Facebook, Instagram, Pinterest, and LIKEtoKNOW.it.
xoxo, heidi
Don’t forget to pin this for later…
shop the post


Thank you for your comment Shannon! It always so fun finding another “Heidi”!!!
I’ve been remembering this craft for months and am finally getting around to it. Had to come to the blog for your clear and helpful instructions – thank you, Heidi!
Also, we named our daughter Heidi. She’s eight now and I showed her your Instagram account the other day and told her your name is Heidi too. She was so enthralled and is inspired to also be a Heidi with a beautiful home when she grows up – super sweet! 🙂
I’m glad you like the air dry clay coasters, they are so fun to make! The exact cookie cutters I used for this DIY are located in a rectangle block right below the materials you’ll need section. Just click on the photo of the house cookie cutters and it will take you right to Amazon.
These coasters are adorable! May I ask if you have a link to the cookie cutters you used? Thank you for this idea. I will definitely be making coasters for my family Christmas gifts this year!