
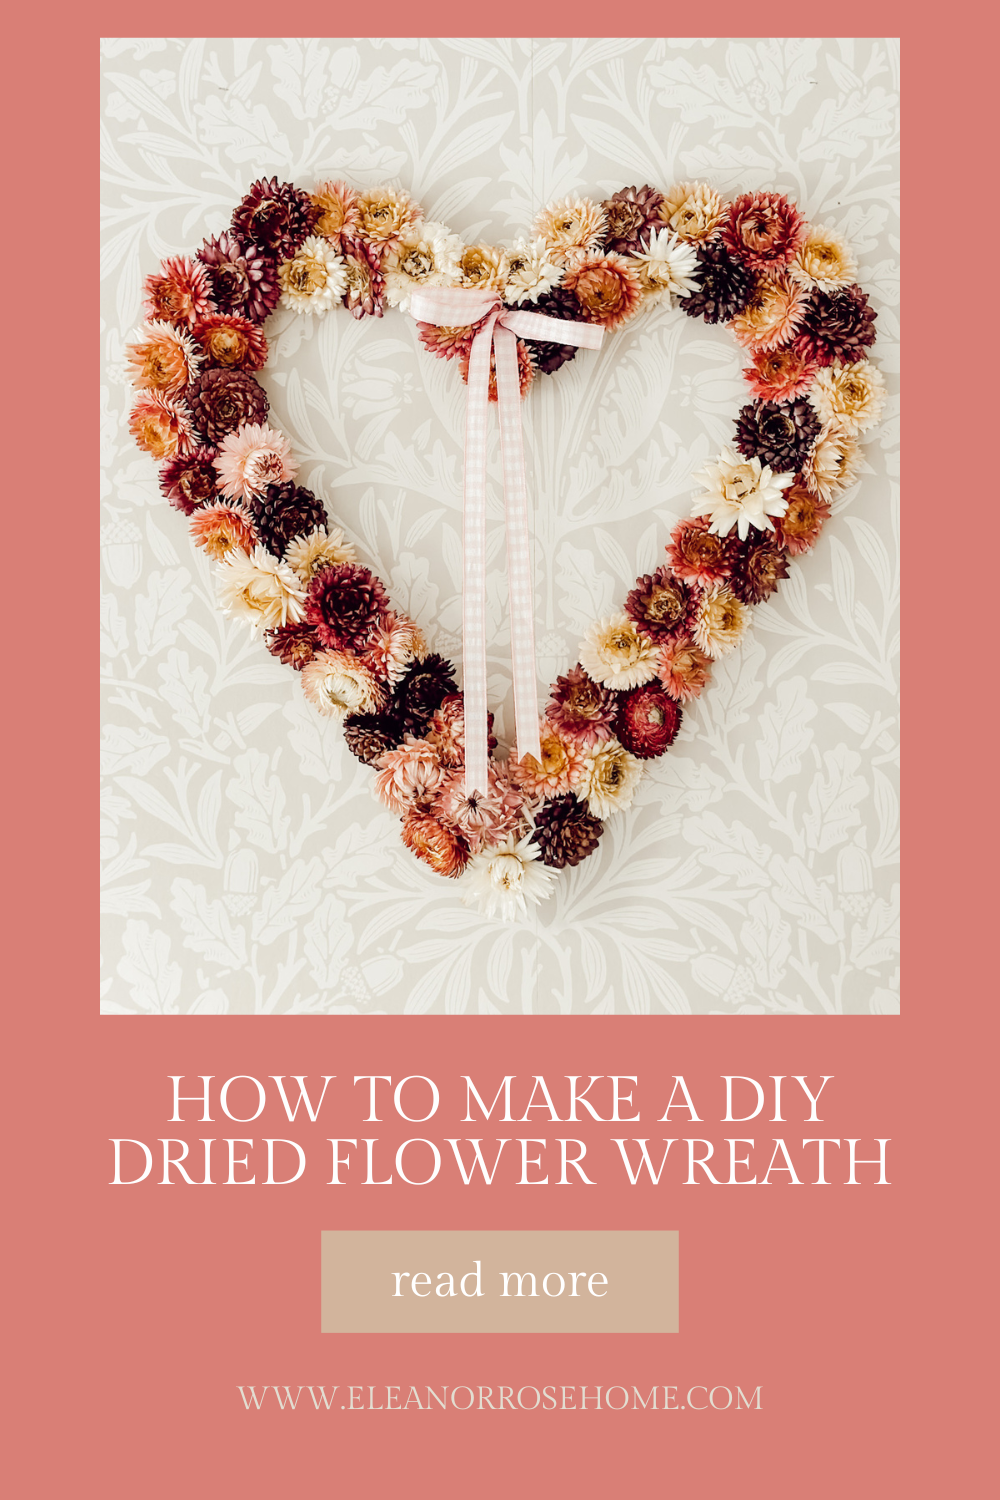
How to Make an Easy DIY Dried Flower Valentine Wreath
 Shop This Post

Follow this step by step guide on how to make an easy DIY dried flower valentine wreath with dried straw flowers and a heart wreath form.

If there is one thing I want to do more of this year, it’s making and decorating wreaths.
Wreath making is something I’ve always enjoyed, and something my mom always did when I was growing up.
The last few years have been so busy that crafting anything, including wreaths, was just something I didn’t have the time for.
Not this year.
I’m making it a priority in the new year to do more things that I love and that bring me joy…and that includes making wreaths.
There is something therapeutic in transforming ordinary items like dried flowers and a wreath form, and turning them into one of a kind home decor pieces.
So, I’m starting off the this year with a simple, charming, and rustic DIY valentine wreath that is easy to make and customize.
Let’s get crafting!
What You’ll Love About This DIY
Choosing Dried Flowers for Your Valentine Wreath
Like I said earlier, the good news about making your own DIY dried floral wreath is that you can customize it to fit the style and aesthetic of your home.
I used dried straw flowers to make our beautiful wreath, however there are plenty of other flowers that are just as pretty dried as they are fresh that you could use as well.
A few ideas include…
- Lavender
- Baby’s Breath
- Eucalyptus
- Statice
- Wheat Stalks
- Bunny Tails
- Rose Buds
- Hydrangeas
- Dried Grasses
- Thistle


you might also enjoy
Making This DIY Heart Topiary
How to Dry Flowers for a DIY Wreath
If you have fresh flowers in your own backyard, air drying is a great way to preserve the beauty of the flower for crafts, including wreath making.
Start with fresh, undamaged flowers and gather them in small bundles, then secure the bundle of stems with a rubber band.
Hang the bundles upside down in a dry, dark, and well-ventilated area of your home.
Allow the flower bundles to air dry for several weeks until they are completely dry to the touch.
Once dried, your flowers are ready to be added into wreaths and any other crafts you might want to use them for.
Now, if you’re like me and don’t have fresh flowers growing in the garden (because you have a brown thumb), you can also purchase dried flowers at craft stores like Hobby Lobby or Michael’s, or Amazon is another great resource.
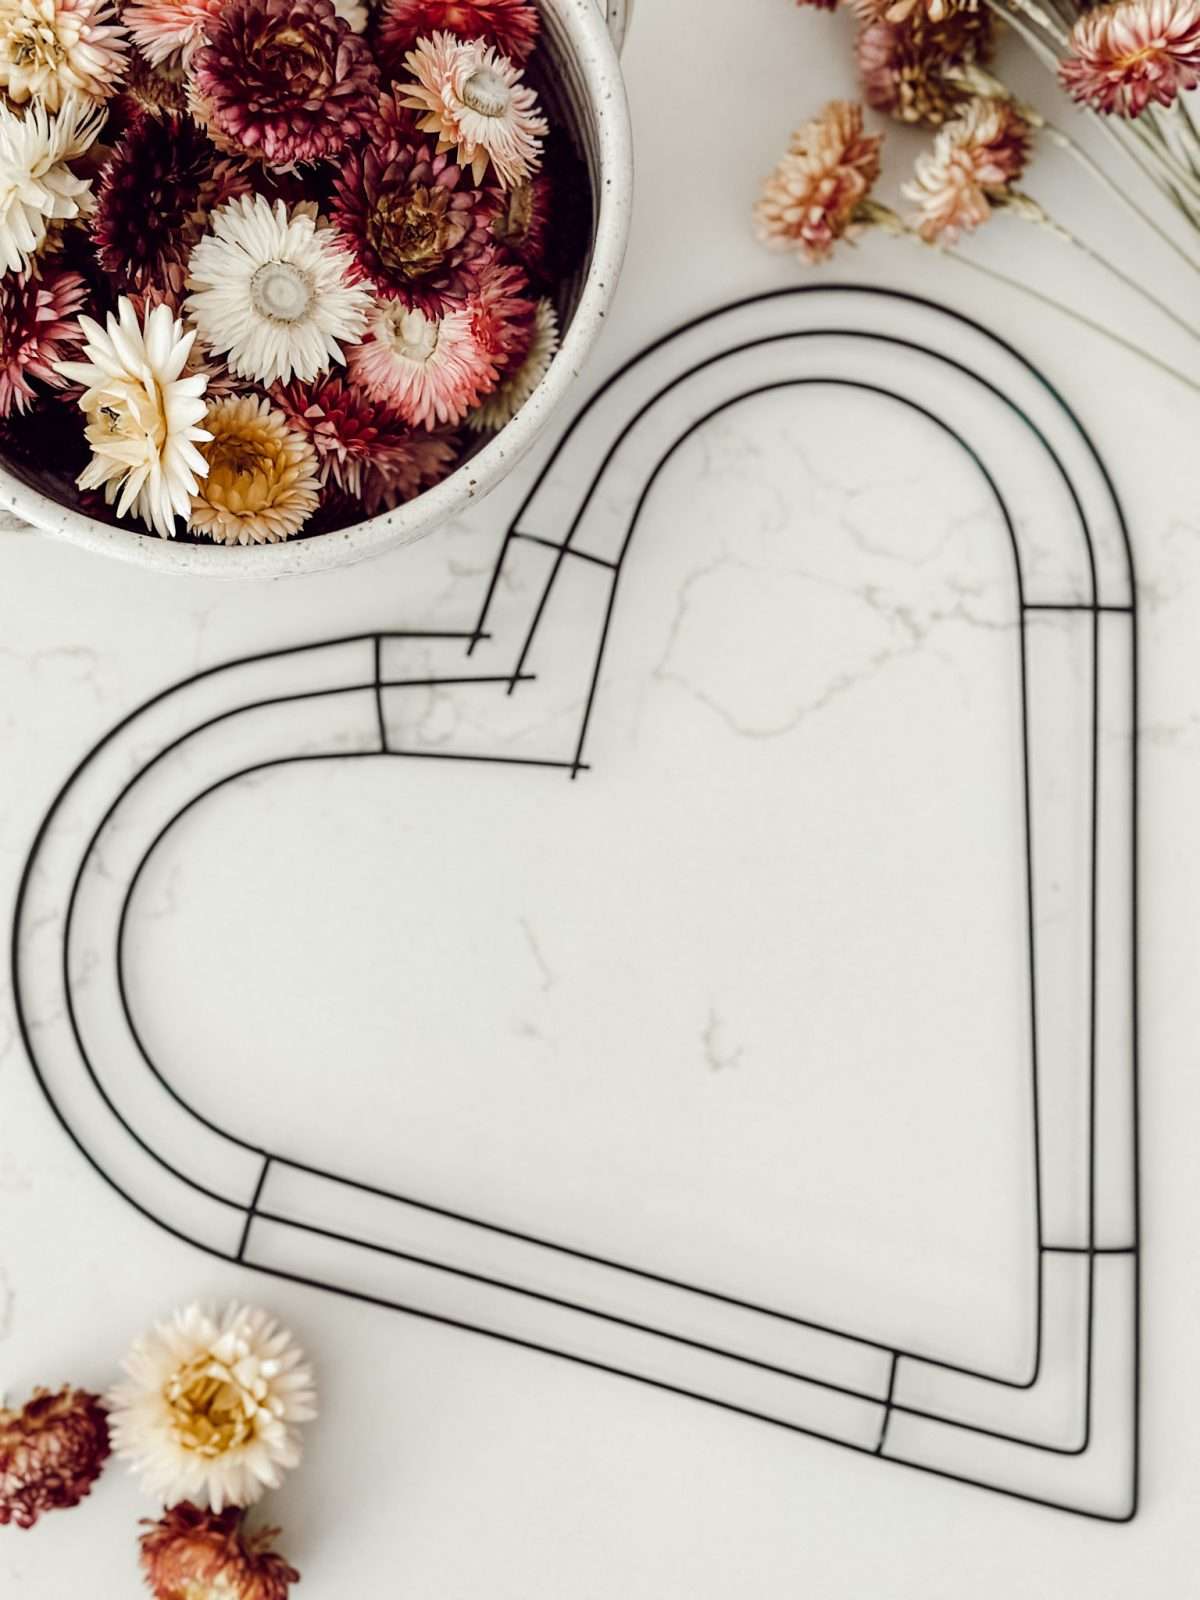
Supplies You’ll Need to Make This Simple Wreath DIY
Here’s everything you’ll need to make this heart shaped Valentine wreath…
materials you’ll need
*If you make a purchase using one of these links, I may receive a small commission. This does not add any cost to you, but helps me to continue to create & share meaningful content. Thank you for supporting my small business!
I’m Heidi, the heart and hands behind Eleanor Rose Home.

I’ll show you that your home can become a place of warmth, comfort, and style with practical tips, creative ideas, and my own journey to help you create a space that feels like you…welcoming, personal, and full of charm.
Step by Step Tutorial on How to Make Your Own Dried Valentine Wreath
Just follow these simple steps and you’ll have a beautiful DIY heart wreath to hang in your home in no time!
cozy ideas delivered to your inbox
When you join our newsletter!
01
Gather Materials & Prep Your Work Space
Gather all of your materials to begin creating the wreath. Choose an area to work that you won’t mind getting dirty. There will be petals that will fall off the dried flowers and the hot glue can get a little messy. You could put a drop cloth or even an old tablecloth on your workspace to make cleanup even easier.
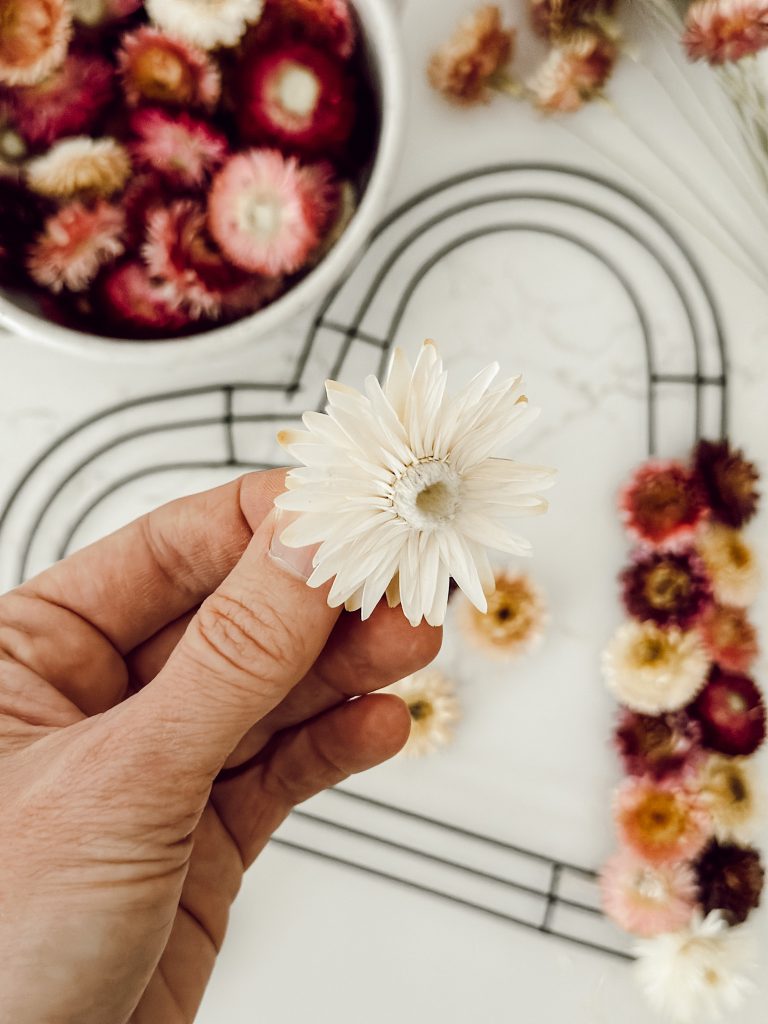
02
Prep the Straw Flowers
If your straw flowers have stems (mine did not) use a pair of snips to remove those and discard. Separate your straw flowers by color. This will allow you to plan the arrangement and balance of colors on your wreath. You don’t want too many dark or light colors bunched together, you want the various colors to be evenly distributed.
03
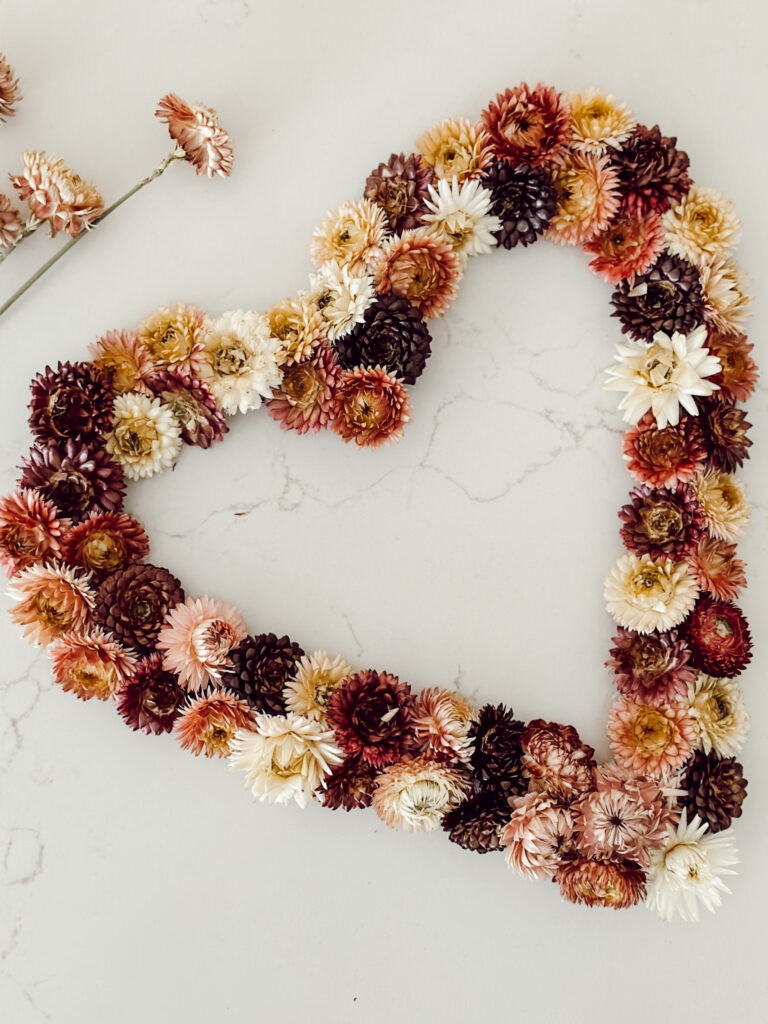
Glue Flowers to Wreath Base
Use a hot glue gun to attach each flower carefully to the base. I liked the look of the back side of the flower best. So, I placed a dab of hot glue on the front, flatter side of the flower and pressed that gently onto the wreath base.

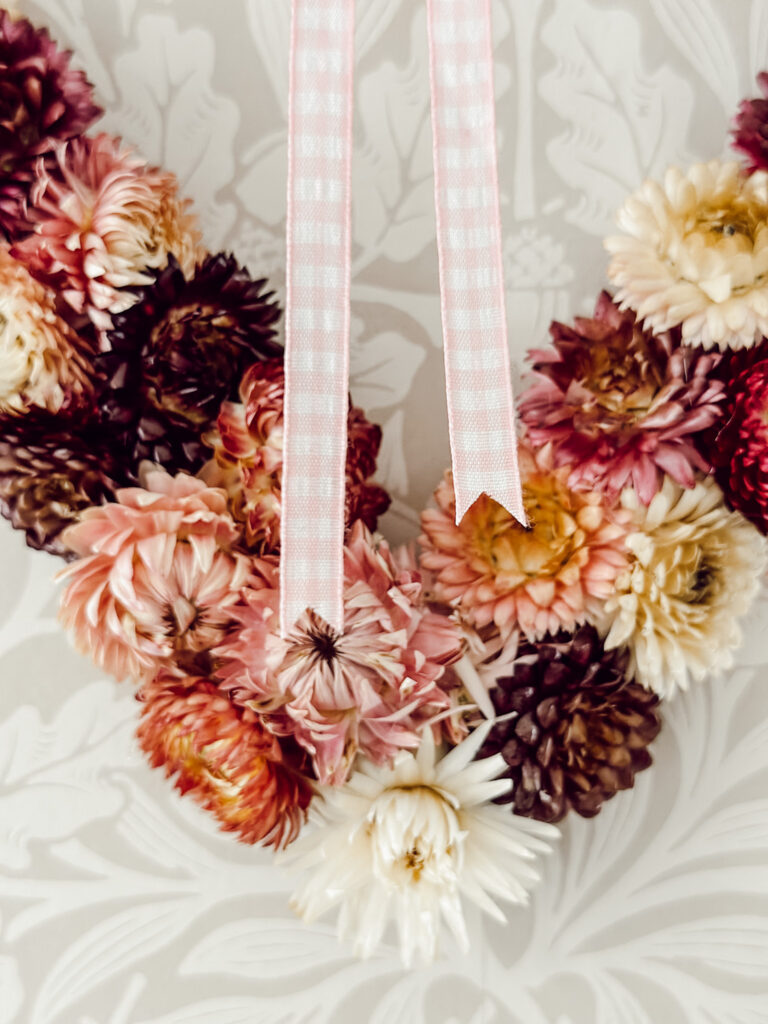
04
Finish With Ribbon
Once the entire wreath frame is covered with flowers, cut a length of ribbon and tie it in a bow. Attach the bow with hot glue or floral wire to the top of the wreath or wherever you like the placement. You’re wreath is now ready for hanging!

Hey friend! What can I help you find?
Search our entire site!
Helpful Tips
- Lay down a tablecloth or drop cloth on your workspace to catch drips from the hot glue.
- Before you start gluing, arrange the dried flowers on the wreath form to visualize your design.
- Feel free to customize your wreath by combining flowers with different colors, sizes, and textures.
- While I love the heart shape, don’t hesitate to experiment with different wreath shapes like circles, squares, or ovals for a unique look.
Frequently Asked Questions
Can I hang this DIY wreath outside?
I do not recommend hanging your dried floral wreath outside. Rain and humidity can damage the dried flowers, and direct sunlight will fade the colors.
Can I use another type of wreath base to create this wreath?
Yes! While a wire wreath frame works great, you can easily use other bases like a grapevine wreath, straw or styrofoam wreath, embroidery hoop, or even repurpose an old wreath you already have.
How do I store a dried flower wreath when I’m not displaying it?
Store your dried flower wreath in a cool, dry place away from direct sunlight to prevent fading. Consider placing it in a flat box or wrapping it in tissue paper to protect the delicate floral elements.
Can I spray my dried flowers with a sealant to preserve them longer?
You can use a clear foliage sealant or hairspray to help preserve dried flowers. However, test it on a small section first to ensure it doesn’t affect the colors.
What is the best way to clean a dried flower wreath?
Gently dust your dried flower wreath using a soft brush or a can of compressed air. Avoid using water or cleaning solutions, as they may damage the delicate dried flowers.
Did you make this craft?
Mention us @eleanorrosehome or tag us using #eleanorrosehome so we can see your creations. You can also leave a comment below!
You Might Also Enjoy
-
DIY Valentine Heart Playing Card Garland With Ribbon
This DIY valentine heart playing card garland is an easy way to decorate for Valentine’s Day using ribbon and heart…
-
Easy Valentine DIY and Recipe Ideas for a Cozy Valentine’s Day
A roundup of easy Valentine DIY and recipe ideas that include simple crafts, home decor, and sweet recipes for Valentine’s…
-
DIY Heart Topiary: Easy Budget-Friendly Valentine Decor Idea
This DIY heart topiary is inexpensive to make, easy to create, and a great way to add charm to your…


Shop My Favorite Products
Shop my favorite home decor & lifestyle products, my LTK sources, and my Amazon Storefront.
By making a purchase with one of my affiliate links, I earn a small commission which helps me continue to create meaningful content for you!
I look forward to sharing more of my home with you and inspiring you to enjoy simple cozy living!
Follow me on Facebook, Instagram, Pinterest, and LIKEtoKNOW.it.
xoxo, Heidi

Don’t forget to pin this for later!
Shop this post


Thank you Lynne! That sounds amazing, you could make such a beautiful fall wreath!
This shape is so pretty, Heidi!
I grow several varieties of this strawflower. ( They are so fun to grow! ) I am going add a few more to the mix this year so I can fashion a pretty wreath for late summer, early fall.