Easy Way to Create a Beautiful Hydrangea Floral Arrangement
Learn how to create a hydrangea floral arrangement in minutes with this easy guide along with tips and tricks on keeping your blooms looking fresher longer.

With summer now here and hydrangeas coming into season, I wanted to share a simple and easy way to create your own hydrangea arrangement.
Hydrangea blooms are beautiful to look at in outdoor landscapes, but they are even prettier when clipped and brought indoors to be styled inside your home.
I love going out into our yard and clipping a few fresh stems to style on our kitchen island or placing a handful in a vase in our built-in bookshelves.
Hydrangeas are not quite in season here in the northeast (just a few more weeks to go) however that has not stopped me (and shouldn’t stop you) from enjoying these beautiful flowers all spring long thanks to the grocery store.
Fresh hydrangea stems transformed into arrangements and bouquets have become a staple in our home from spring all the way through the end of summer.
Over the years, I’ve learned a few tips and tricks when it comes to creating hydrangea centerpieces as well as the secrets to keeping hydrangea blooms looking fresher longer, so I’m going to share those with you today!
More Hydrangea Posts
Where to Find Hydrangea Stems for Floral Arrangements
If you do not have hydrangeas growing in your yard or if they are just not in season yet, your local grocery store is a great resource for hydrangea stems.
My go-to grocery store to purchase fresh floral stems is Trader Joe’s.
The fresh cut flower selection is always phenomenal and their prices are relatively inexpensive.
I’ve noticed that the local supermarkets in our area have upped their “flower game” by stocking a more robust flower selection to include bunches of hydrangea.
You’ll pay a slightly higher premium when purchasing hydrangea at the supermarket, however when you’re in need of big beautiful blooms, you may be willing to spend a little more money.
- Trader Joe’s $5.99/3 stems
- Local Supermarket $12.99-19.99/3-5 stems (this will vary by supermarket & time of year)
A little note
I discovered the best real touch faux hydrangeas that no one will know are fake…but you! You can see and shop them, here.
Simple & Easy Way to Create a Hydrangea Arrangement
Hydrangea arrangements are one of the easiest to create and are extremely versatile!
You don’t need many hydrangea stems to create an impactful display because of the fluffy, voluminous blooms.
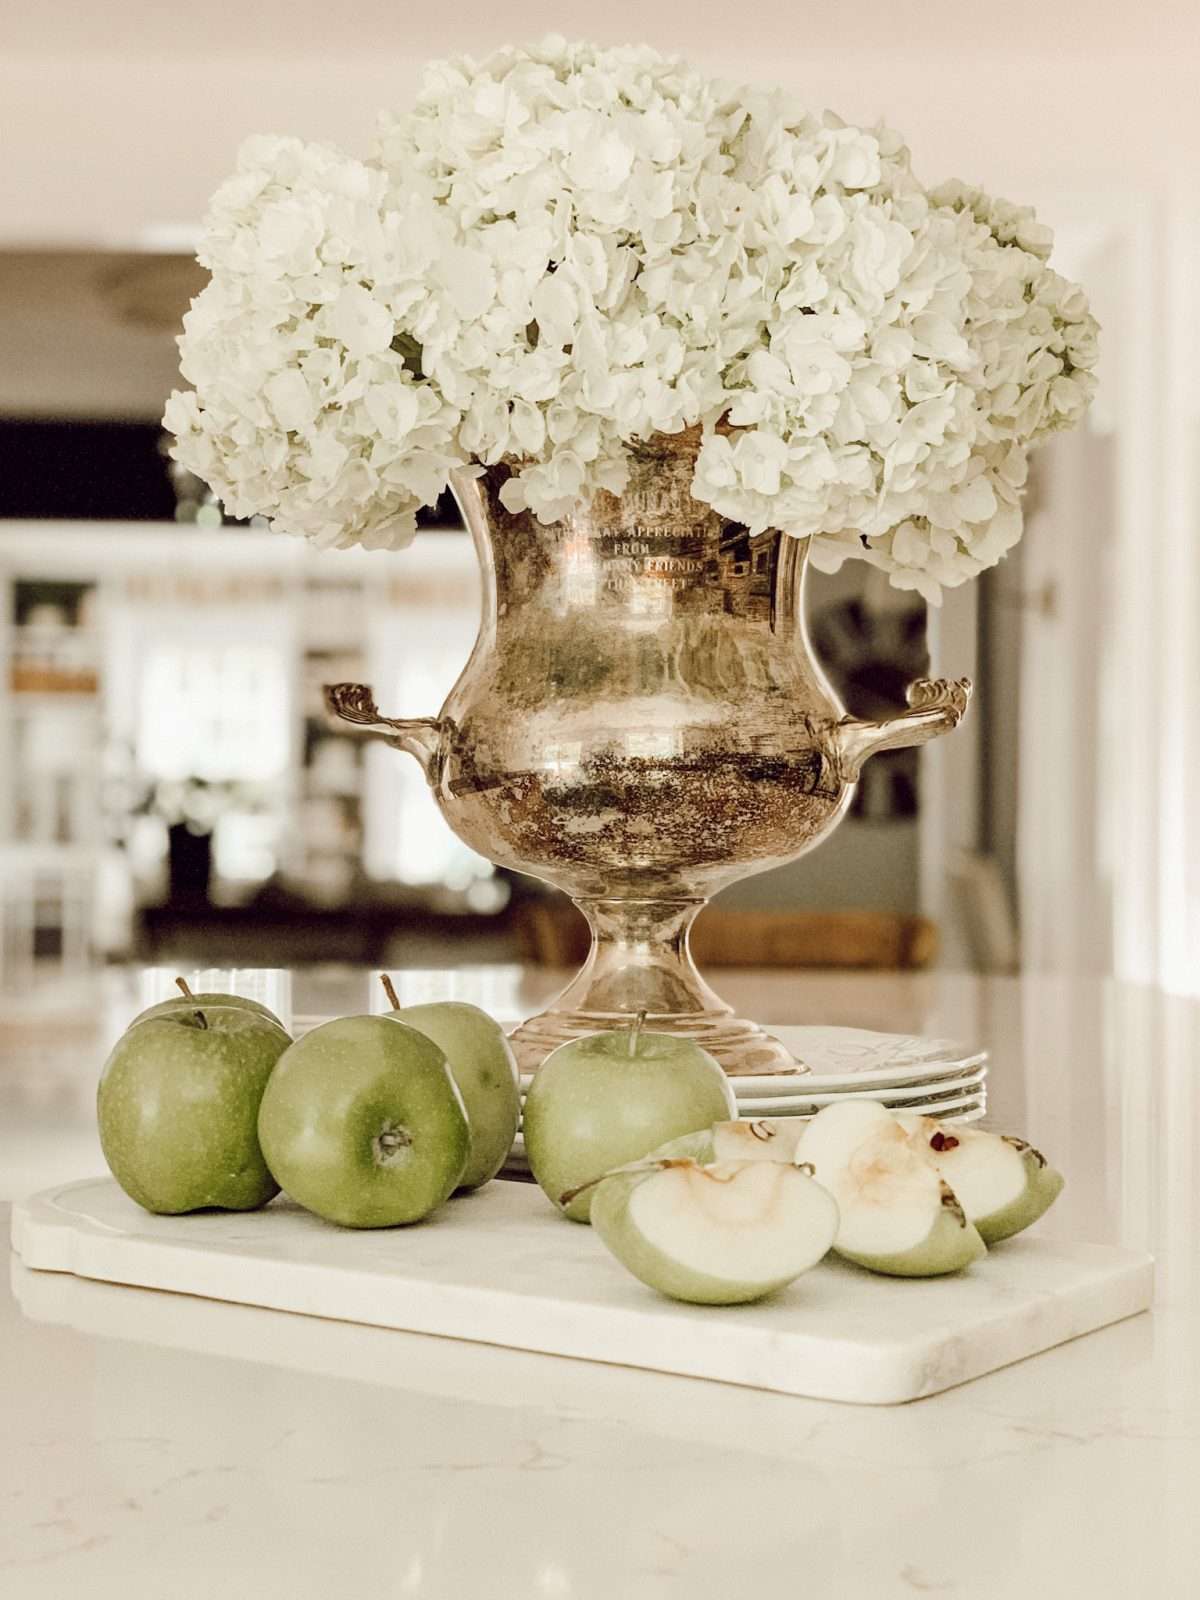
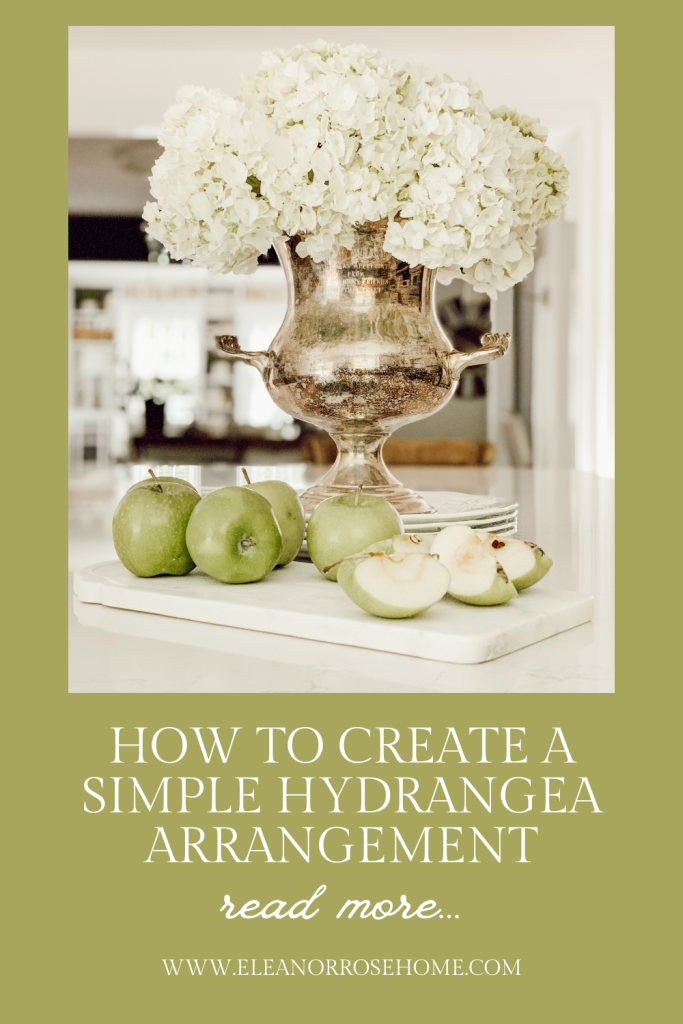
One of my favorite ways to create a centerpiece with hydrangeas is by simply adding a handful to a vessel like a pitcher, wooden bucket, glass vase, or a vintage trophy.
The amount of hydrangea stems you will need will depend on the vessel you’re using (keep reading…I am going to share a trick when using a wide mouthed vessel), but typically you will want to add an odd number of stems to fill your bouquet.
When only adding hydrangea stems to your vessel, you are going to have a more rounded centerpiece with blooms beginning where another one ends.
I personally love how an all hydrangea centerpiece looks big and fluffy…it’s so fun and organic looking!
simple cozy living
Want more inspiration to make your home feel cozy and inviting?
Check out our collection of home decor ideas for creative tips and stylish touches you’ll love!
Step One: Decide on a Vessel
To create a hydrangea centerpiece, you’ll first need to decide on the vessel you’ll be using to know how many hydrangea stems to purchase (or cut from your landscape).
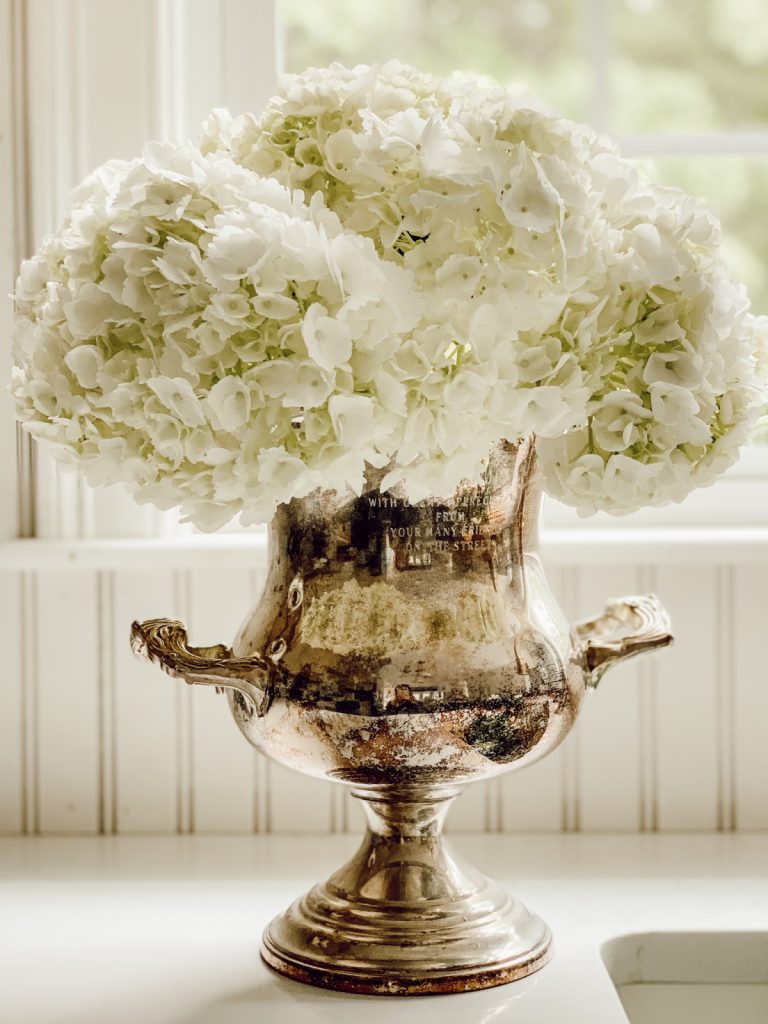
I chose to use a vintage silver trophy for this centerpiece.
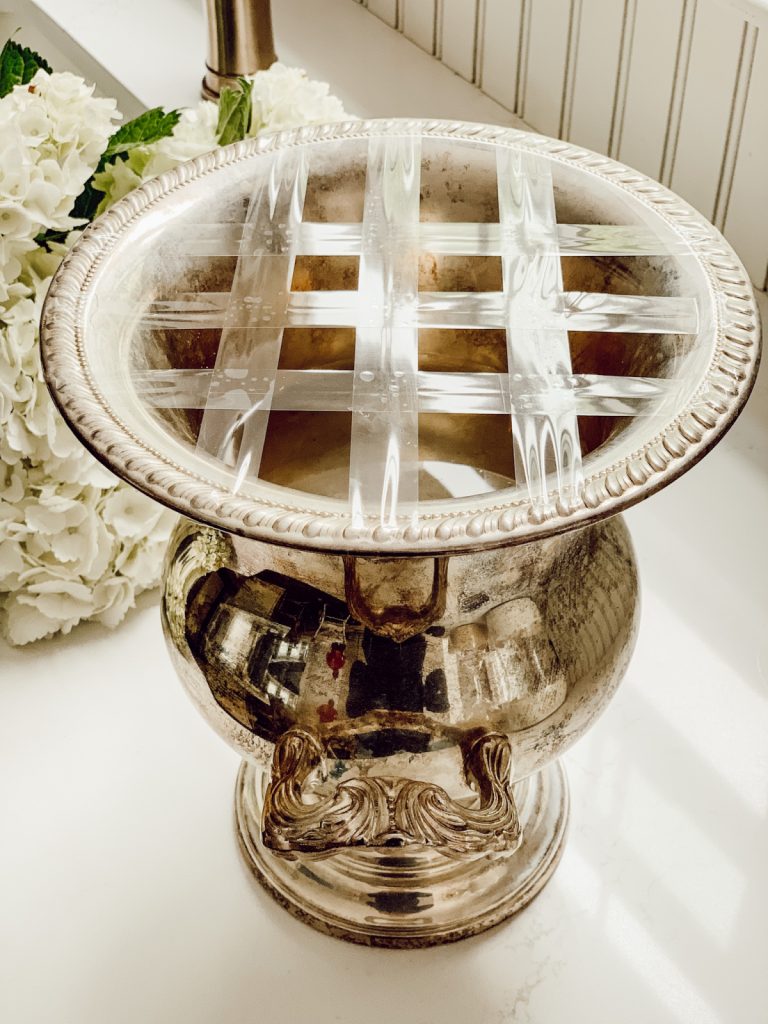
Hydrangea stems are extremely top heavy, so to help me create this arrangement and to keep the blooms & stems in place, I used a taping technique.
To use this technique, simply create a grid on your vessel (keeping the grid squares as large or as small as you like) with scotch tape.
Step Two: Add Hydrangea Stems
When your grid is in place, you can start adding in your hydrangea stems.
Cut your stems (see tips on this farther down this blog post) all about the same length.
The length will vary on the vessel.
Once you have one stem cut to the correct length, use that stem as a guide as to how long the other stems should be.
Continue to fill the vessel with hydrangea stems, placing each stem into a square in your tape grid, until you have achieved the desired fullness of your centerpiece.
Step Three: Add Additional Flowers (if desired)
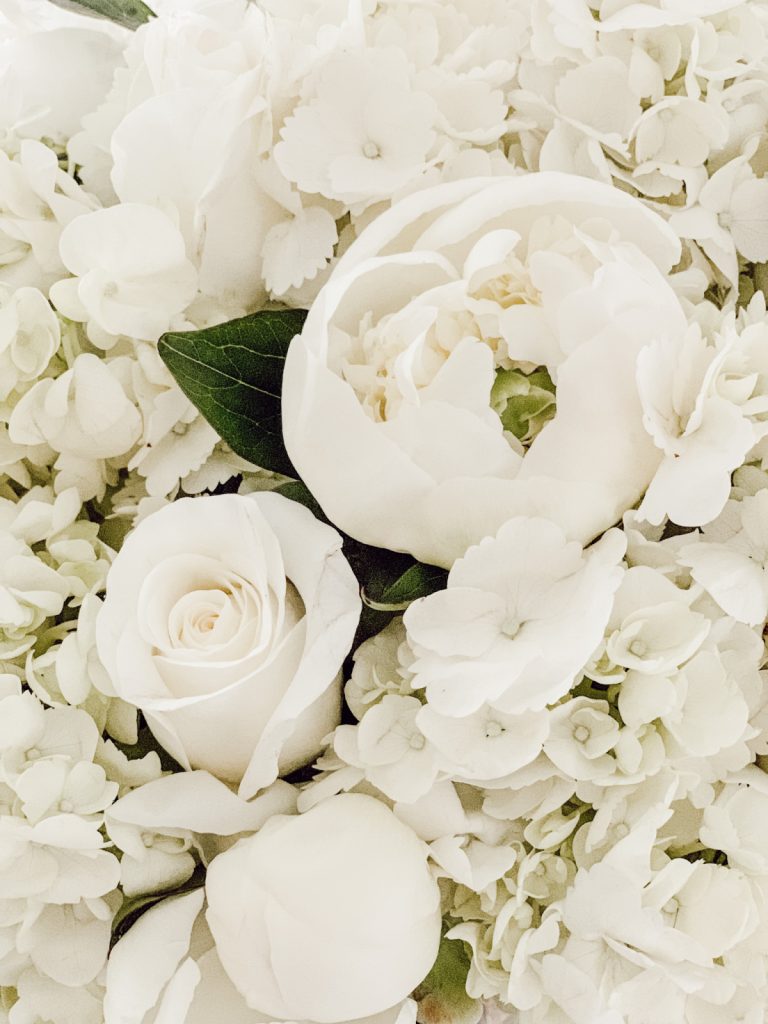
Hydrangeas make a beautiful centerpiece on their own, however hydrangeas can be used as a filler flower as well.
Mix other flowers into your centerpiece for a different look!
When deciding on other flowers to add to your centerpiece, remember to think in groups of three.
White roses and peonies are the perfect flowers to tuck among the large hydrangea blossoms.

More Flower Arrangement Ideas

Tips & Tricks to Keeping Your Hydrangea Blooms Looking Fresher Longer
There is nothing more frustrating than creating a flower arrangement and within the next day or even hours your hydrangeas are wilted and limp.
This has happened to me numerous times until I learned a few tricks to help keep those blooms lasting longer!
Hey friend! What can I help you find?
Search our entire site!
Hydrangeas Need Lots of Water
The most important fact to know about hydrangeas is their need for water…lots of water.
Your centerpiece should stay well watered (add fresh water daily) to keep the hydrangea flowers fresh and full.

Did you know?
Hydrangea actually comes from the Greek words “hydor”, which means water and “angos”, meaning jar or vessel…such an appropriate name for a water loving flower!
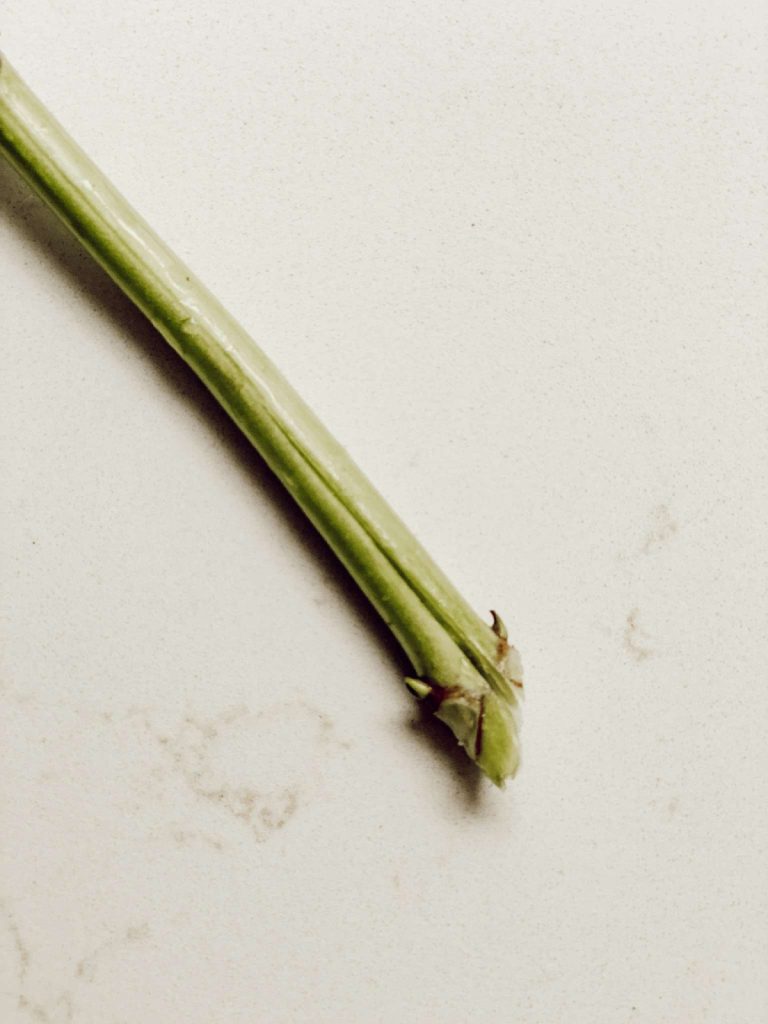
Give Your Hydrangeas a Fresh Cut
In order for the hydrangea stems to drink as much water as possible, give your stems a fresh cut when you bring them home.
Cut the stems at a 45 degree angle, then cut up the stem about an inch from the bottom.
This allows the hydrangea stem to drink as much water as possible.
I’m Heidi, the heart and hands behind Eleanor Rose Home.

I’ll show you that your home can become a place of warmth, comfort, and style with practical tips, creative ideas, and my own journey to help you create a space that feels like you…welcoming, personal, and full of charm.
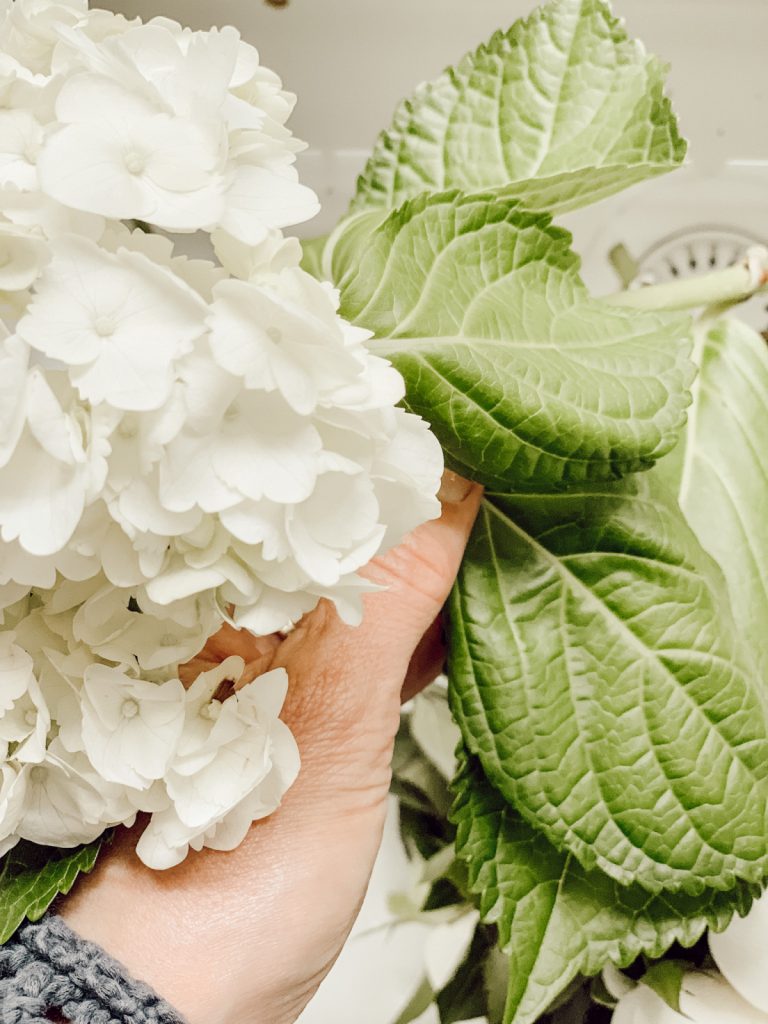
Remove the Leaves
Next, you want to remove the leaves from the stem.
The hydrangea leaves require water so by removing them, the blooms will be able to soak up more water and will stay fresher longer.
Soak in Water
If your hydrangea flowers do begin to droop, don’t worry!
Fill your sink full of cold water and submerge the hydrangea flowers and stem into the cold water.
Leave them in the cold water for several hours or overnight.
After a short amount of time, your droopy wilted flowers will start to look full and voluminous again.
Once your flowers have returned to their fullness, remove from the water, shake off any excess water, snip a little of the stem off the end, and put back into your centerpiece.
I have had hydrangeas last several days after using this technique to revive them!
You May Also Like
-
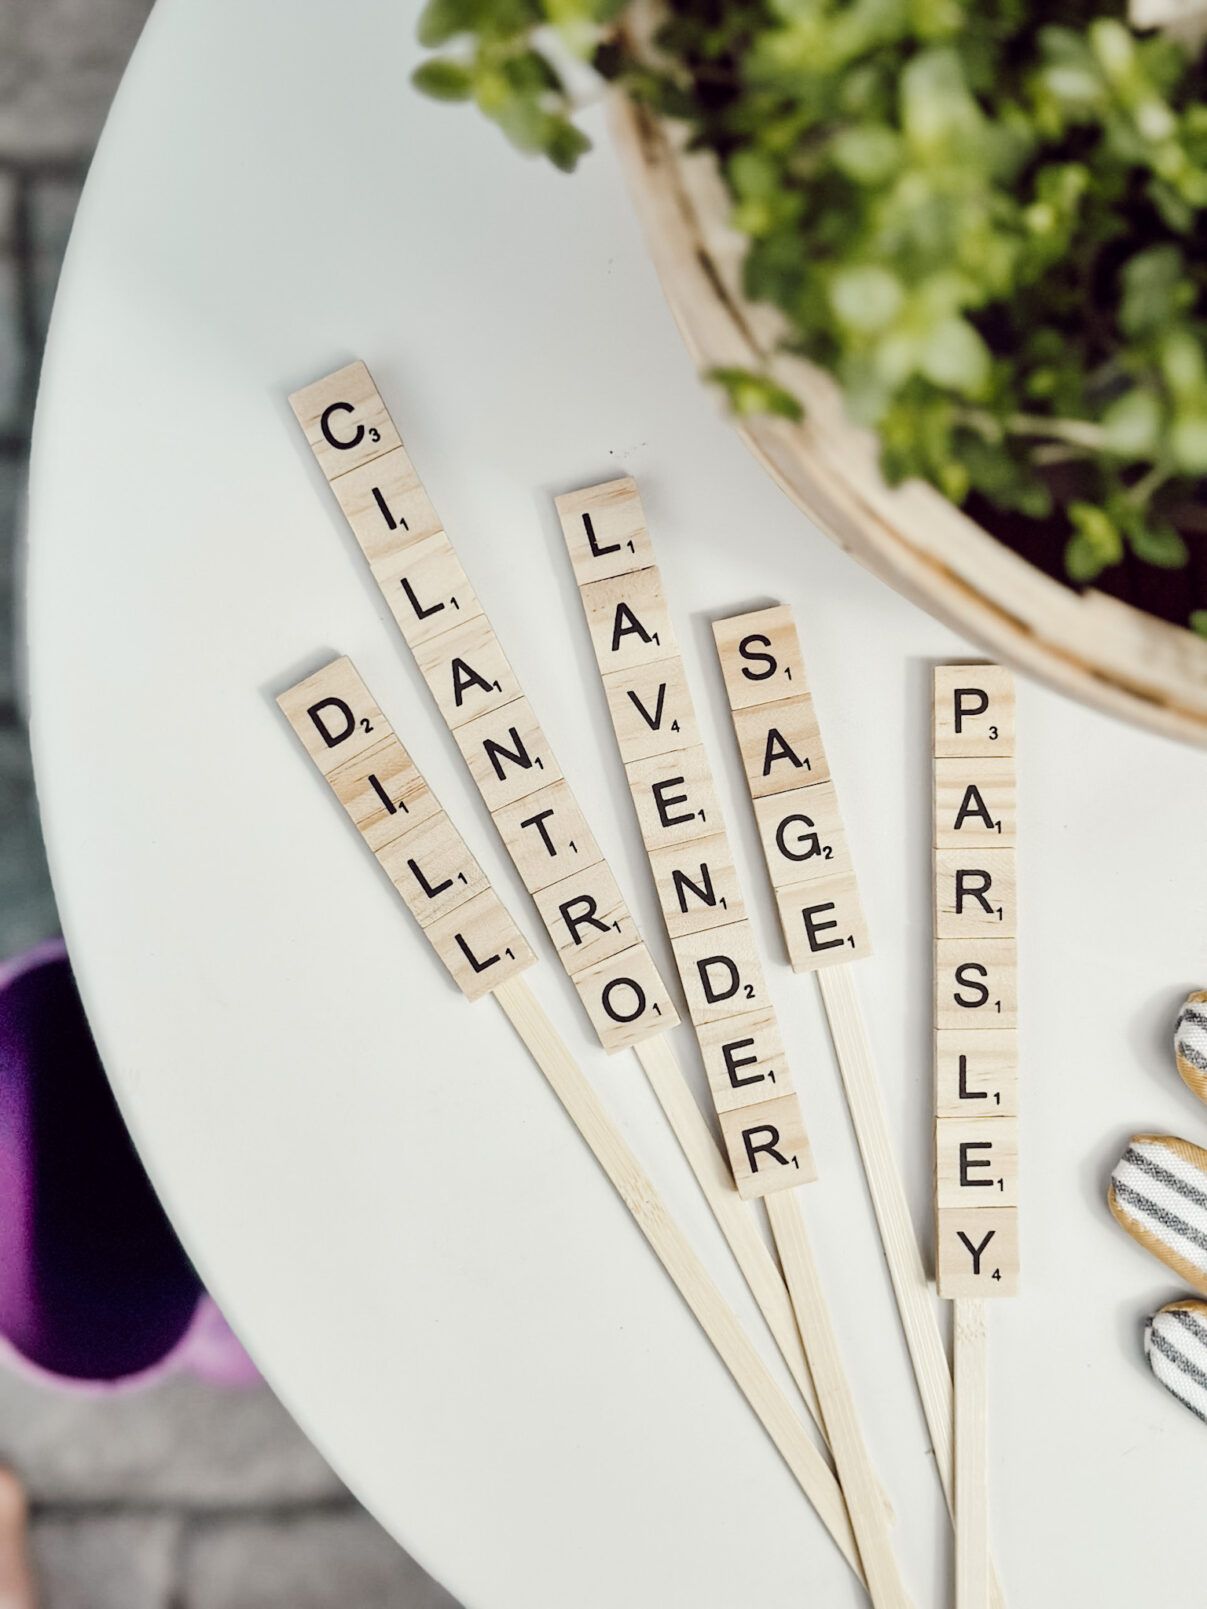
DIY Plant Labels for the Garden Using Scrabble Tiles
These DIY plant labels made with Scrabble tiles are one of the easiest and most budget-friendly garden projects you’ll ever…
-
Easy DIY Stenciled Flower Pots You Can Make in 10 Minutes or Less
Easy DIY stenciled flower pots made with this simple tutorial. Perfect for customizing pots for spring, patios, or indoor plants….
-
A Lazy Girl’s Guide to Drying Hydrangea Blooms
Learn the easy way for drying hydrangea blooms without any complicated steps. Just let nature do the work for long…

Shop My Favorite Products
Shop my favorite home decor & lifestyle products, my LTK sources, and my Amazon Storefront.
By making a purchase with one of my affiliate links, I earn a small commission which helps me continue to create meaningful content for you!
I look forward to sharing more of my home with you and inspiring you to enjoy simple cozy living!
Follow me on Facebook, Instagram, Pinterest, and LIKEtoKNOW.it.
xoxo, heidi
Don’t forget to pin this for later!


Thank you Barbara! I appreciate that, happy Friday!
Oh how I love all white!! This is stunning Heidi! And thanks for the tips too – I’m totally inspired. Happy Friday!
Oh my goodness, thank you so much!!!
Your beautiful post rose to the top again this week and we are featuring you in Fabulous Friday Link Party. Congratulations.
Beautiful centerpiece and helpful tips too!
Thank you so much Renae!!!
Absolutely stunning!