
Small Flower Arrangement for Spring
With a bouquet of fresh flowers from the grocery store, moss, ribbon, and a small vessel you can easily create a gorgeous, small flower arrangement for spring that is centerpiece or gift-worthy for any special occasion.

It’s usually right around this time, the day or so after Valentine’s Day that I begin to get the itch for spring. I’m ready to ditch the winter jackets, pull out the flip flops, and fill our home with spring blooms. Winter is long here in the Northeast and while we are still months away from flip flop weather, it’s not going to stop me from adding freshness & color to our home with this small flower arrangement for spring.
A small arrangement can be made in less than 15 minutes, and it’s easy enough for anyone to put together regardless of your craftiness or flower arranging skills with its small size and use of an unusual vessel, a toothbrush holder. Yes, you read that right, a toothbrush holder (we’ll talk more about that in a minute)!
This arrangement is ideal for displaying as a small centerpiece on a table, on a bedroom nightstand, or on a sink in the bathroom. It’s beautiful enough to be given as a gift to a friend to show you care or it would be adorable as a Mother’s Day gift as well. Whether you’re gifting this arrangement or keeping it for yourself, it’s the perfect way to start welcoming the warmth of spring into our homes.

Supplies for a Small Flower Arrangement for Spring
This arrangement can be made with any flowers or greenery you love. You can use flowers picked right from your yard, or an already arranged bouquet from the store.
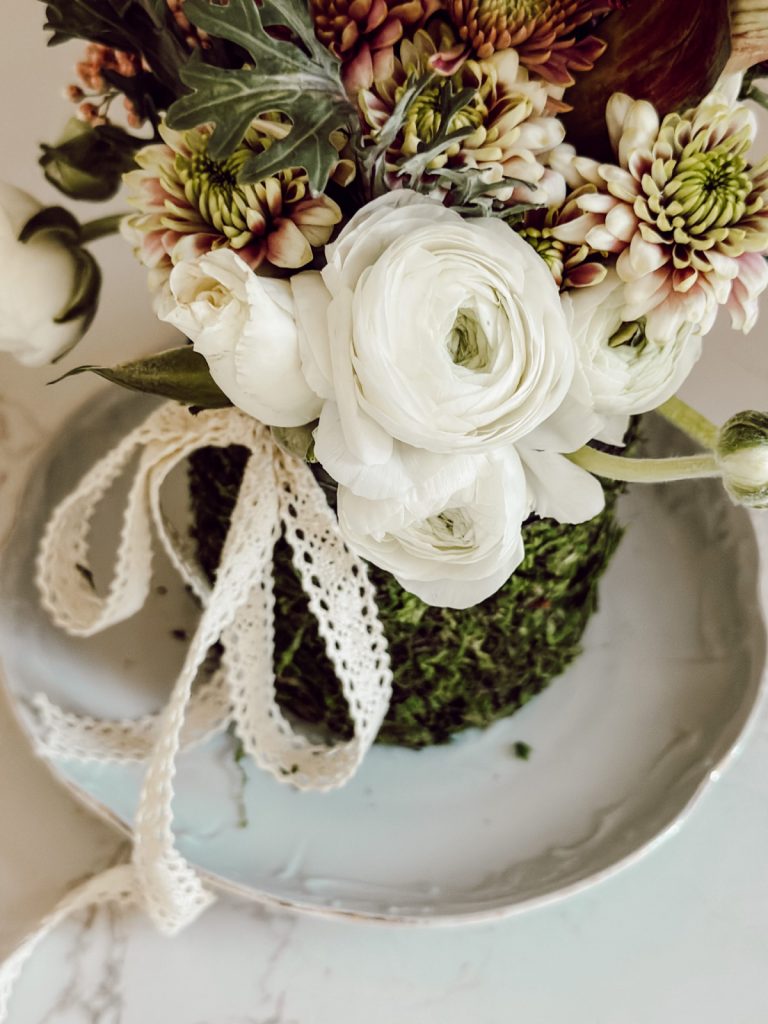
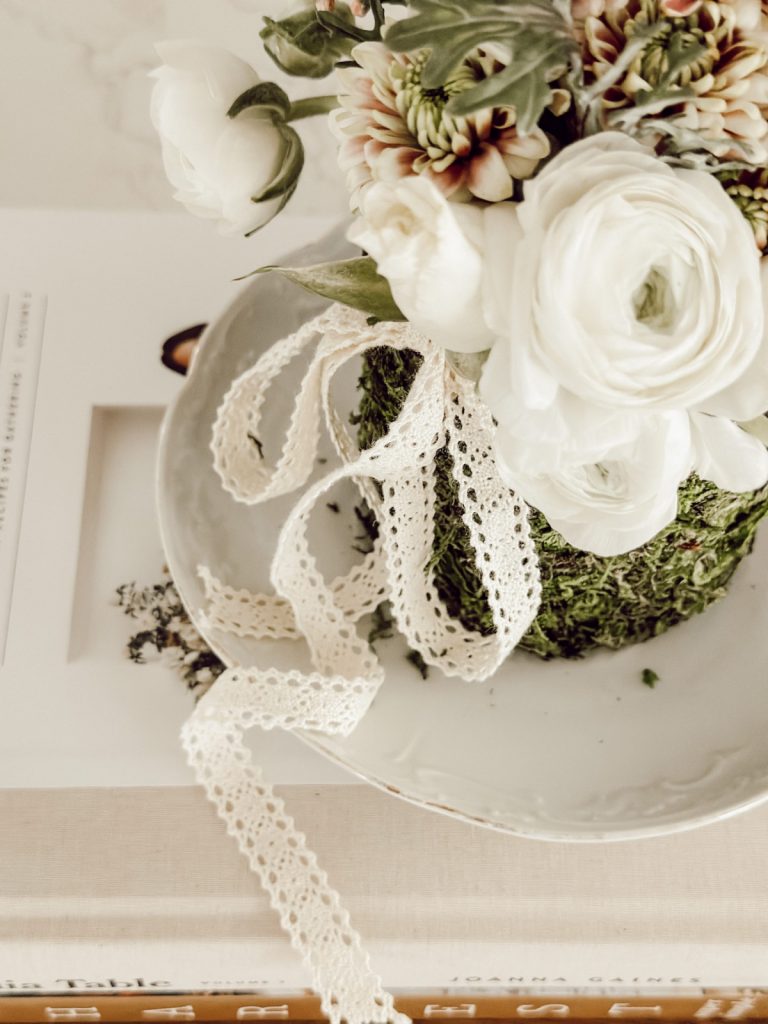
- 1 Bouquet of Assorted Flowers: The bouquet I purchased included roses, mums, Calla Lilies, pea shoots, and purple cabbage.
- 1 Bouquet Ranunculus: These are one of my favorite flowers! They add character and texture to an arrangement with their unique stems & layered blooms.
- Peel & Stick Moss
- Small Vessel: For this arrangement I used this toothbrush holder. This actually was a happy accident. I purchased this glass vessel thinking it was a small vase and later realized it’s actually a toothbrush holder! Here’s why I love using a toothbrush holder as a vase. The top piece where you add the toothbrushes acts as a sort of flower frog. It holds the flowers in place as you arrange them, genius…right?!
- Ribbon
- Water
- Pliers or Scissors
Pro Tip: A toothbrush holder makes a great vessel for a small flower arrangement. The toothbrush holder top piece acts as a flower frog, holding the flowers in place as you create the arrangement.
Creating a Small Flower Arrangement for Spring
To create a small flower arrangement for spring, begin my cutting the peel & stick moss to the correct width and length to cover the circumference of the glass jar you are using. Once the moss is cut to the correct size, remove the film from the back of the moss and begin adhering the sticky side of the moss to the jar. Continuing around the entire jar until moss is adhered.
Next, fill the glass jar about 3/4 full of water and place the toothbrush holder piece back on top.
Begin by placing the larger flower blooms into the vase first. I like to work from front to back of the arrangement or from one side to other. Adding in the bigger blooms and then filling in with smaller flowers.

Continue filling in the vessel with flowers until it looks full and symmetrical. Move the vase around to make sure it looks good from all angles.
Add the greenery and the ranunculus at the very end to fill in any holes and to make the arrangement look fuller. The ranunculus look so pretty spilling out of the vase with their funky, twisty stems.
Finally, tie a bow with ribbon around the top of the glass vase. Your small flower arrangement is complete!
Pro Tip: Remember when arranging the flowers that imperfection is perfection. Nothing in nature is perfect and neither should your arrangement.

Small Flower Arrangement Tips
- Use fresh water in a clean vessel.
- Remove most of the leaves from the stem of the flower. Removing the leaves will not only keep your arrangement looking neat and tidy, but it will allow the water to go to the flower and not the leaves. This means the flower will last longer in the arrangement.
- Make sure there is no foliage in the water.
- Cut the flower stem at a 45 degree angle. The stem will be able to drink more water this way.
- Remove any dead or dying flower buds/leaves to keep the arrangement fresher longer.

More Flower Inspiration
For more flower arrangement inspiration, check out these posts.
- Soup Tureen Centerpiece
- Wooden Bucket With Spring Florals
- How to Create a Hydrangea Centerpiece
- Heirloom Pumpkin Centerpiece
Shop Our Home
Links to products featured in this post can be found in our Shop Our Home page. I hope this page makes shopping our home a little easier for you! I earn a small commission when you make a purchase from one of our LTK links. Your support helps me continue to create meaningful content for you!
I look forward to sharing more of my home with you and inspiring you to have a well loved home! Follow me on Facebook, Instagram, Pinterest, and LIKEtoKNOW.it.
xoxo, heidi
Did you enjoy this post? PIN it for later!


