

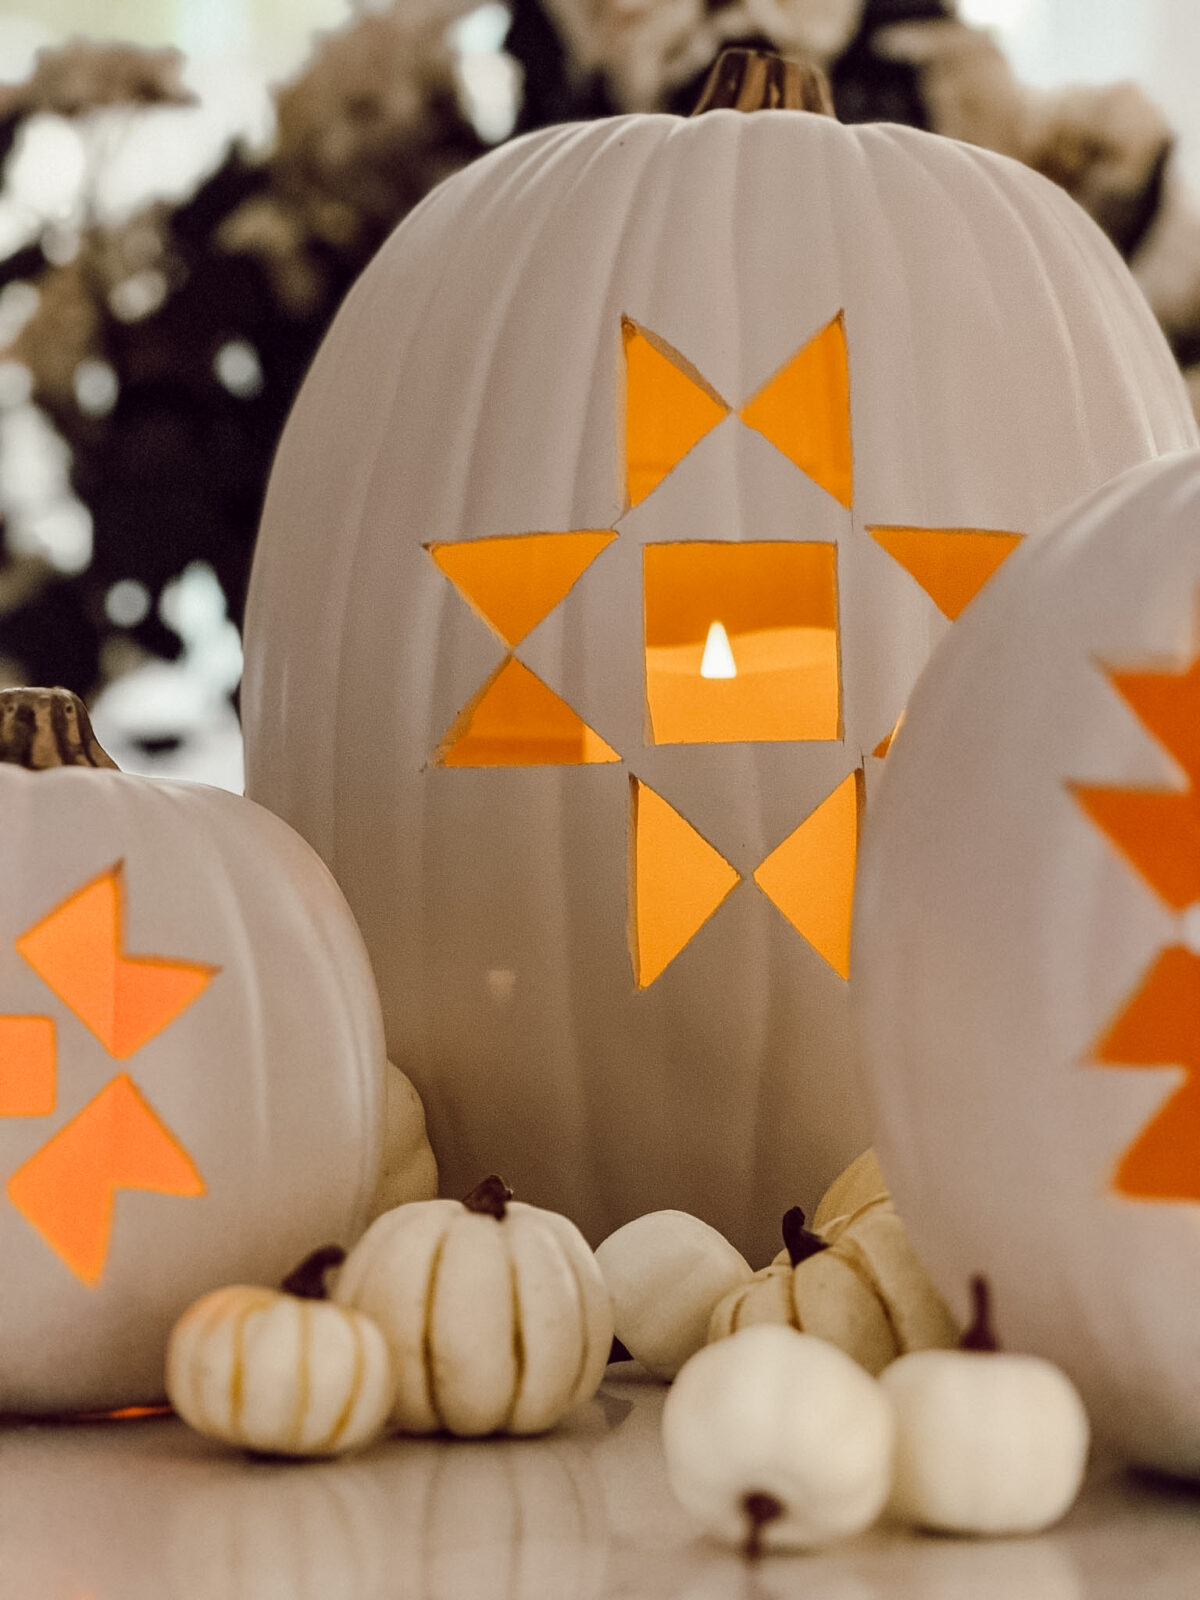
How to Carve a Quilt Pattern Into a Pumpkin With Free PDF Patterns
 Shop This Post

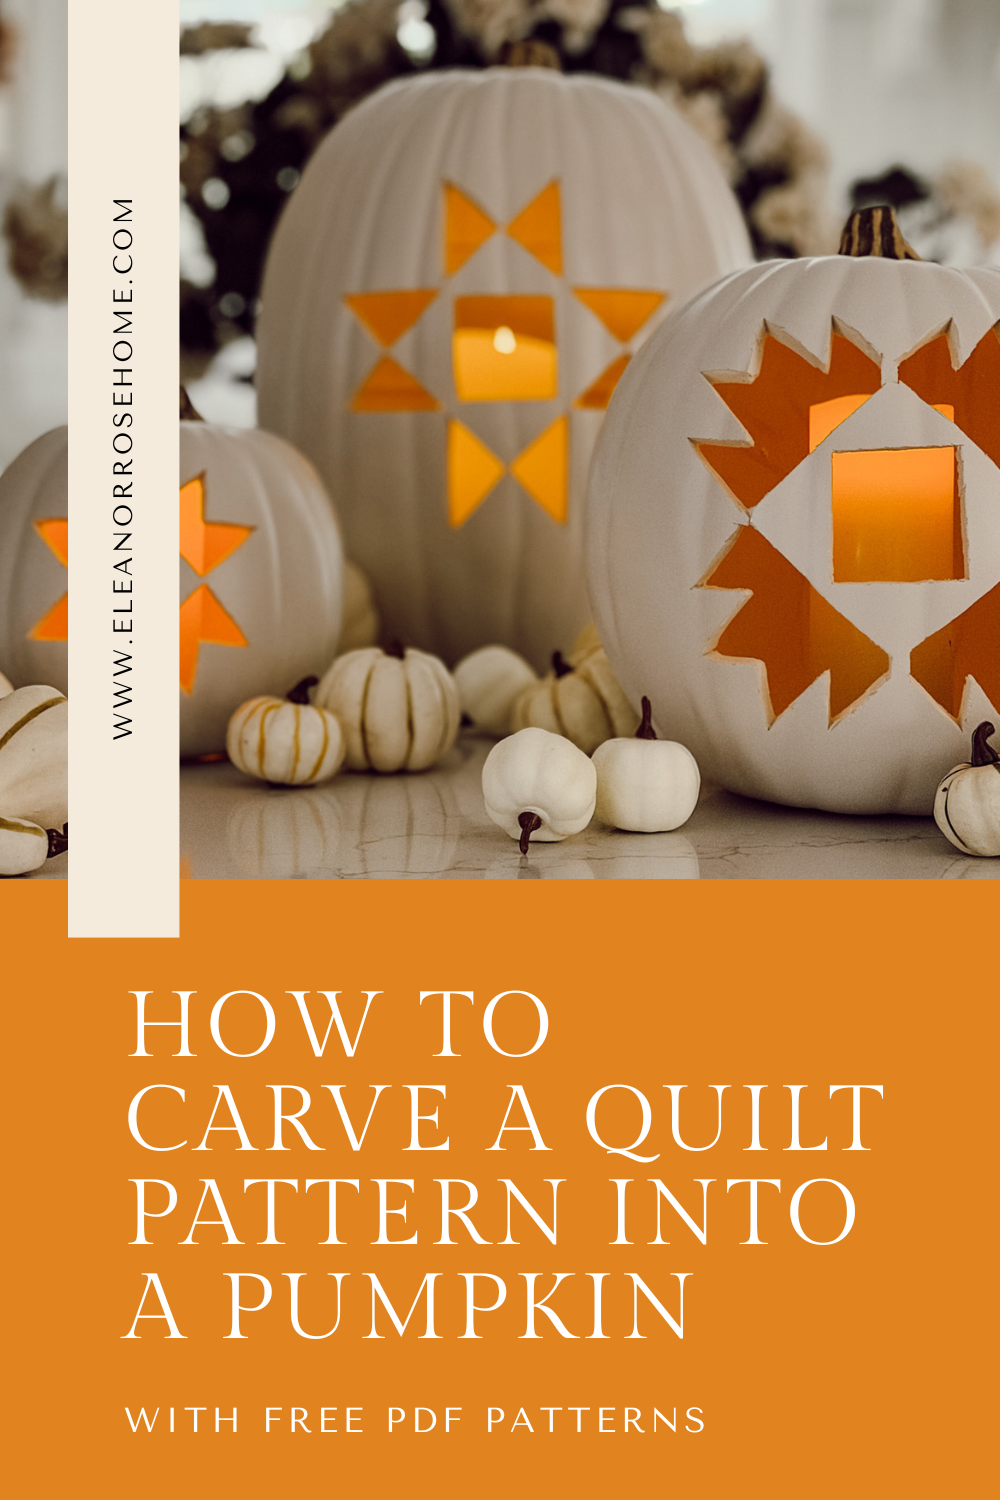
Learn how to carve a quilt pattern into a pumpkin with this easy fall DIY, plus download our free PDF quilt patterns to make your own.
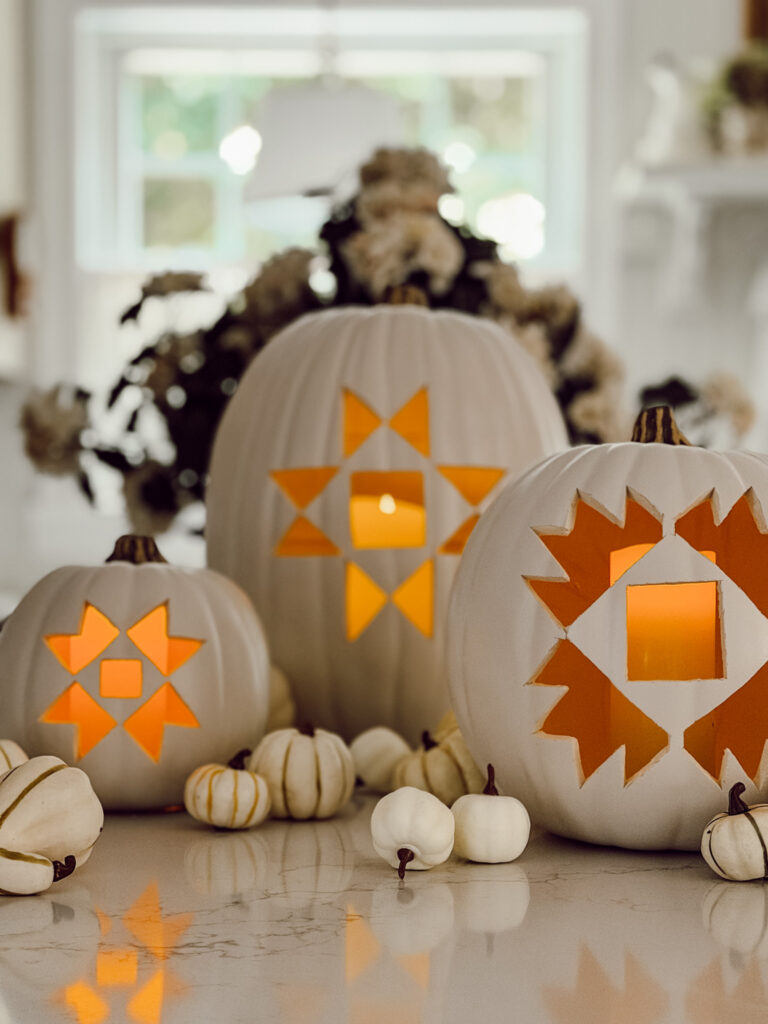
Who says us non-Halloween fans can’t have a little fun?
You probably already know that Halloween is not my thing.
I’m much more of an apples, cozy blankets, crunchy leaves, and pumpkins-that-don’t-have-scary-faces kind of fall girl.
But that doesn’t mean I want to miss out on all the traditional Halloween things to do.
So instead of carving a traditional jack-o’-lantern, I decided to give pumpkin carving a cozy, cottage twist.
I grabbed a couple of faux pumpkins, found a quilt pattern I loved, and started thinking about how I could carve a geometric design right into the pumpkins.
And I have to say, I’m obsessed with how it turned out.
The combination of an old-fashioned quilt pattern and a pumpkin feels cozy and nostalgic…why I have not thought of this before?!
And because I used faux pumpkins, there’s no scooping out pumpkin guts (yuck), no worrying about them rotting, and I can pull them out to decorate with year after year.
I also created free PDF quilt patterns for you to use so you don’t have to figure out the designs yourself.
Don’t worry, this DIY looks much more complicated than it actually is.
With a sewing tool that makes transferring the pattern super easy, I’ll show you step-by-step how to carve a quilt pattern into a pumpkin.
Let’s ditch the spooky pumpkins this year and go for cozy!
What You’ll Love About This DIY
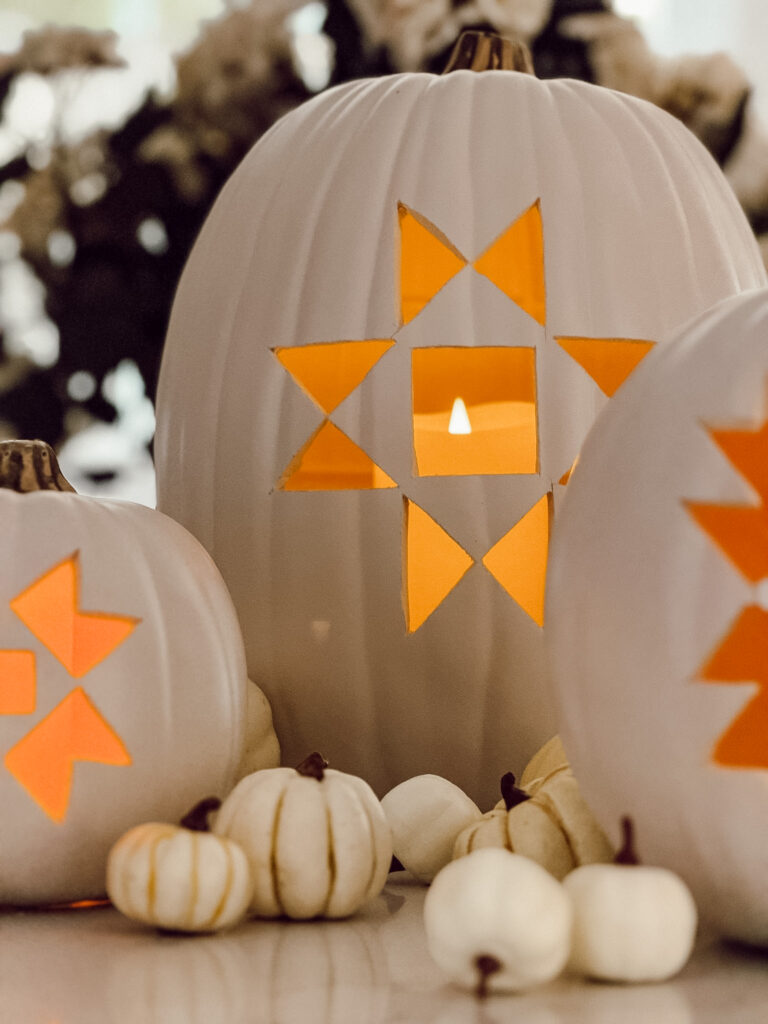
Simple Supplies You’ll Need to Create a Quilt Carved Pumpkin
You only need a few materials to make this quilt carved pumpkin, which you might already have a few of them around your house.
The sewing tracing wheel is the one tool you may not have on hand, but it makes transferring the quilt pattern lines onto the pumpkin A LOT easier.
materials you’ll need
*If you make a purchase using one of these links, I may receive a small commission. This does not add any cost to you, but helps me to continue to create & share meaningful content. Thank you for supporting my small business!
I’m Heidi, the heart and hands behind Eleanor Rose Home.

I’ll show you that your home can become a place of warmth, comfort, and style with practical tips, creative ideas, and my own journey to help you create a space that feels like you…welcoming, personal, and full of charm.
Free Printable PDF Quilt Patterns to Carve Your Pumpkins
To make this DIY project as simple as possible, I created free PDF quilt patterns you can print at home and use as a guide for carving your pumpkin.
Choose your favorite design, print it out, and resize if necessary depending on the size of your pumpkin.
Don’t worry about perfection.
Part of what makes handmade quilts so beautiful is that they aren’t perfect, and I think the same applies here.
A slightly imperfect carved line adds to the charm!
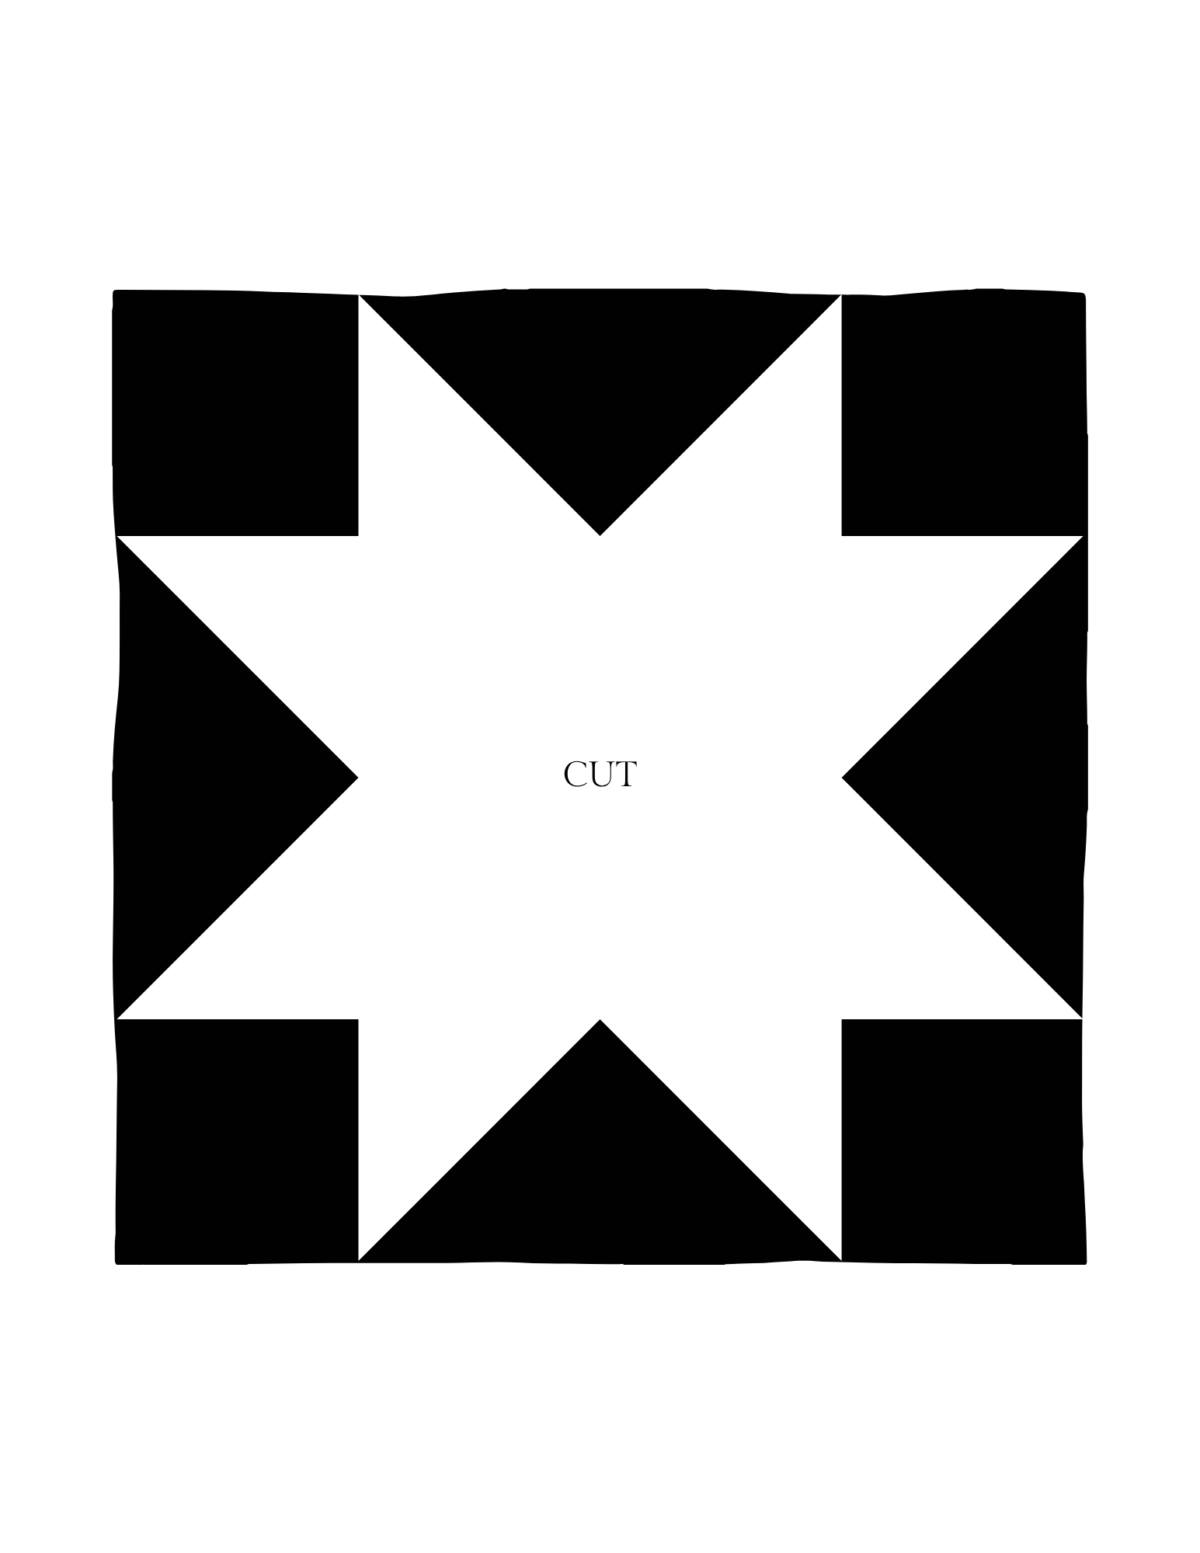
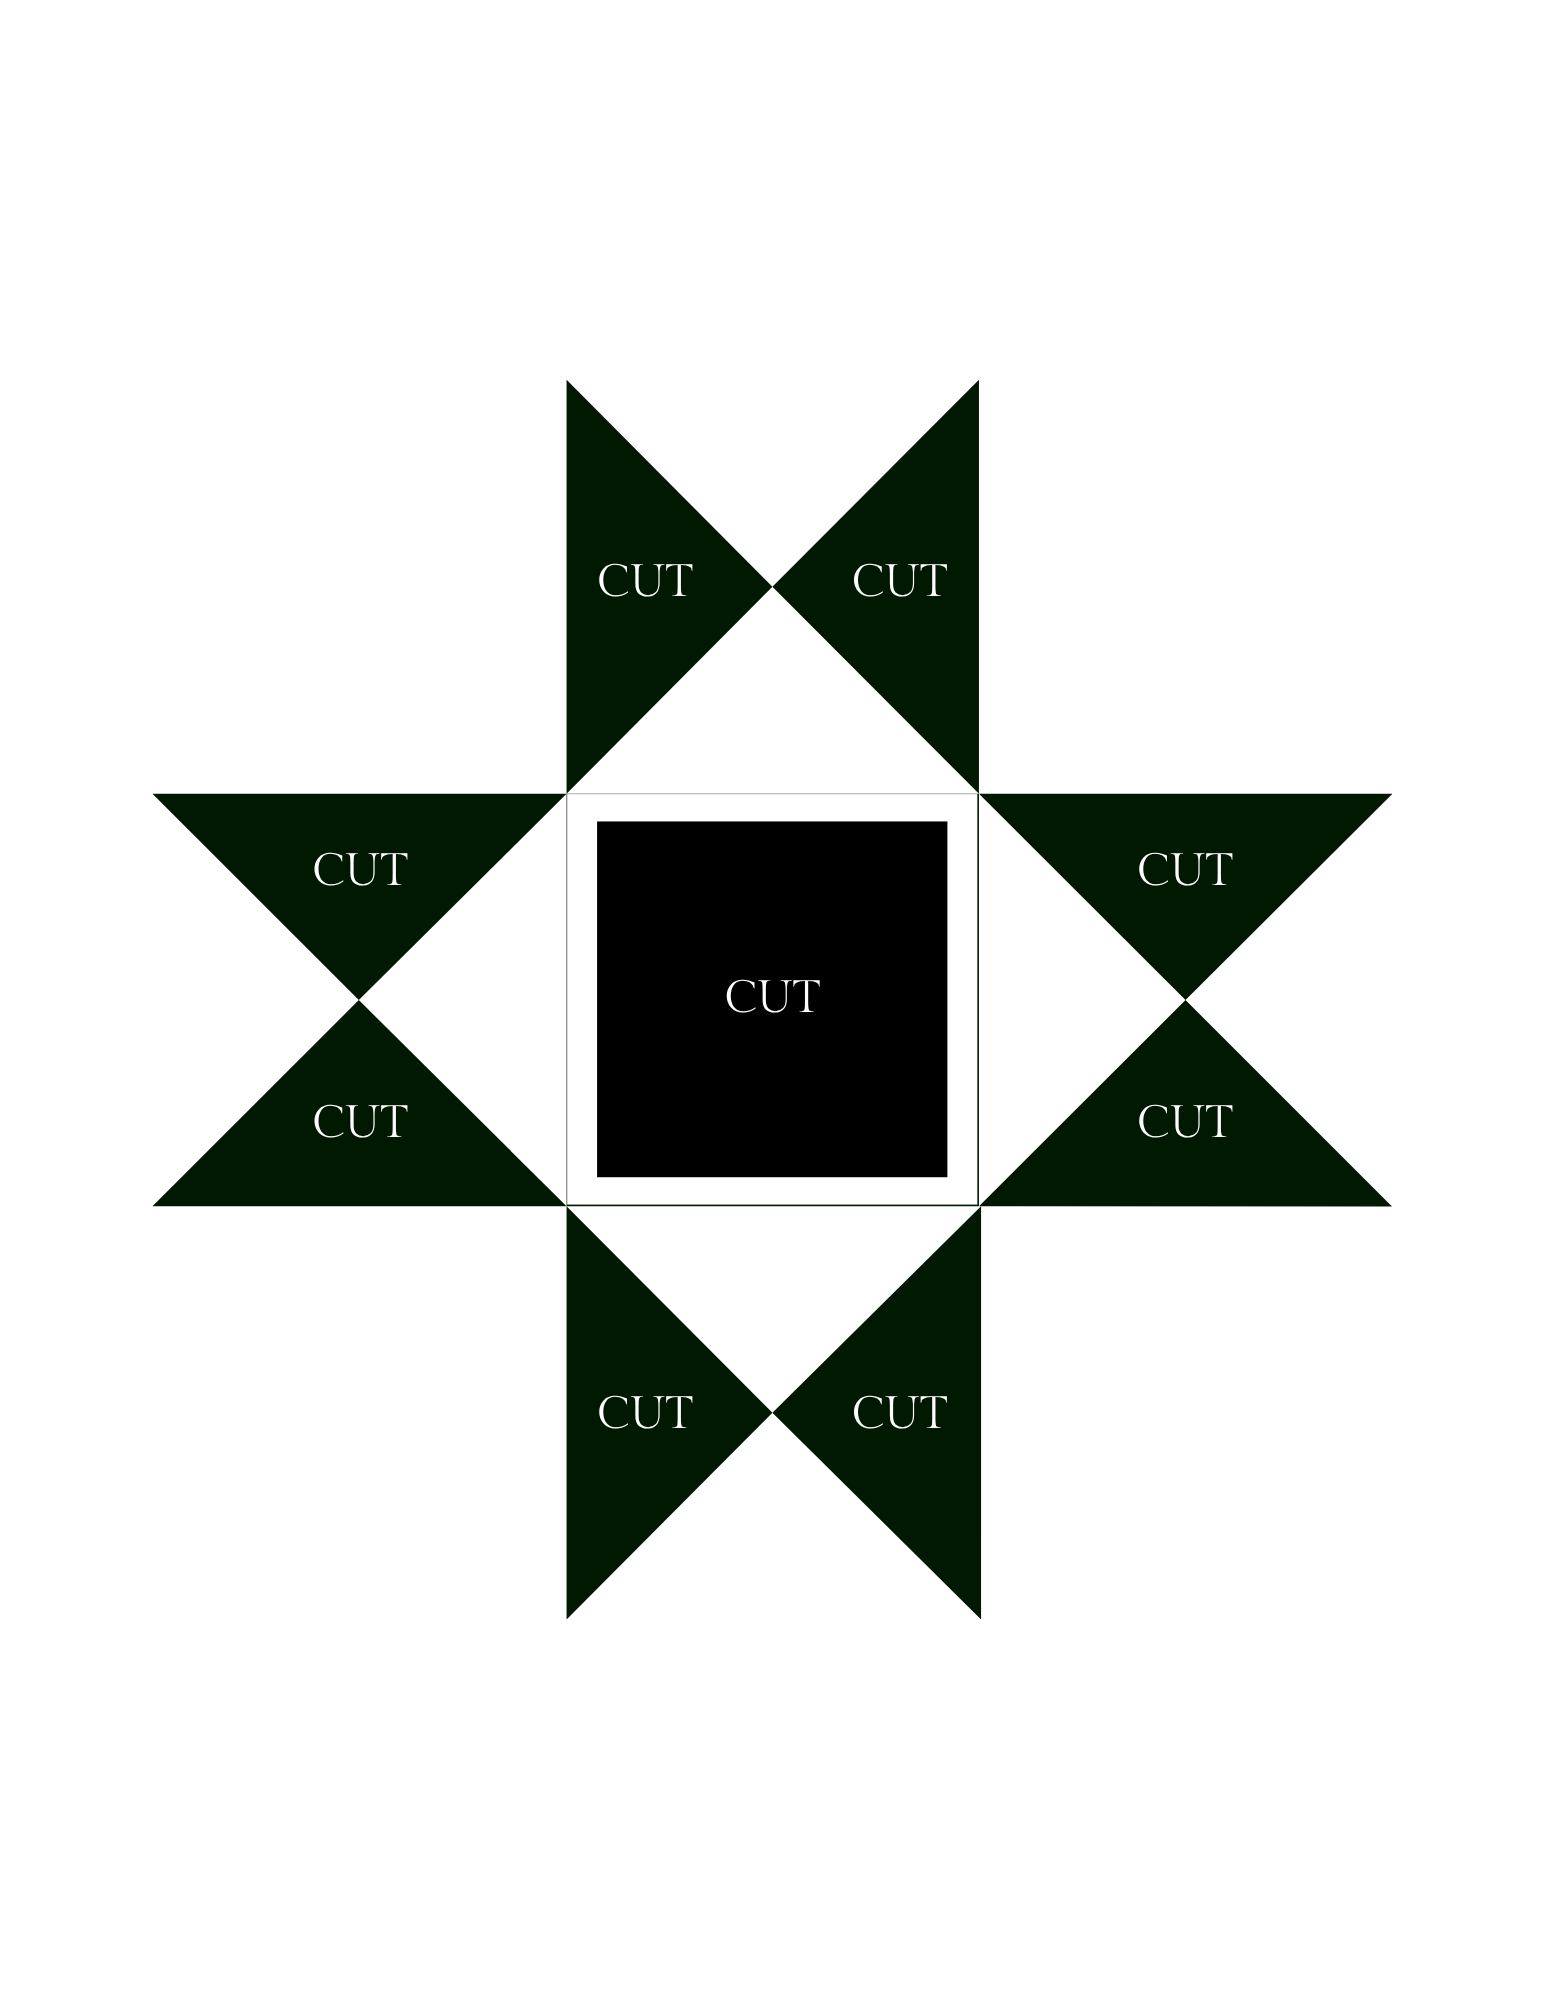
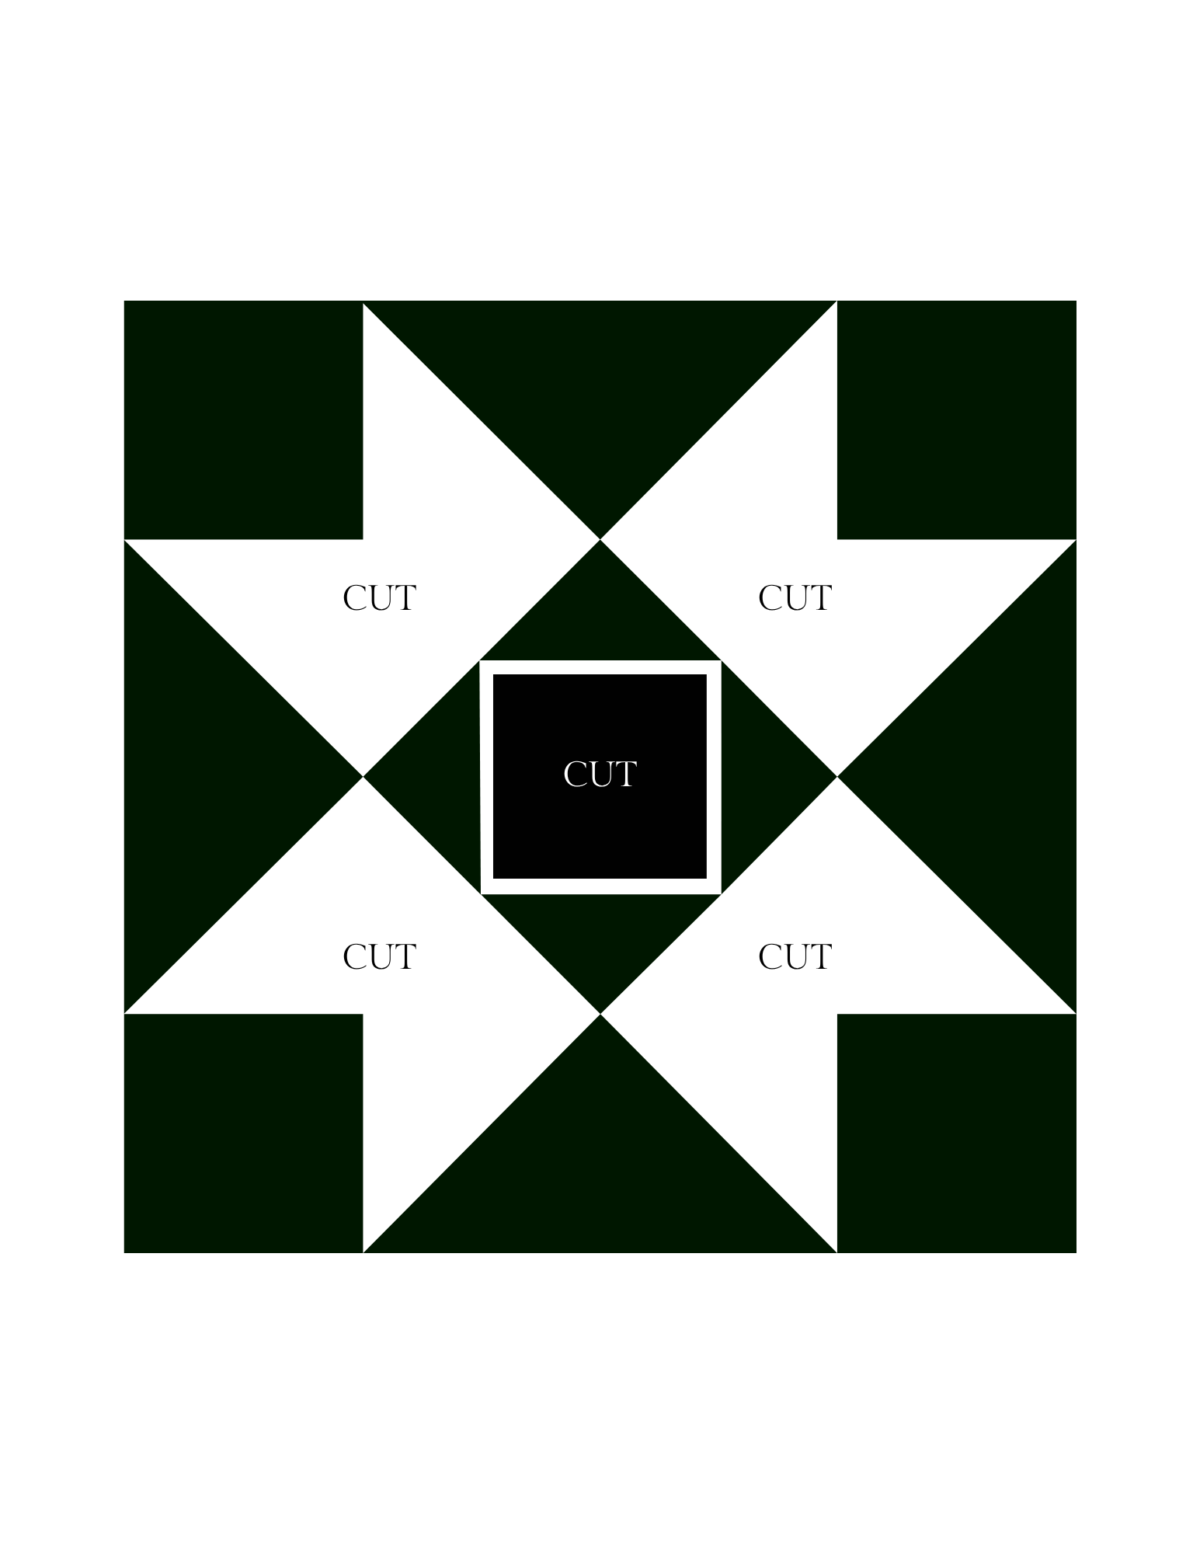
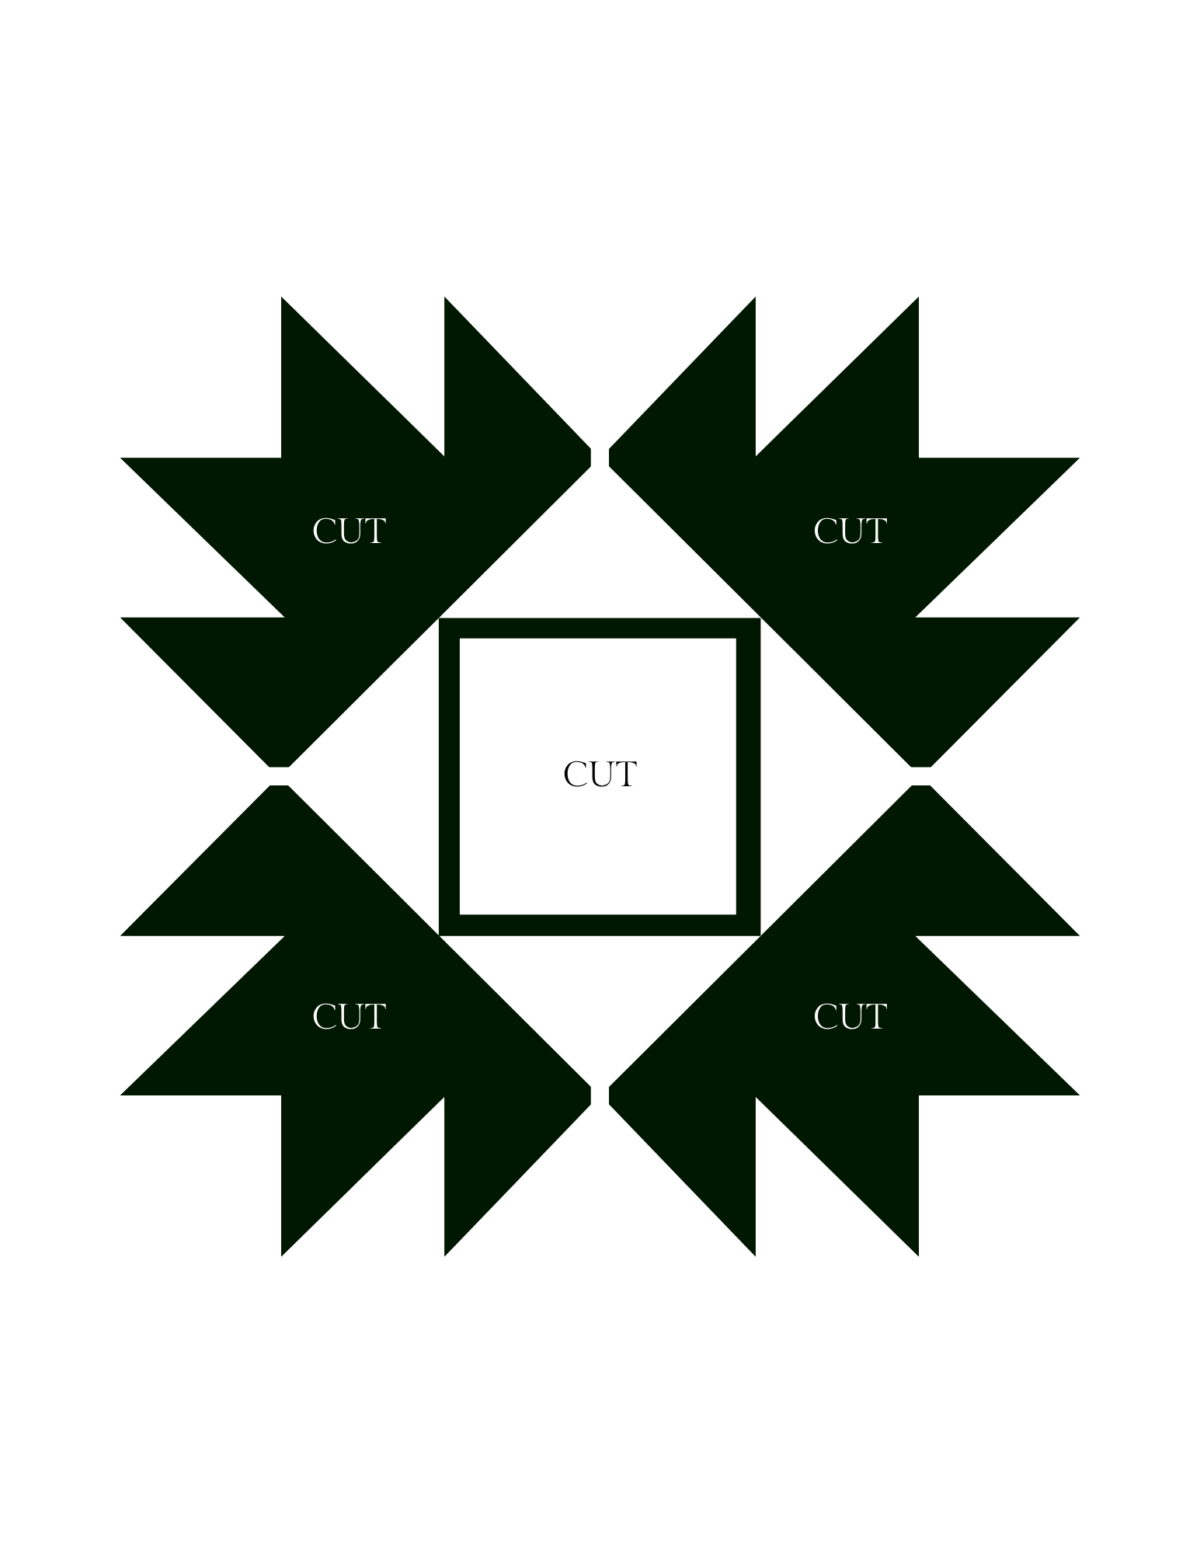
How to Read the Free Quilt Patterns I Created for You
I’ve made it easy to know which parts of the pattern to remove.
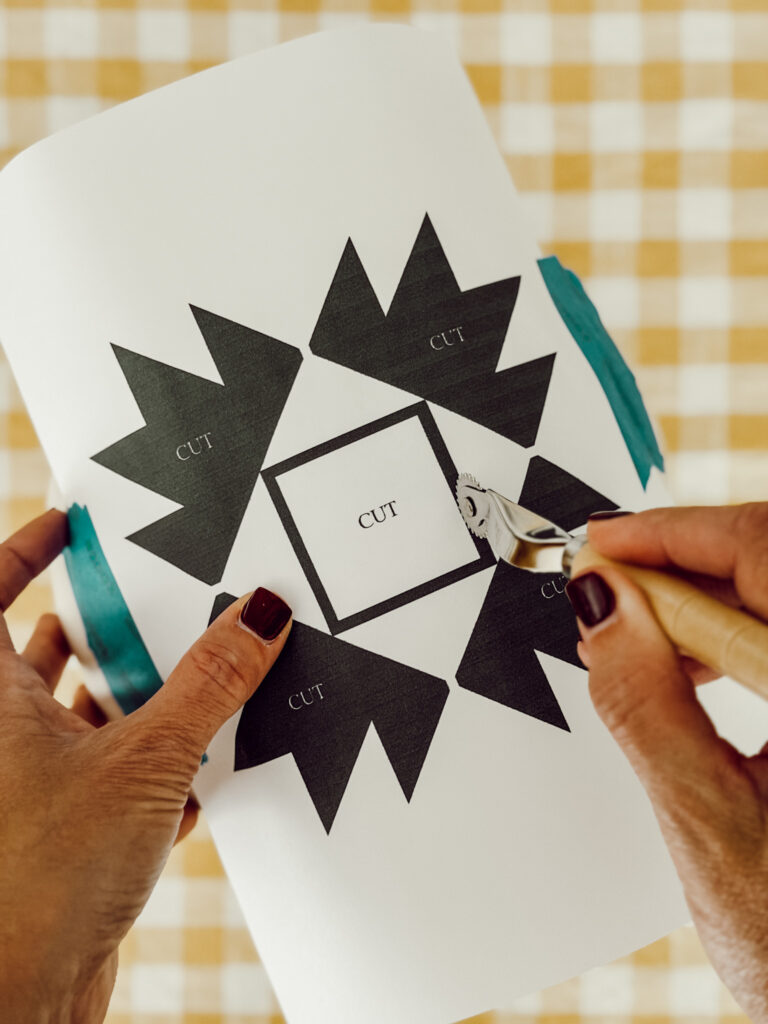
Every section that needs to be carved out is marked with the word “CUT.”
If a section doesn’t say cut, leave it intact.
You’ll also notice that some of the patterns have thin white borders or spaces connecting different parts of the design.
Don’t cut through these areas!
I intentionally added them to keep all of the pieces of the quilt design connected to the pumpkin.
Without those little connecting areas, some sections of the design could fall out as you carve around them.
Your pattern may look slightly different from a traditional quilt block because of these added spaces, but they’re there for a reason.
6 Easy Steps on How to Carve a Quilt Pattern Into a Pumpkin
Once you’ve chosen your favorite quilt pattern and gathered your supplies, it’s time to start carving.
cozy ideas delivered to your inbox
When you join our newsletter!
01
Print Your Pattern
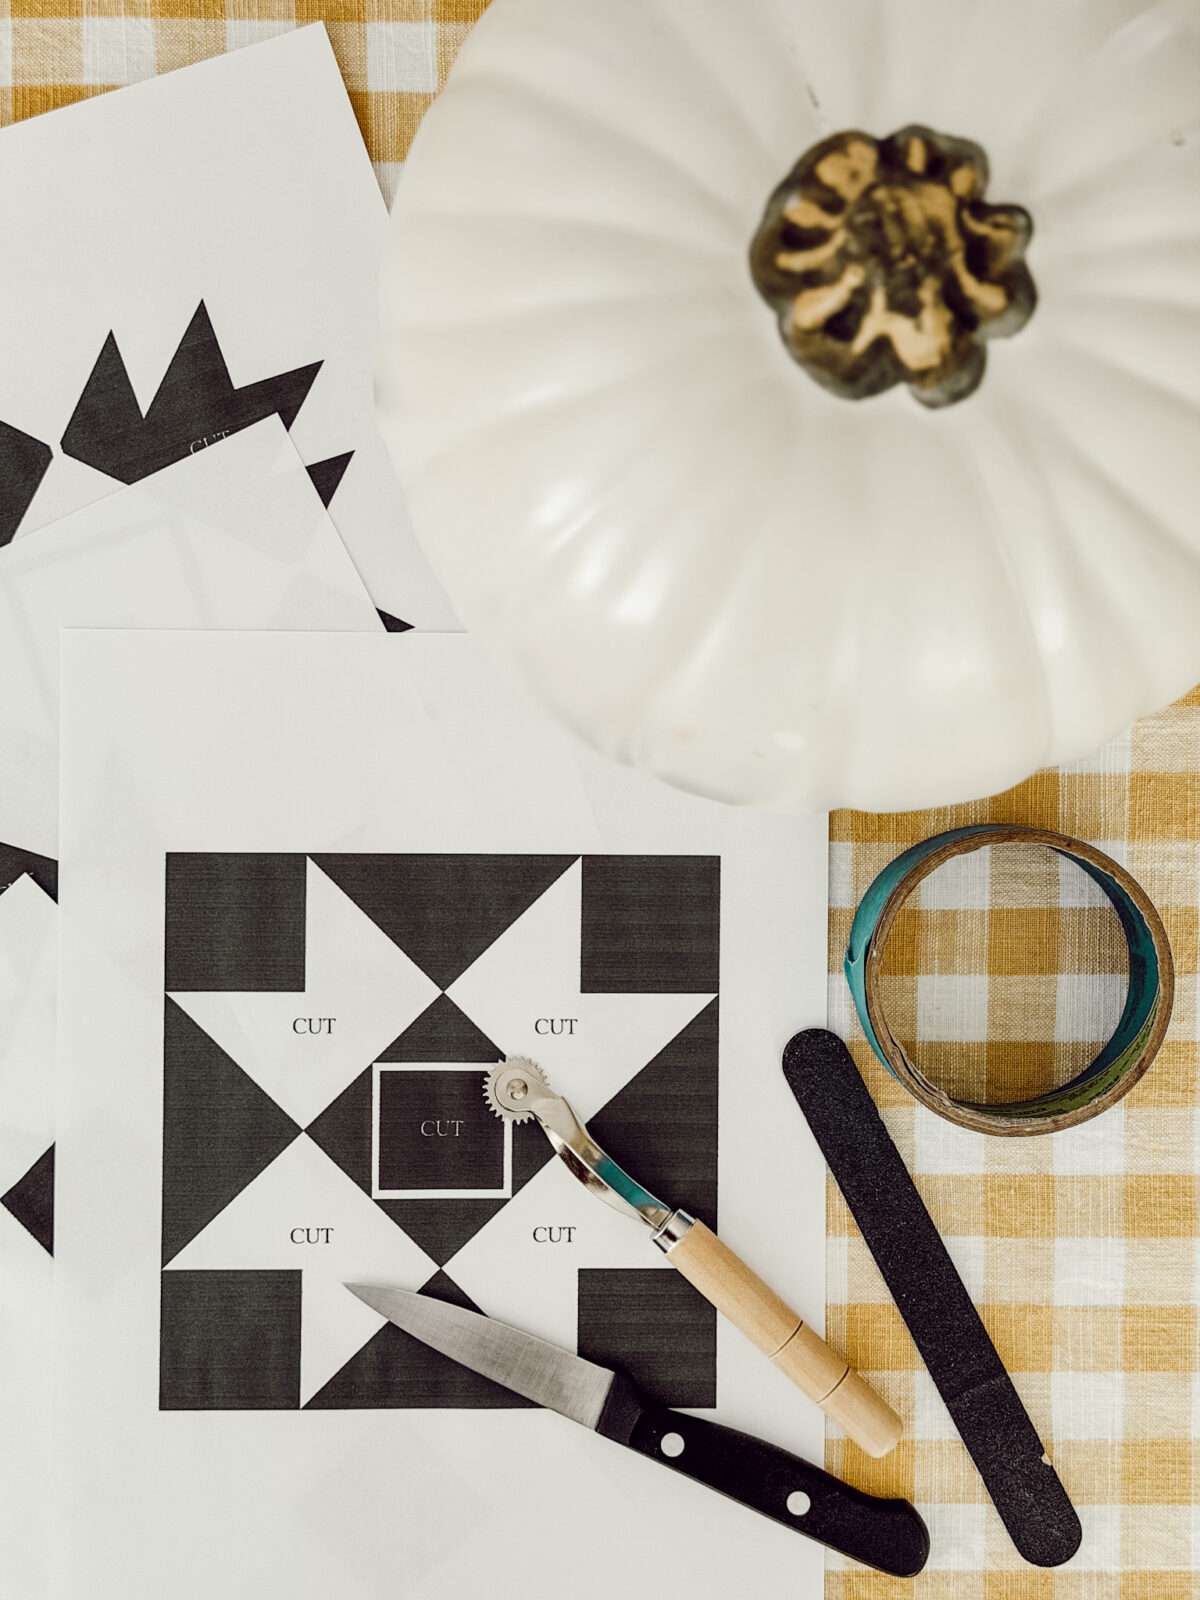
Start by downloading and printing the quilt pattern you’d like to carve into your pumpkin. Hold the printed pattern against the front of your fake pumpkin to make sure you like the size and placement of the design.
If the pattern feels too large or too small, adjust the scale in your printer settings and print it again. You want the quilt design to fill a good portion of the front of the pumpkin without wrapping too far around the sides, which can make it more difficult to transfer and carve.
02
Attach the Quilt Pattern to the Pumpkin
Center the pattern on the front of your pumpkin and secure it with painter’s tape. Since you’re trying to attach a flat piece of paper to a round pumpkin, it’s not going to sit perfectly flat. Add additional pieces of painter’s tape wherever you need them to keep everything from moving while you trace.
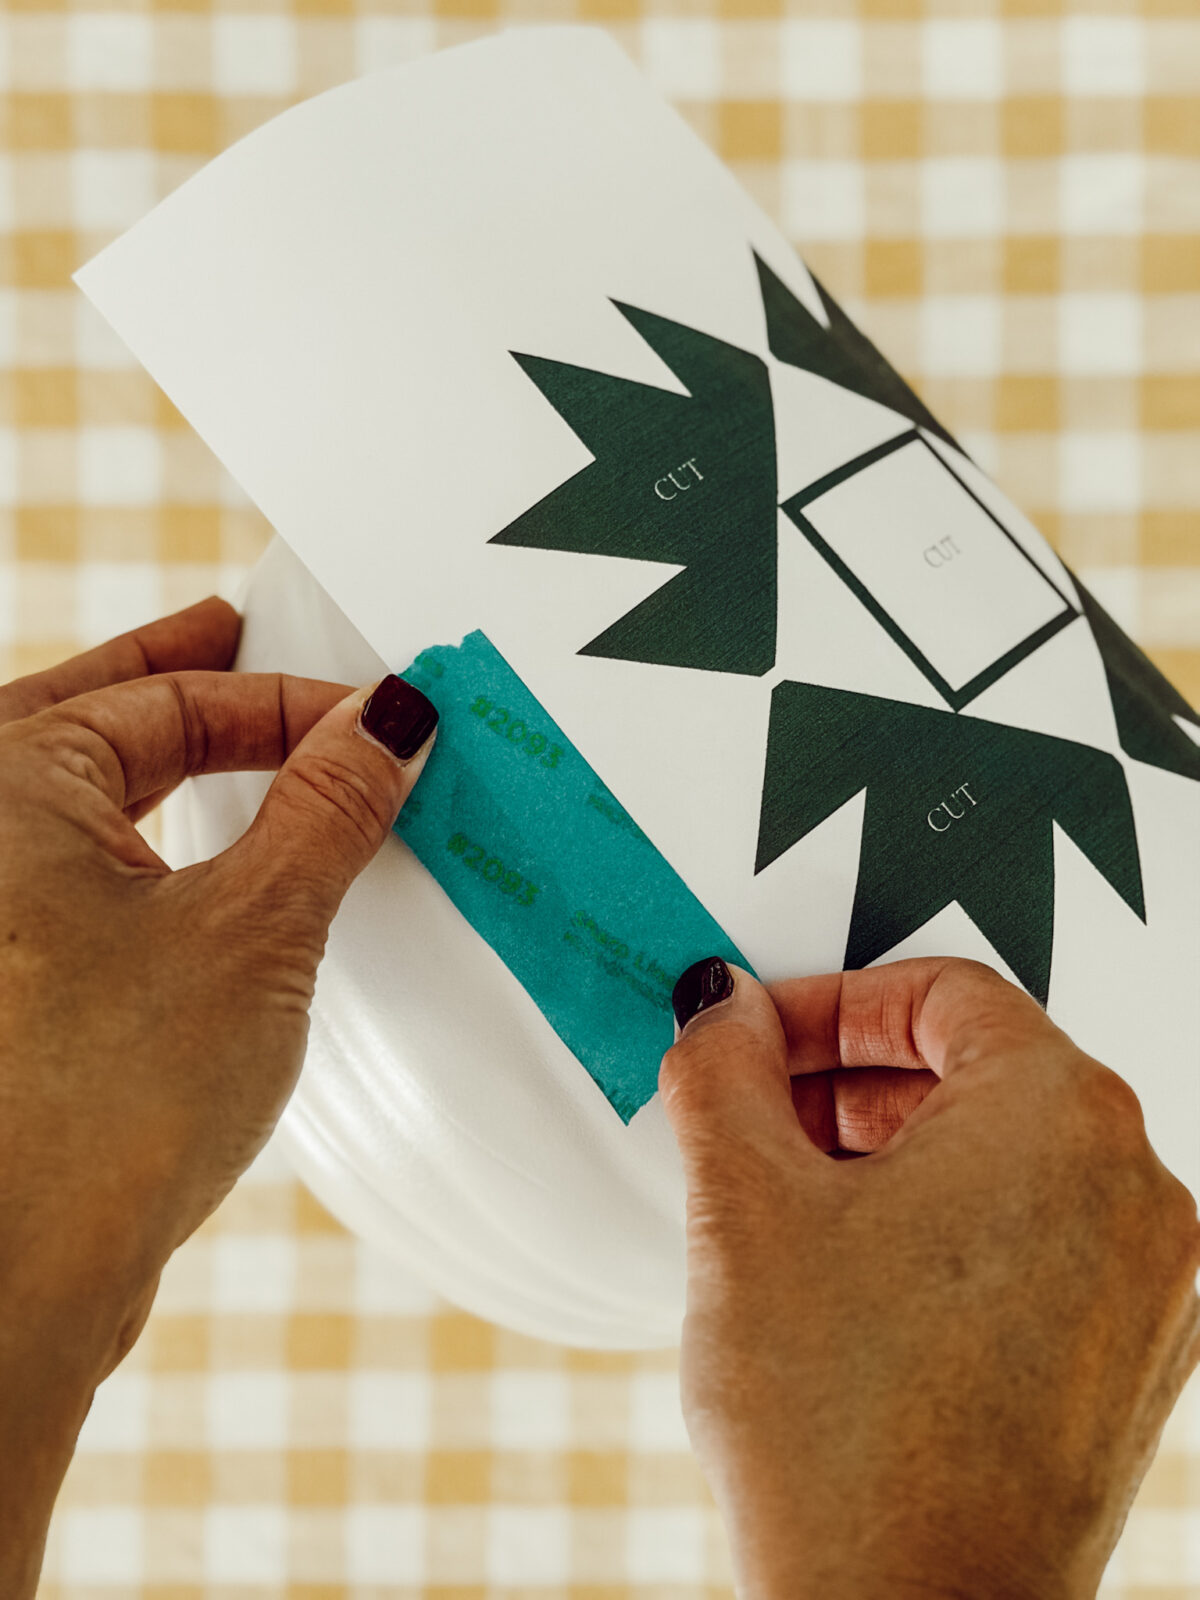
03
Transfer the Quilt Pattern
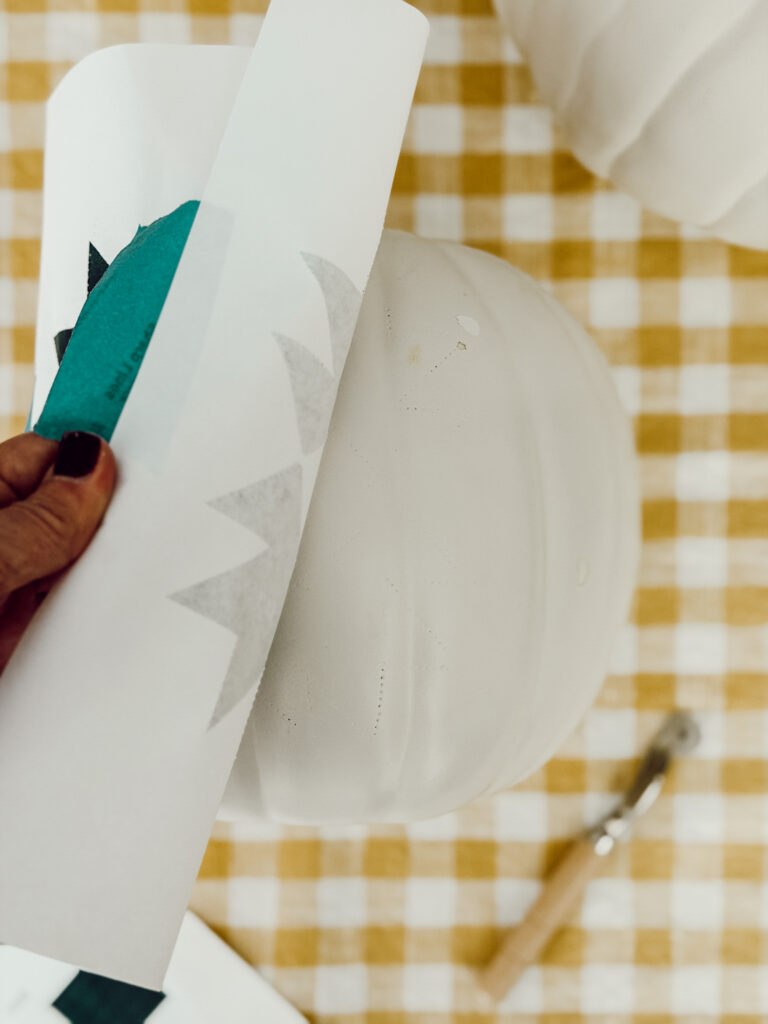
With the paper pattern taped securely to the pumpkin, roll the tracing wheel directly over the lines of the quilt design that say “cut”. Apply enough pressure that the teeth of the wheel go through the paper and leave a dotted line on the surface of the pumpkin underneath. Once you’ve traced the entire design, carefully remove the paper and painter’s tape.
04
Carve the Quilt Pattern
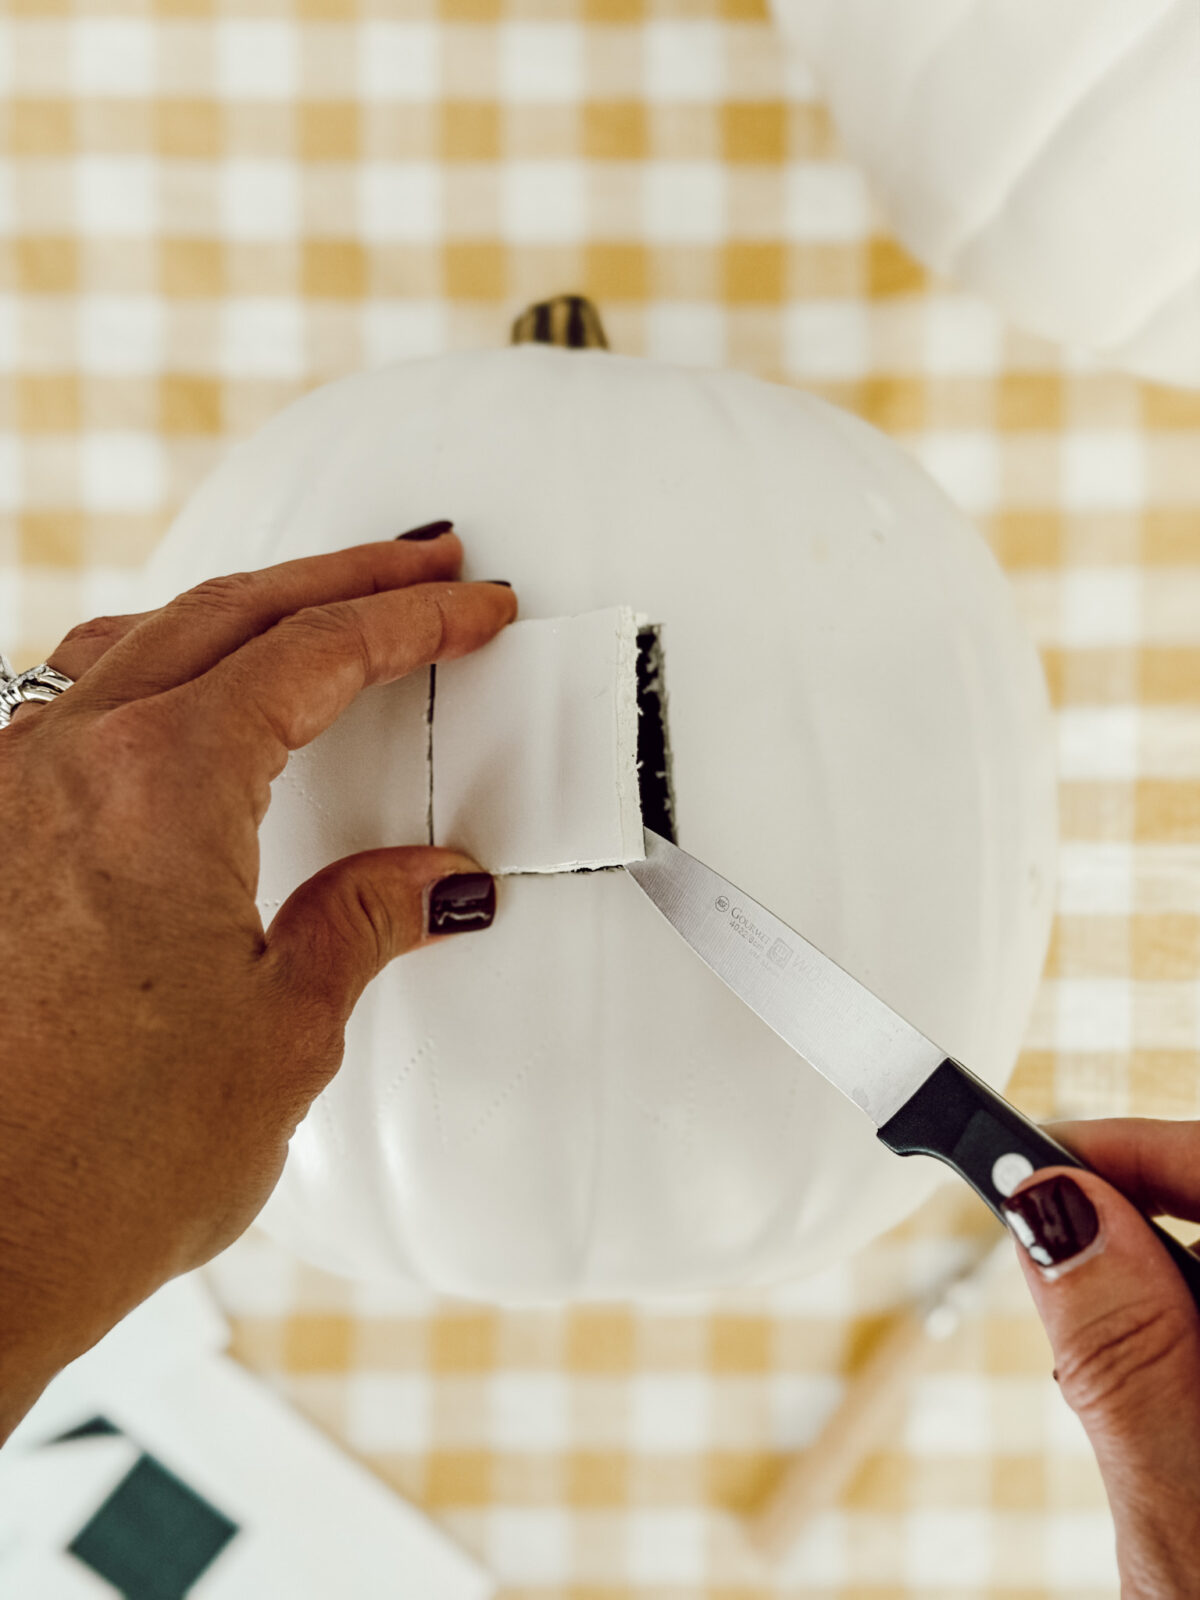
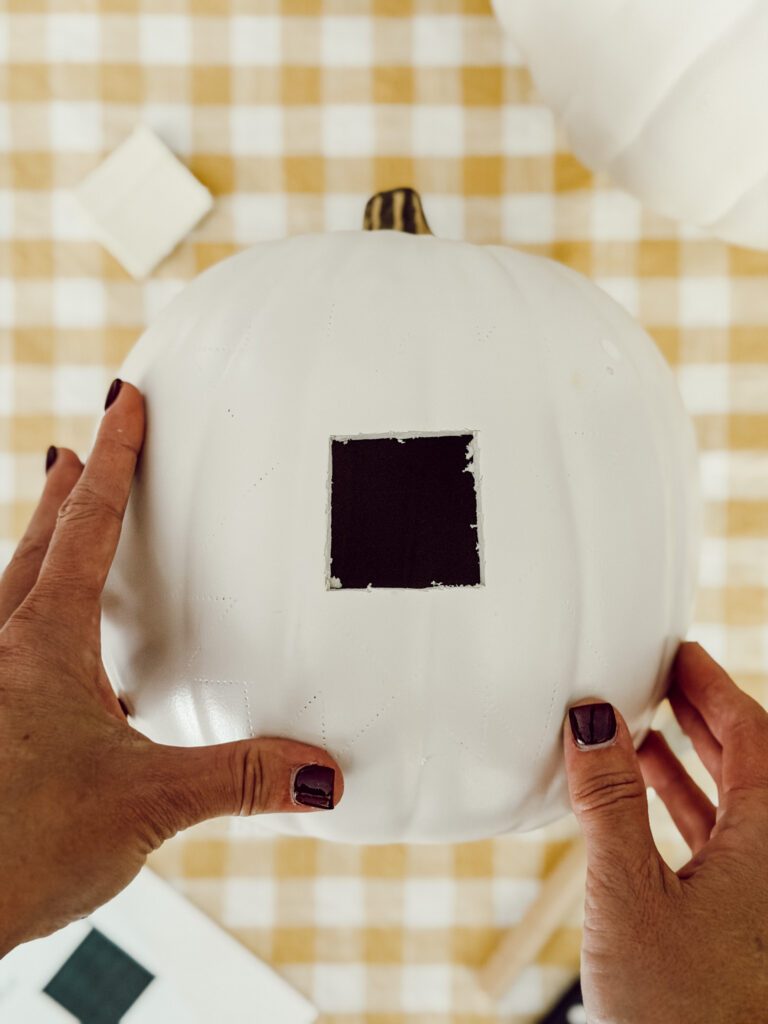
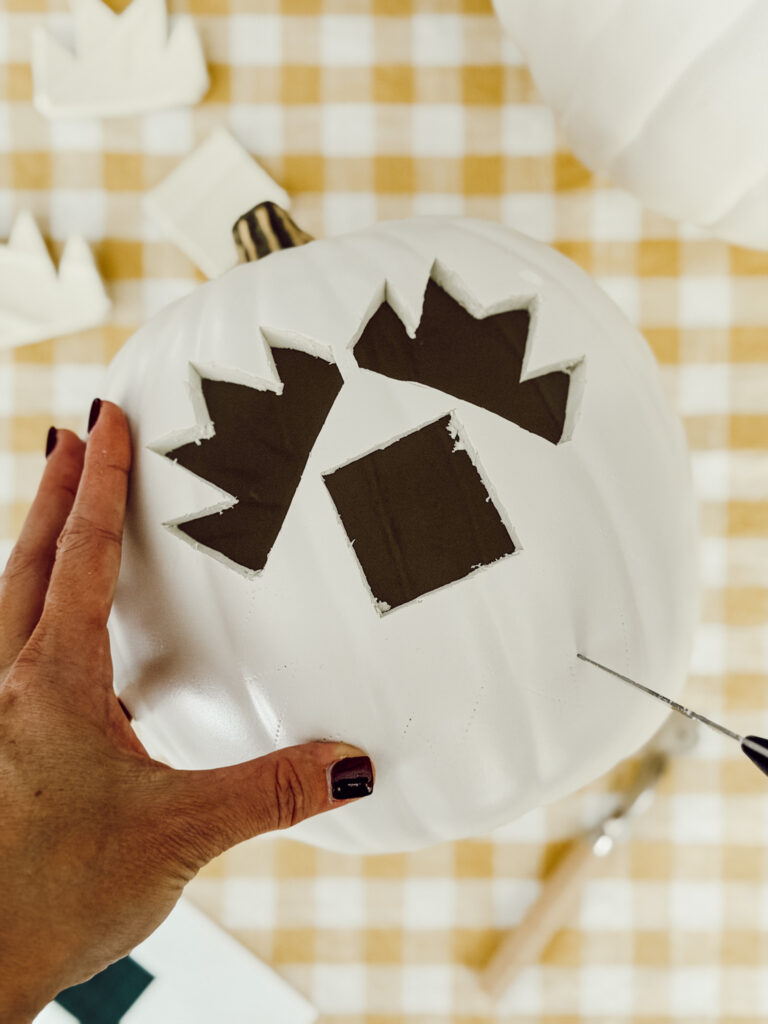
Using a small, sharp knife, carefully follow the dotted lines you made with the tracing wheel. Instead of trying to carve long sections all at once, work slowly and make shorter cuts. This will give you more control and help keep those geometric shapes looking nice and crisp.
05
Remove the Cut Pieces
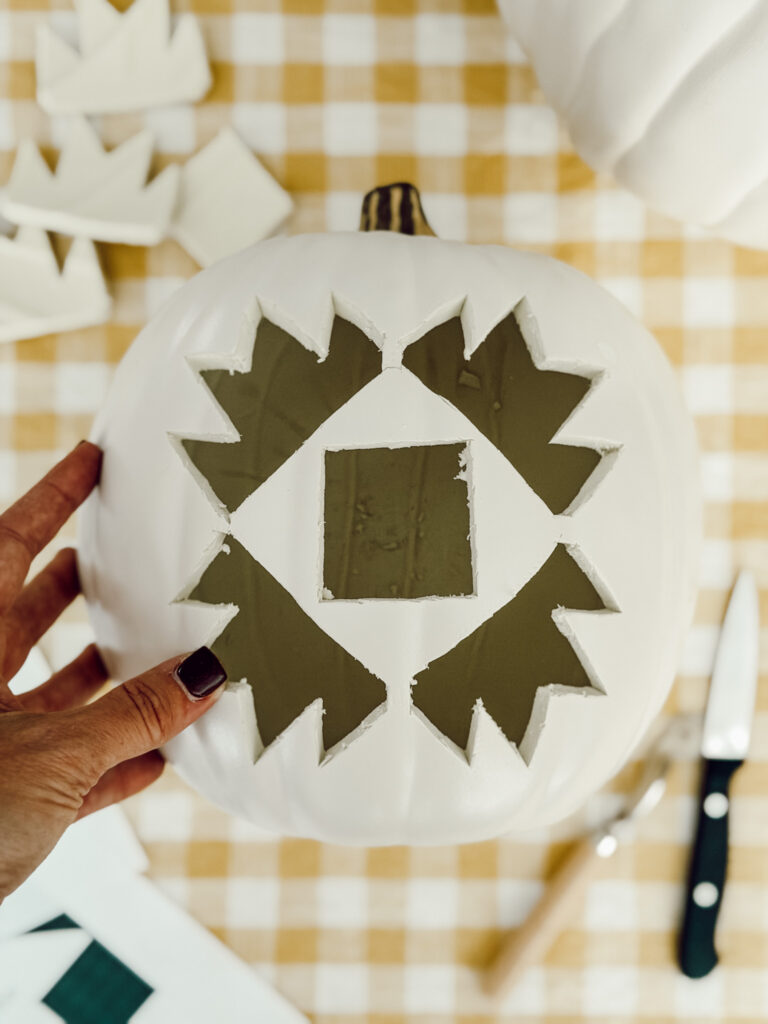
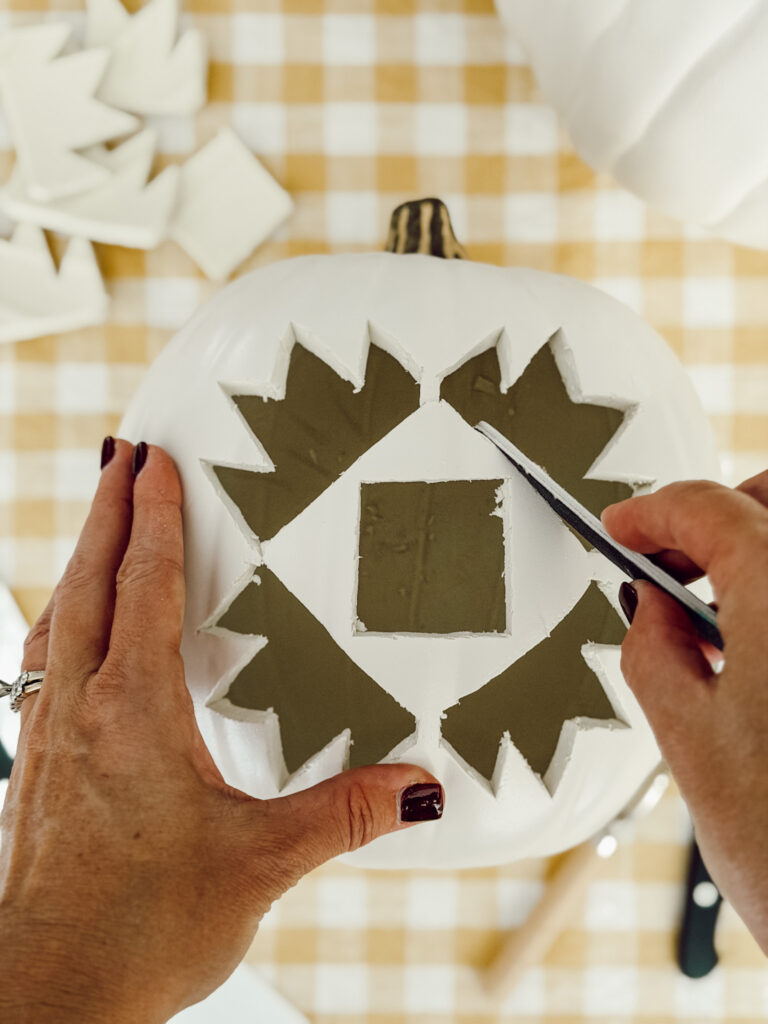
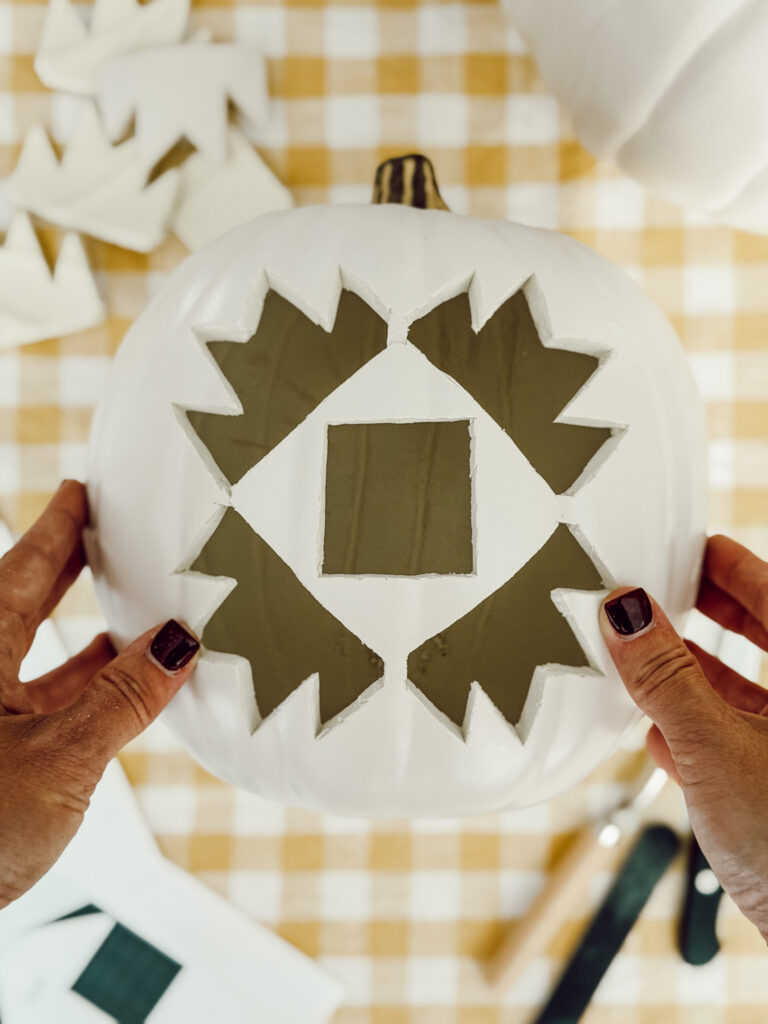
As you finish carving each section, gently push the cut pieces through the pumpkin or carefully pull them out. If a piece doesn’t come out easily, don’t force it. Go back around the edges with your knife and make sure you’ve cut completely through the pumpkin.
Once the pieces are removed, you may notice that some of the cut edges look a little rough. Use a nail file or a small piece of sandpaper to gently smooth them out. I found this made a big difference and gave the quilt pattern a much cleaner, more finished look.
06
Add a Light to the Inside of the Pumpkin
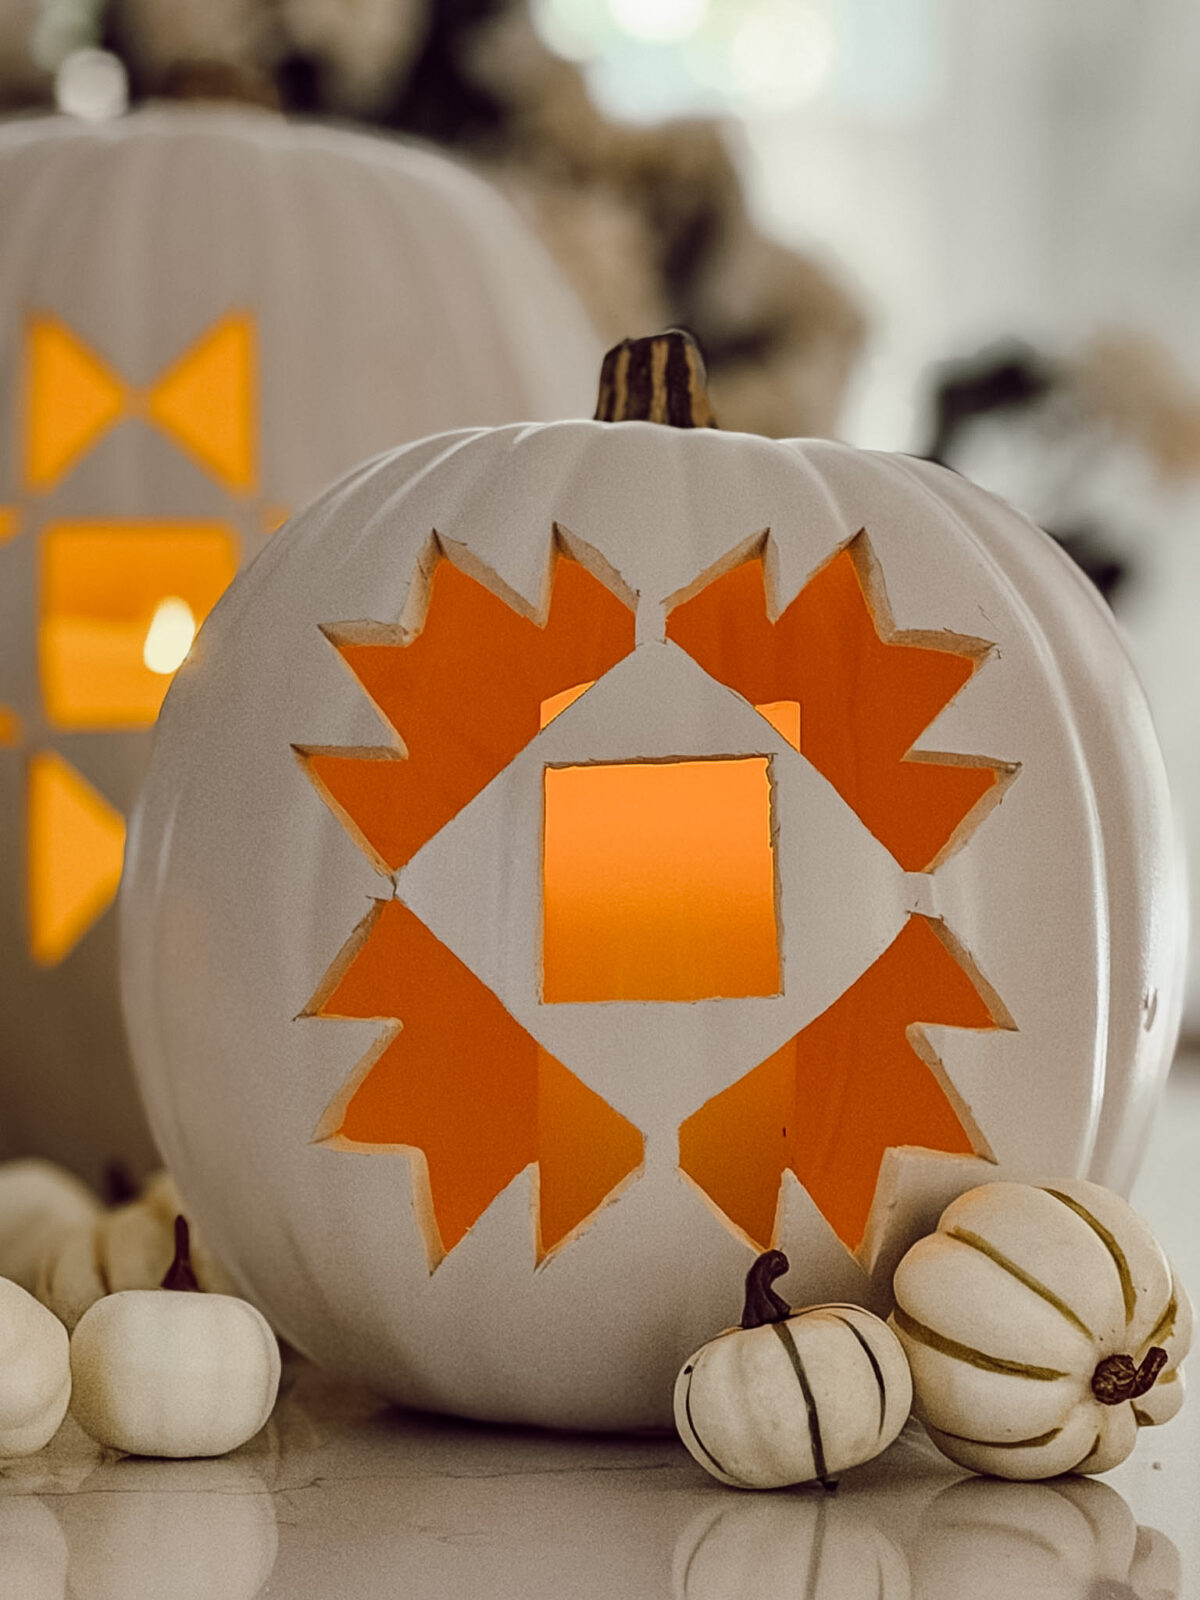
This step is optional, but I love how the quilt pattern looks when it’s glowing. Cut a small hole in the bottom of your pumpkin and place a battery-operated candle inside for a beautiful glow.
Helpful Tips
- Not all faux pumpkins are made to be cut, so look for a hollow craft pumpkin that’s specifically labeled as carvable.
- A pattern with lots of small details may be difficult to carve on a smaller pumpkin. Resize your PDF pattern before printing so the design fits comfortably on the front of your pumpkin.
- The paper will naturally want to lift away from the curves of the pumpkin, so use painter’s tape to keep it from shifting while you use trace the pattern.
- Double-check your entire quilt pattern before peeling away the paper. It’s much easier to go over a missed line while everything is still taped in place than to try to line the pattern up again later.
- Instead of trying to carve one long line at a time, make shorter, controlled cuts.
- Use a sharp knife and always cut away from your hands and fingers.
- Smooth any rough edges with a nail file or fine-grit sandpaper after carving. Be gentle so you clean up the edges, without changing the shape of your quilt pattern.
- Never use a real candle or open flame inside a faux pumpkin since the material can melt or catch fire.
Where to Display Your Cozy Quilt Pumpkin
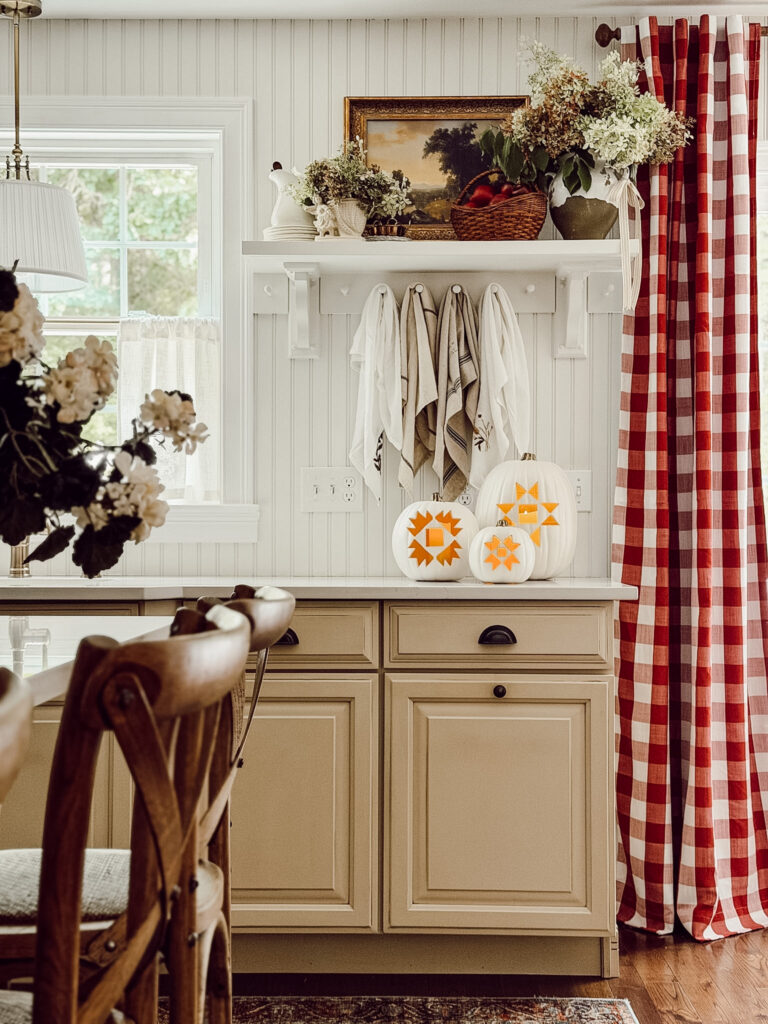
As someone who is not a fan of Halloween, I love fall decorations that can stay out all season long without looking spooky or overly Halloween-y.
And that’s the best thing about this carved quilt pumpkin.
The quilt pattern makes the pumpkin feel cozy and you can display it from September all the way through to November.
Hey friend! What can I help you find?
Search our entire site!
Here are a few places you can display it…
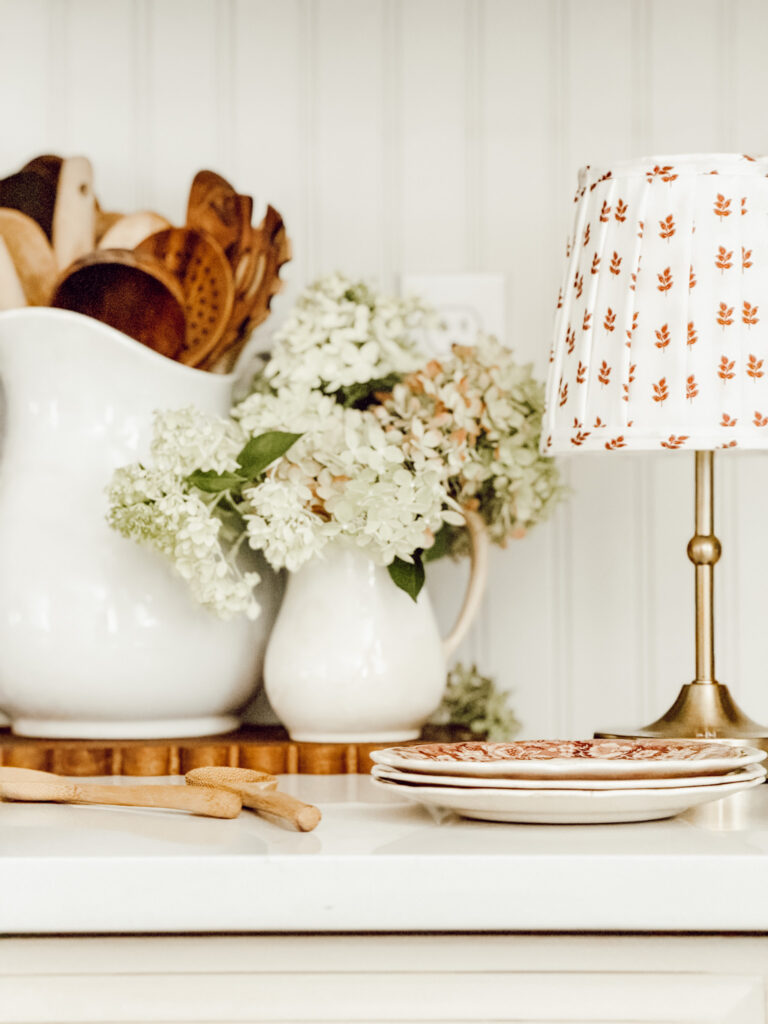
- Kitchen Counter: Tuck it next to a crock of wooden spoons, a bowl of apples, or a vase filled with fall stems.
- Shelf or Hutch: Mix your carved pumpkin in with old books, framed artwork, brass candlesticks, or other collected pieces you already have.
- Entryway: Add it to a small grouping with a lamp, basket, or vase of branches to make your entry feel a little more like fall.
- Fireplace Mantel: Let your quilt pumpkin be the star or mix it with a few smaller pumpkins.
- Covered Porch: If your faux pumpkin is safe for the outdoors, place it on a porch table or tuck it into a vignette of mums and pumpkins near the front door.
Frequently Asked Questions About Carving a Quilt Pattern Into a Pumpkin
Can you carve any faux pumpkin?
No, not all faux pumpkins are made to be carved. For this DIY, look for a hollow foam pumpkin that’s specifically labeled as carvable. If you’re unsure, test your craft knife on a small, hidden area on the bottom or back of the pumpkin first.
Can I carve a quilt pattern into a real pumpkin?
Absolutely! You can use the same free PDF quilt patterns on a real pumpkin. Prepare the pumpkin as you normally would by cutting an opening and removing the seeds and pulp, then follow the same steps to transfer and carve your quilt design.
What kind of quilt pattern is easiest to carve into a pumpkin?
Simple geometric quilt patterns with larger shapes and straight lines are going to be the easiest to carve. Patterns made from squares, triangles, and diamonds are beginner-friendly.
How do you transfer a quilt pattern onto a faux pumpkin?
I found that a sewing tracing wheel works great for this DIY. Tape your printed PDF pattern securely to the pumpkin, then roll the tracing wheel along each line. The little teeth will go through the paper and leave a dotted outline on the surface of the pumpkin for you to follow with your knife.
Can I make a quilt pattern pumpkin without carving it?
If you love the quilt look but don’t want to carve your pumpkin, use the free PDF pattern as a template for painting instead. Transfer the design to your pumpkin and paint the individual shapes.
What should I put inside a carved faux pumpkin?
Use a battery-operated candle or small strand of twinkle lights if you’d like your quilt pattern to glow. Never put a real candle or any type of open flame inside a faux pumpkin because the material can melt or catch fire.
Can I reuse my carved quilt pumpkin next year?
Yes, that’s one of my favorite things about using a faux pumpkin! Once fall is over, remove the LED lights and store your pumpkin somewhere it won’t get crushed or damaged. Then you can pull it out and enjoy it again next fall.
Did you make this craft?
Mention us @eleanorrosehome or tag us using #eleanorrosehome so we can see your creations. You can also leave a comment below!
You Might Also Enjoy
-
How to Make Your Home Smell Like Fall: 10+ Cozy Ideas
Learn how to make your home smell like fall with these cozy ideas using candles, simmer pots, soaps, potpourri, and…
-
60+ Quick Fall Kitchen Decor Ideas That Take 5 Minutes or Less
Try these 60+ quick fall kitchen decor ideas to make the heart of your home feel warm and cozy for…
-
DIY Fall Soap Dispenser: An Easy 2-Minute Decorating Idea
Create a DIY fall soap dispenser in minutes with clear soap and acrylic fall shapes for a simple way to…
Shop My Favorite Products
Shop my favorite home decor & lifestyle products, my LTK sources, and my Amazon Storefront.
By making a purchase with one of my affiliate links, I earn a small commission which helps me continue to create meaningful content for you!
I look forward to sharing more of my home with you and inspiring you to enjoy simple cozy living!
Follow me on Facebook, Instagram, Pinterest, and LIKEtoKNOW.it.
xoxo, Heidi
Don’t forget to pin this for later!
Shop this post