
How to Make DIY Glitter Pumpkins for Glam Fall Decor
Add a little glam to your fall decor with these DIY glitter pumpkins! Discover how to transform mini white pumpkins into dazzling works of art using Mod Podge and brown glitter.
It’s time to say goodbye to ordinary pumpkins and say hello to these sparkly DIY glitter pumpkins!
Fall is full of vibrant colors and cozy moments, and what better way to enjoy the season than by adding a touch of glam to your home decor.
These easy to make glitter pumpkins capture the essence of autumn in such a unique and charming way. What better way to capture the light and create a warm, inviting atmosphere in your home!
And really…who couldn’t use a little sparkle and shine this time of year?!
In this blog post, I’ll show you how easy it is to transform humble, mini white pumpkins into dazzling showpieces using just a few supplies you might already have in your home.

I’m joining a group of bloggers today to bring you unique pumpkin crafting ideas. Continue reading to the end of this post for all the amazing pumpkin inspiration.
Ok, let’s get our sparkles on!
Why You’ll Want to Make These DIY Pumpkins
These unique DIY glitter pumpkins will add a touch of personalized glamour to your decor and I think you’ll find they capture the essence of fall in a fun, unique way.
You will be able to use your creativity to transform ordinary pumpkins into one of a kind, sparkly works of art.
Whether you’re looking to add a centerpiece to your Thanksgiving dinner table, create a warm & inviting atmosphere for your guests, or simply indulging in a creative project for the season; these DIY pumpkins are the perfect choice!
What you’ll love about this DIY:
Supplies You’ll Need for Glitter Pumpkins
Note: Choose mini pumpkins with longer stems. The extended stems not only add an elegant touch to your glitter pumpkins but also provide a convenient handle while crafting. They make it easier to hold the pumpkins without touching the freshly applied Mod Podge and glitter, ensuring a smoother and mess free process.
Why You’ll Want to use Extra Chunky Glitter
Here’s a little secret that is going to elevate your DIY glitter pumpkins…not all glitters are created equal!
When it comes to adding texture and depth to your pumpkins, opt for extra chunky glitter. Unlike finer glitters, extra chunky glitter creates a more pronounced and textured surface.
Chunky glitter is the secret ingredient to making your glitter pumpkins truly stand out, giving them a beautiful, glamorous touch.
SUPPLIES YOU’LL NEED

How to Make DIY Glitter Pumpkins
With a handful of supplies and a sprinkle of creativity, you can turn mini white pumpkins into beautiful works of art that sparkle and shine.
Here’s the easy step by step instructions on how to make glitter pumpkins at home.
1. Prepare Your Workspace
Working with glitter can get messy, which is the fun of it!
But to help with cleanup, cover your workspace with wax paper, newspaper, or a disposable tablecloth to catch any glitter that falls off of the pumpkins while you’re crafting.
2. Clean Pumpkins
If you’re using real pumpkins like I did, clean your mini white pumpkins to remove any dirt or debris.
Use a damp cloth to gently wipe them clean, then make sure they dry thoroughly before moving on to the next step.
3. Apply Mod Podge to Top of Pumpkin
Using a paintbrush, apply a thin, even layer of Mod Podge to the surface of the top half of the pumpkin making sure to get into the ribs as well.
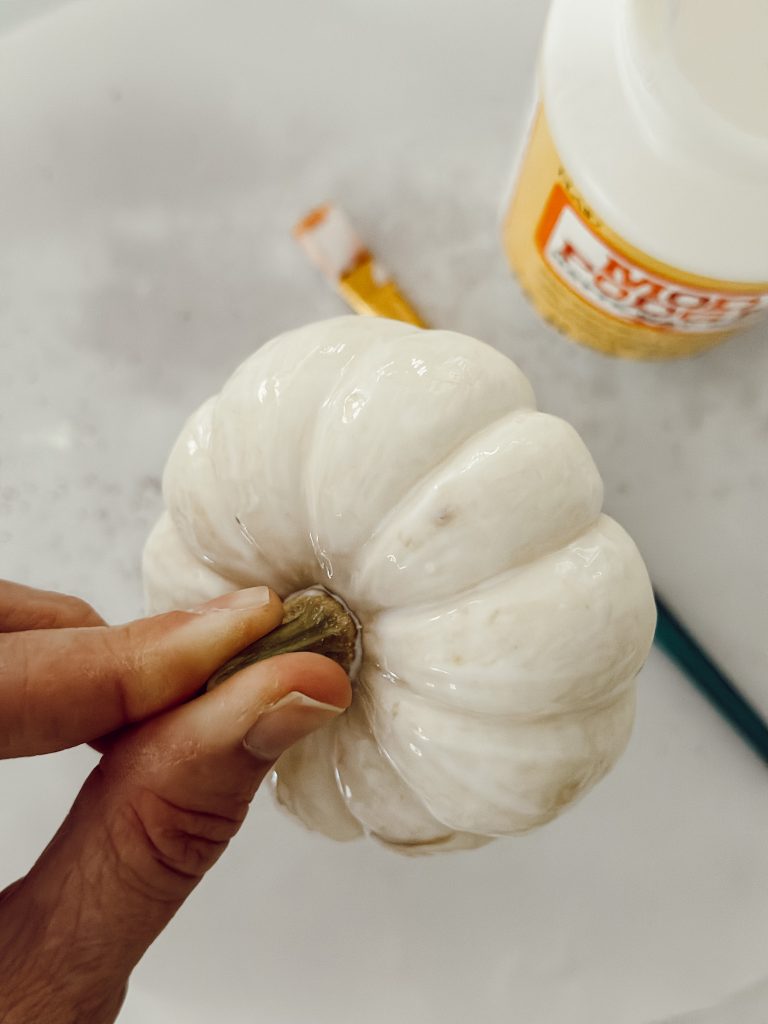
Don’t worry if you get Mod Podge on the pumpkin stem. It dries clear so you won’t see it on your finished pumpkin.
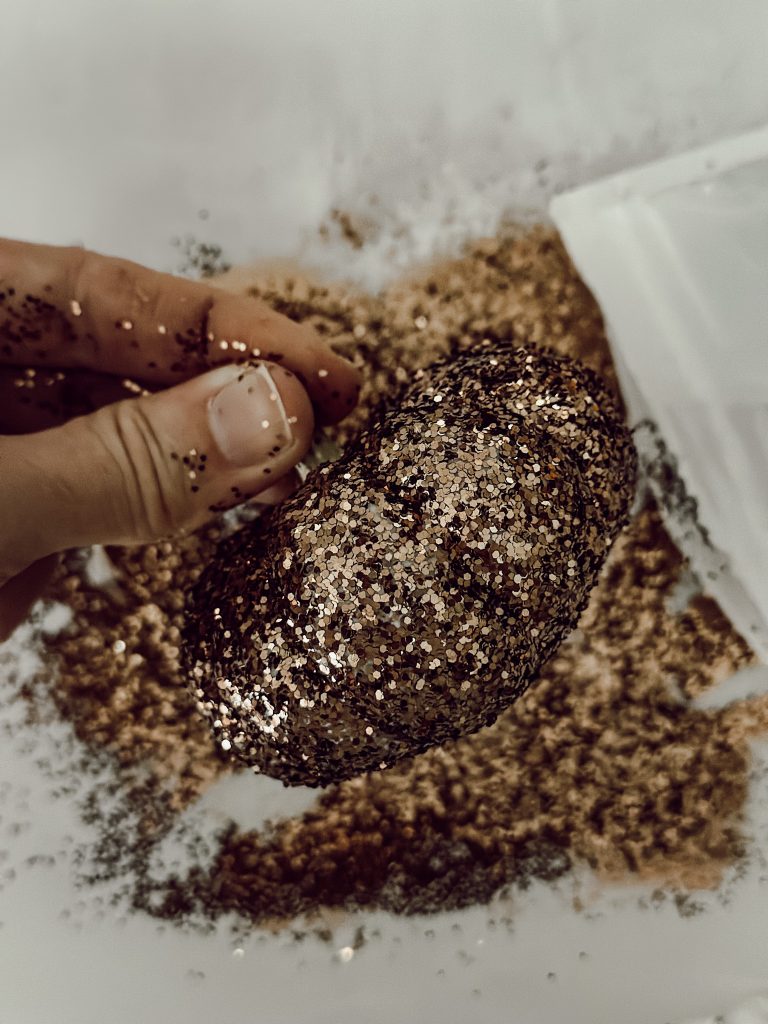
4. Sprinkle Glitter
Holding your pumpkin over a piece of wax paper, generously sprinkle the brown glitter all over the Mod Podge coated surface.
Rotate the pumpkin and continue to sprinkle until it’s entirely covered in glitter. Gently shake off any excess glitter.

Note: Sprinkling the glitter over a piece of paper allows you to collect any excess glitter neatly. Once you’re done, carefully fold the paper, creating a funnel and pour the leftover glitter back into your glitter container. This way, you can reuse any sparkles that haven’t adhered to the pumpkins.
5. Repeat & Let Pumpkins Dry
Repeat the Mod Podge and glitter application process for each pumpkin your decorating.
Let the tops of the pumpkins dry completely for about 1-2 hours.
Once the pumpkin tops are dry, repeat the same Mod Podge and glitter processes for the bottom of the pumpkin.
Hey friend! What can I help you find?
Search our entire site!
6. Seal the Pumpkins (optional)
To prevent the glitter from shedding, you can spray your glitter pumpkins with a clear sealant spray. I did not do this step, but this will help your pumpkins keep longer.
Hold the pumpkins over a protected surface and spray them evenly. Let them dry according to the sealant’s instructions.
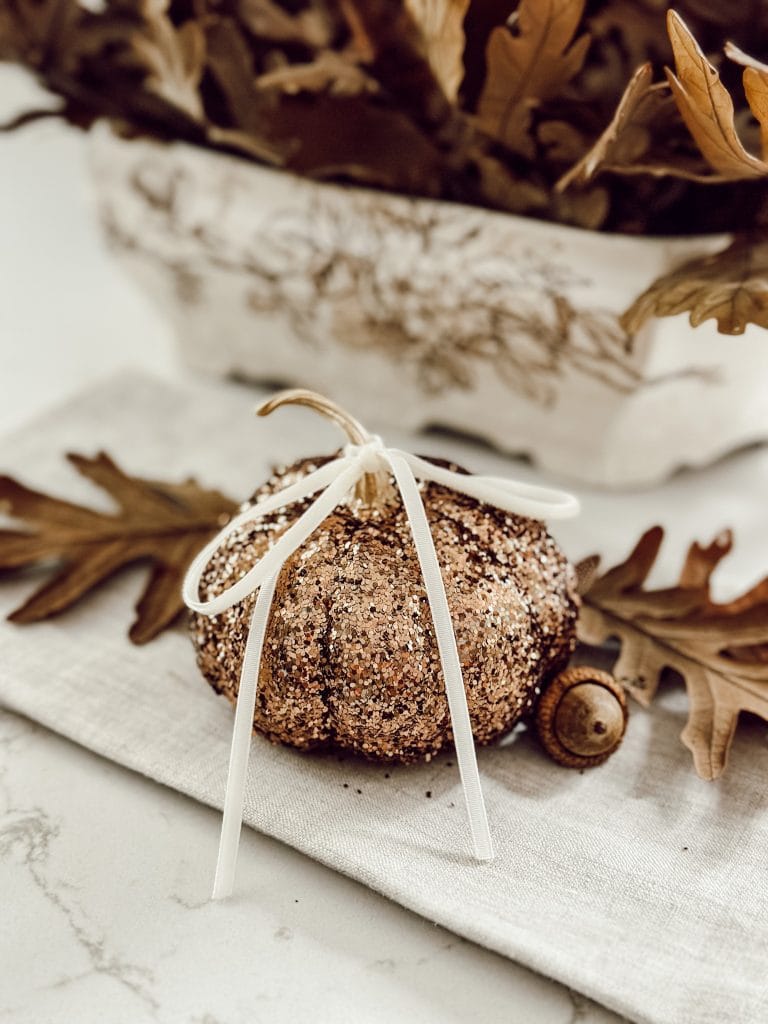
7. Finishing Touch (optional)
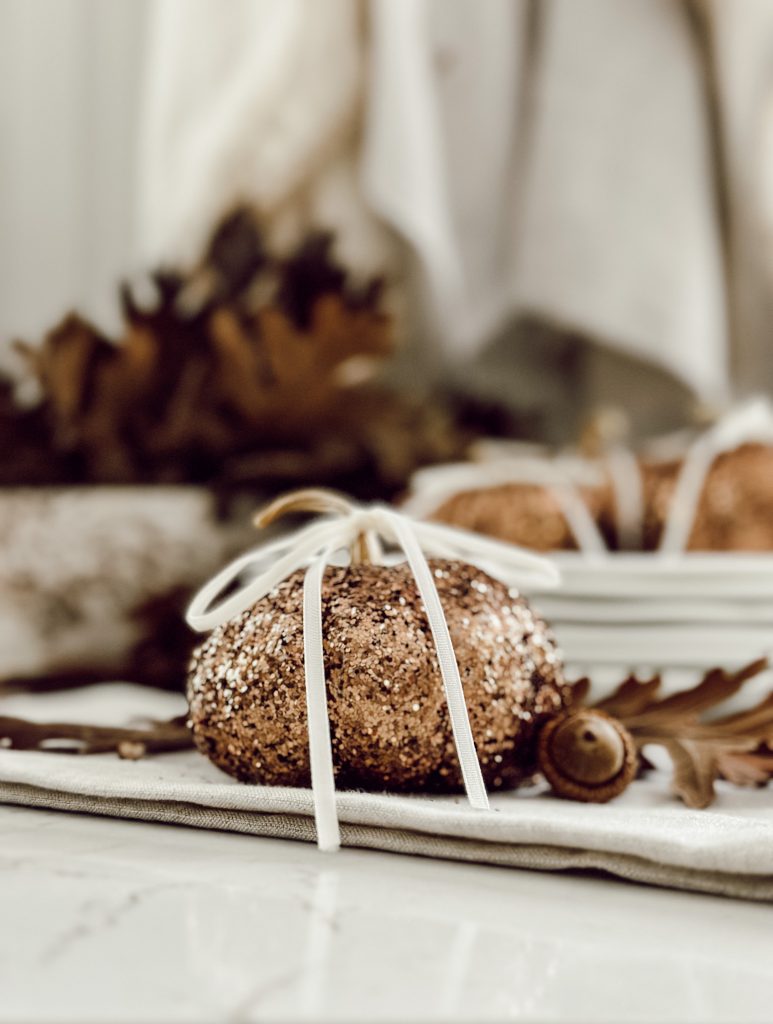
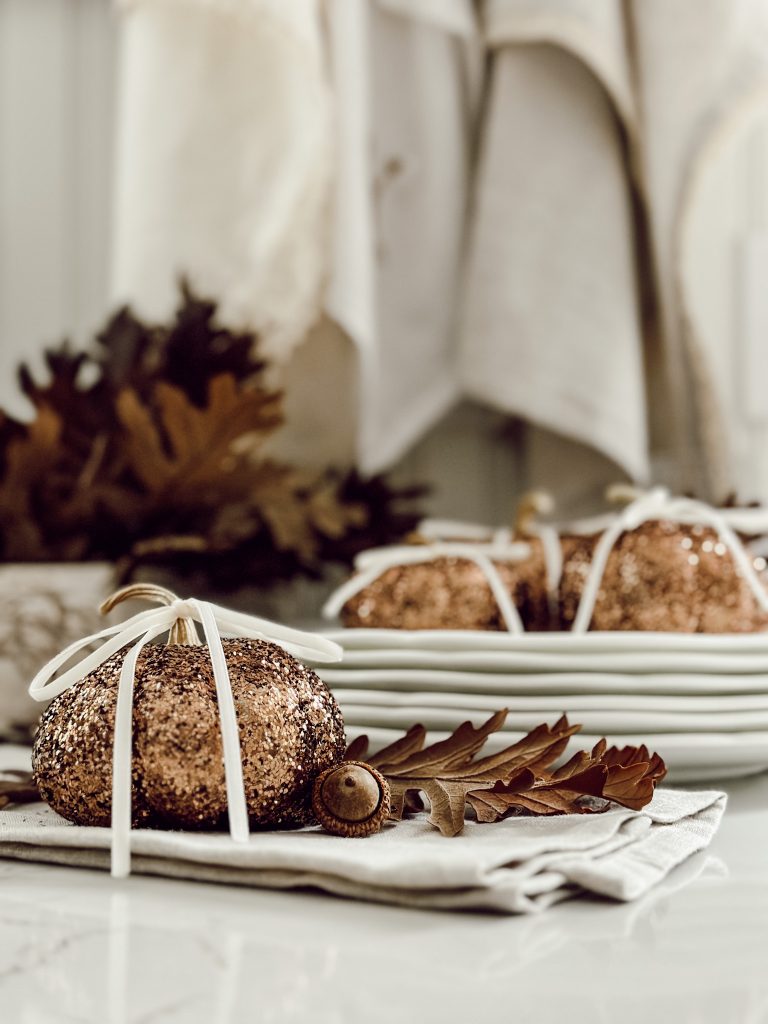
Once your glitter pumpkins are dry, you can add some additional touches to enhance their “glam factor”.
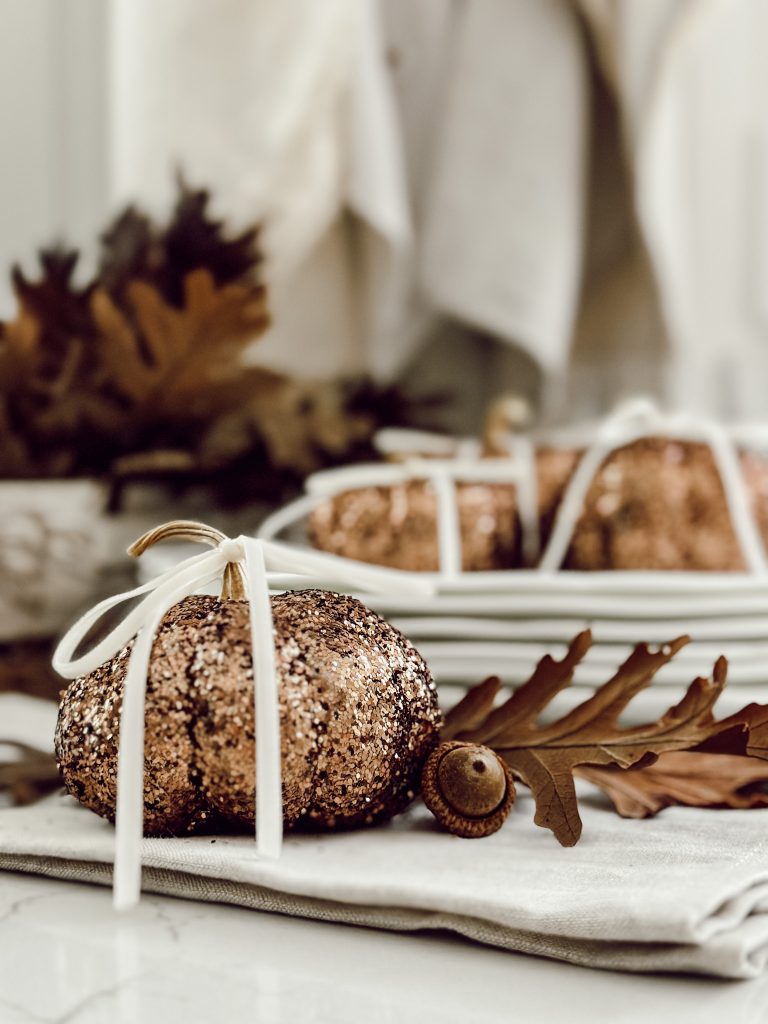
I tied a thin velvet ribbon around our glitter pumpkin stems to complete the look. You could also tie twine around the stem for more of a rustic touch.
TIPS
- Choose mini pumpkins with longer stems. The extended stems not only add an elegant touch to your glitter pumpkins but also provide a convenient handle while crafting.
- Clean your pumpkins thoroughly and ensure they are completely dry before applying Mod Podge. Any dirt or moisture can affect the adhesion of the glitter.
- Use a paintbrush to apply Mod Podge evenly. Uneven application can result in clumps or streaks in your glitter. A thin, smooth layer works best.
- Sprinkle the glitter over a piece of wax paper to catch excess glitter. This makes cleanup easier and allows you to reuse any unused glitter.
- Work on one section at a time. Apply Mod Podge and glitter to one area, let it dry, then move on to the next section. This prevents smudging and ensures a neat finish.
- Consider sealing your glitter pumpkins with a clear sealant spray. This protects the glitter and ensures longevity.
- While brown glitter is classic for fall, don’t hesitate to experiment with other colors or even mix different shades for a unique, sparkly effect.
- For an extra touch of creativity, consider adding rhinestones, sequins, or other small embellishments to your glitter pumpkins.
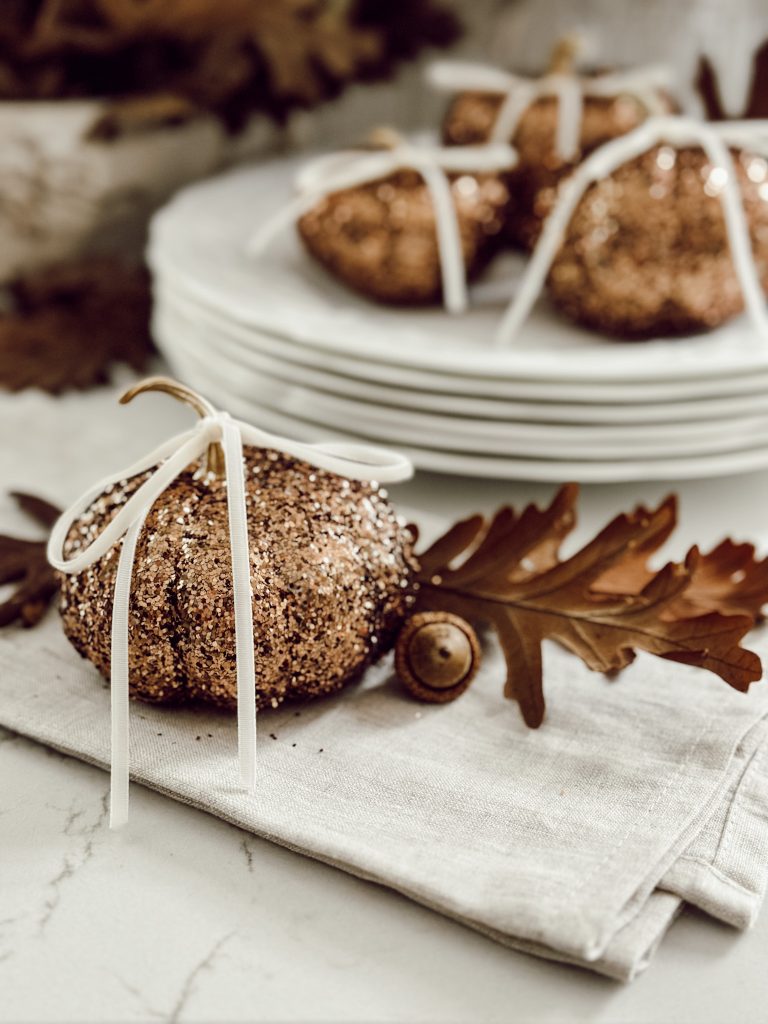
Where to Display DIY Glitter Pumpkins
Wondering where you might be able to display your DIY pumpkins or where you can decorate with them?
Here are a few creative ideas:
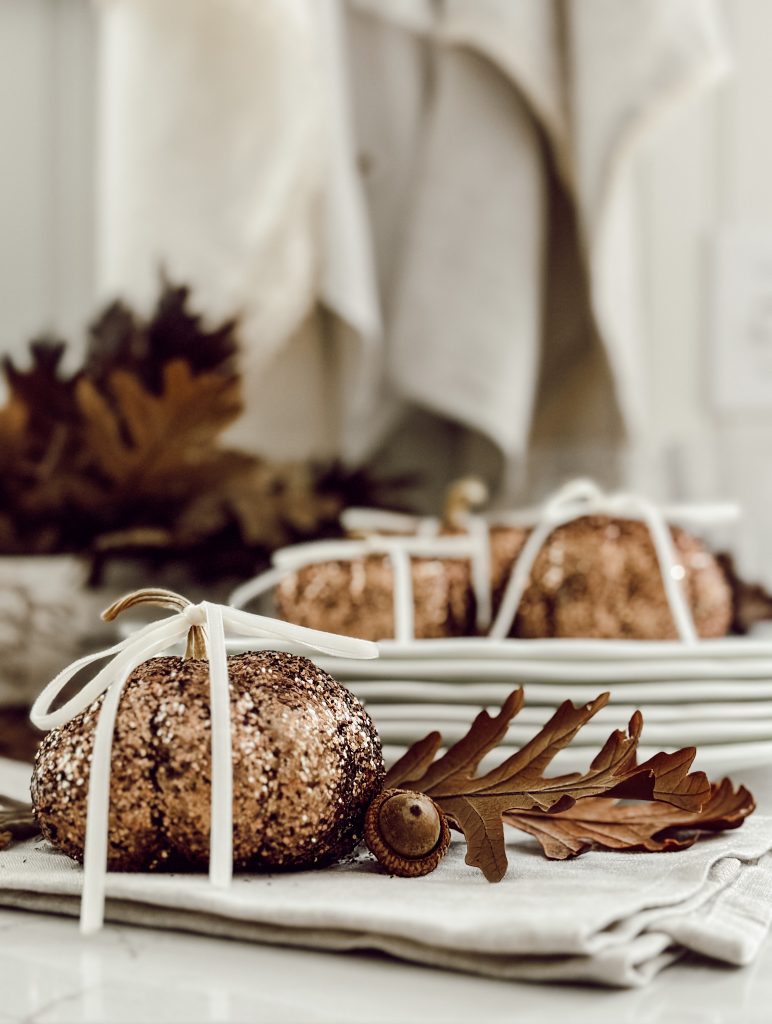
- Fall Centerpieces: Arrange the glitter pumpkins in the center of your dining table. They make for a stunning focal point for fall themed dinner parties.
- Mantel Decor: Line your mantel with these glittering pumpkins alongside candles and autumn foliage for a cozy and sophisticated fall display.
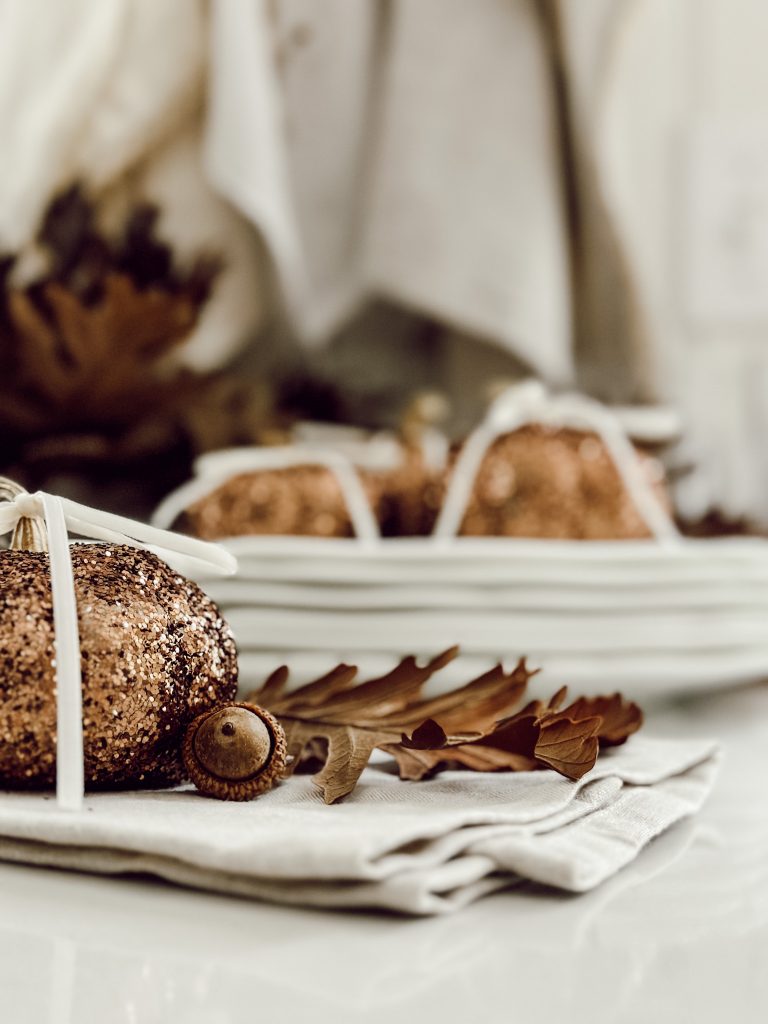
- Table Settings: Use mini glitter pumpkins as place card holders or napkin rings during dinner parties. They add a fun, personalized touch to each guest’s place setting.
- Seasonal Displays: Incorporate these pumpkins into larger seasonal displays. Pair them with pinecones, acorns, and dried leaves for a rustic fall arrangement.
FAQs About Glitter Pumpkins
you might also
Enjoy These Posts
Shop My Favorite Products
Shop my favorite home decor & lifestyle products here, my LTK sources here, and my Amazon Storefront here. By making a purchase with one of my links, I earn a small commission which helps me continue to create meaningful content for you!
I look forward to sharing more of my home with you and inspiring you to have a well loved home! Follow me on Facebook, Instagram, Pinterest, and LIKEtoKNOW.it.
xoxo, heidi
BLOGGER’S BEST PUMPKIN CRAFTS
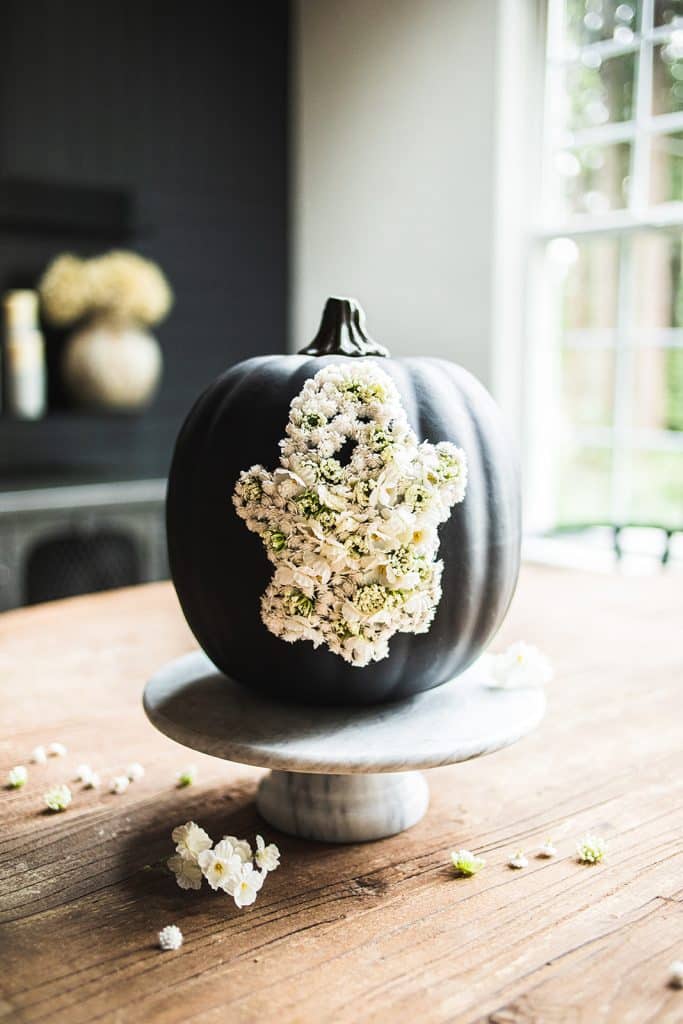
Floral Ghost Pumpkin | My Sweet Savannah
Have fun with your Halloween decor this year and create this easy to make floral ghost pumpkin with my step by step instructions!
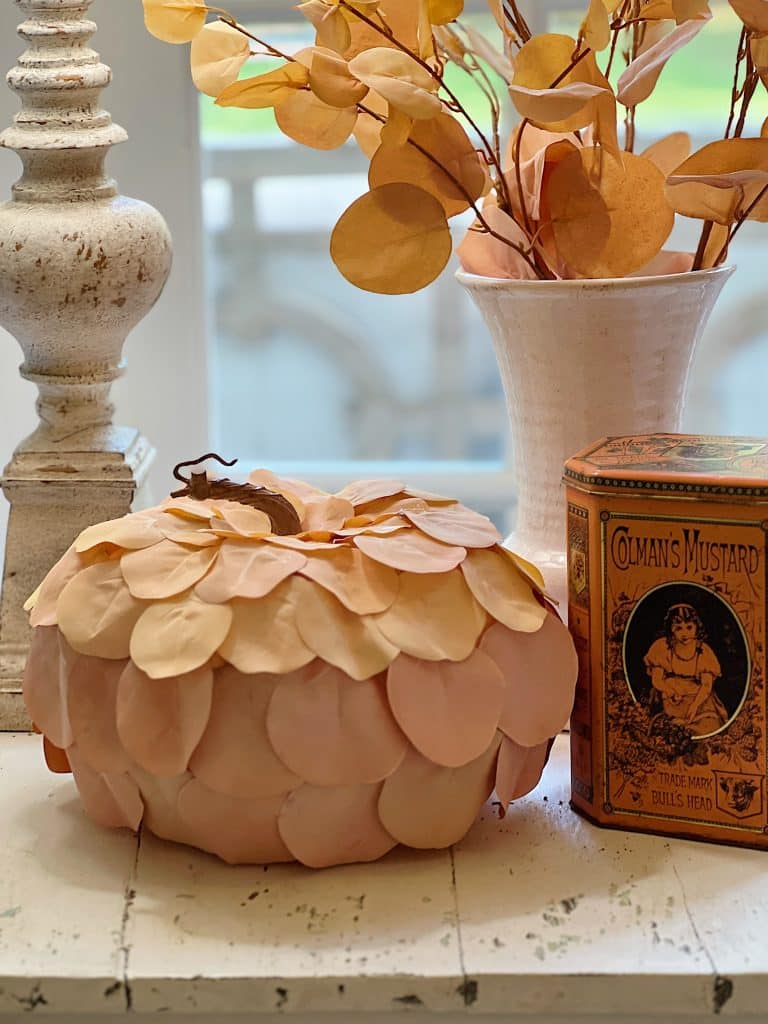
DIY Pumpkin Craft for Your Home | My 100 Year Old Home
Fall is synonymous with vibrant colors, cozy evenings, and, of course, pumpkins! Today we are going to make a beautiful DIY pumpkin craft.

Disco Ball Lighted Halloween Pumpkin Cauldron | Tater Tots and Jello
Transform your Halloween decor with this dazzling DIY disco ball lighted pumpkin cauldron. Start with an metal jack-o-lantern as your enchanting base, then sprinkle it with the magic of disco balls, twinkle lights, and globe lights. Watch as your creation comes to life, casting a spell of whimsy and glamour on your spooky celebrations.
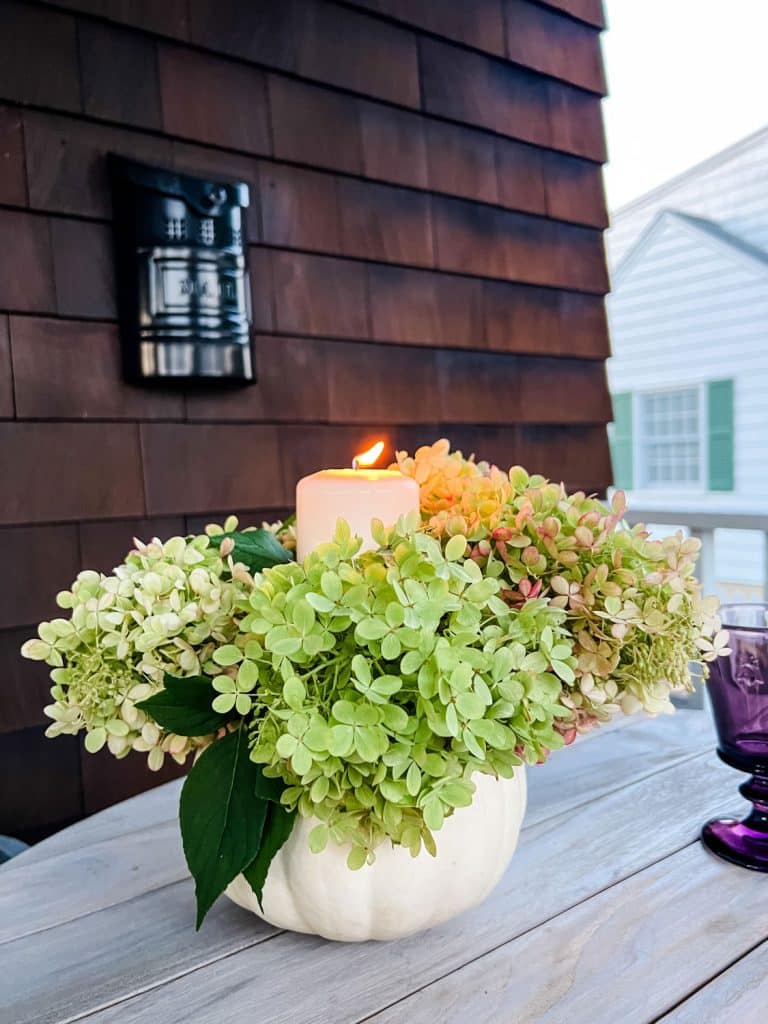
Pumpkin Candle Holder | Most Lovely Things
A simple centerpiece using a pumpkin, a pillar candle and hydrangeas beginning to change color.
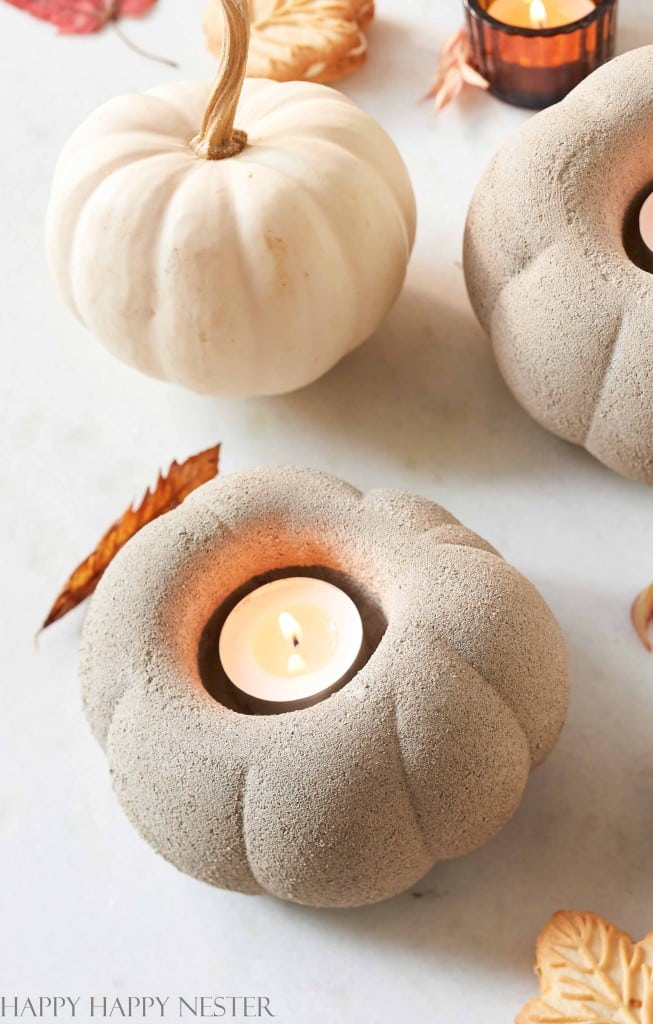
Cement Pumpkin DIY (with Candleholders) | Happy Happy Nester
Get ready for fall with these easy, do-it-yourself Cement Pumpkins DIY Candleholders. All you need is cement, a nylon sock, and a few other supplies. They’re sure to light up your home with the cozy feeling of autumn. Incorporate your favorite fall scents and share this craft with friends and family.
Don’t forget to pin this for later…
shop the post


Thank you Anna!
I absolutely love this idea! Your pumpkins turned out great and I love the color of the glitter you selected.
Lol, I love the messiness of glitter every once in a while!
First, I do like the brown glitter. It does make it more glam! I made glitter pumpkins a few years ago with my young grandkids The usual gold glitter and white glue with fake pumpkins. Not sure why guys don’t like glitter projects. Sometimes my SIL still has to adjust to what my grands and I get up too with their mom right there too!
Thank you Michele!
So cute Heidi! I will be sharing these on my Saturday Morning Gather post tomorrow.
Have a wonderful weekend!
Thank you Annie!
These are so elegant, but the color makes them earthy! Lovely!!
These are so fun, I love them!
Thank you Renae! Super easy to make and so cute!
This is the cutest pumpkin craft ever! I’m definitely doing this. You have the best ideas.