
How to Gift Wrap Fresh Flowers Like a Professional
Learn how to gift wrap flowers like a professional with this easy tutorial. Elevate a grocery store bouquet with tissue paper, craft paper, ribbon, and gift tags I’ve made exclusively for you.

The arrival of spring not only marks the arrival of warmer weather and longer days but occasions were bouquets of flowers are often given.
Mother’s Day, dance recitals, weddings, anniversaries, and birthdays to name a few.
Floral arrangements serve as tokens of affection, symbols of congratulations, or expressions of gratitude.
Yet, among the excitement of finding the perfect flowers, we can sometimes overlook the importance of presentation.
Those grocery store bouquets are convenient and affordable however, they often come wrapped in cellophane, lacking the personal touch that takes a gift from ordinary to extraordinary.
I’m hear to tell you that you don’t need to be a professional florist to create a beautifully wrapped bouquet!
With just a few inexpensive supplies, you can turn even the simplest grocery store flowers into a gift that looks like you spent a small fortune.
So, ditch the plastic, cellophane wrapped flowers and elevate your gifted bouquets with this easy step by step guide.

Selecting the Right Flower Bouquet to Give Your Gift Recipient
You may be wondering, “How do I know which is the right flower bouquet to choose in the grocery store?”
Ultimately, there is no right or wrong answer.
When choosing the right bouquet you want to consider the occasion, the recipient’s preferences (if you know), the freshness of the flowers available, and the message you want to convey with your gift.

The great thing about shopping for flowers in the grocery store is that they most likely have mixed flowers already arranged in a bouquet for you. That takes the a lot of the guess work out of mixing & matching flowers to create a beautiful bouquet.
Look for flower arrangements that feature a combination of focal flowers, such as roses or lilies, along with filler flowers like baby’s breath or statice, and some greenery or foliage for added depth and contrast.
Once you’ve chosen a bouquet, don’t be afraid to get creative!
You can easily combine two or more smaller bouquets into one larger arrangement.
Materials You’ll Need to Gift Wrap Flowers Like a Pro
Gather these materials before you begin this DIY project.
SUPPLIES YOU’LL NEED

Gift Wrapping Flowers: The Step by Step Guide
Whether you’re a DIY beginner or a seasoned florist, elevate your gifted floral bouquets with this easy step by step tutorial.
1. Prepare the Flowers
Start by gently removing any plastic wrapping, cellophane, or rubber bands from the bouquet of flowers.

Carefully arrange the blooms in your hand, ensuring they’re evenly distributed and any stems that are too long are trimmed so that all the stems are the same length at the bottom of the bouquet.
Put the bouquet of flowers off to the side.
Hey friend! What can I help you find?
Search our entire site!
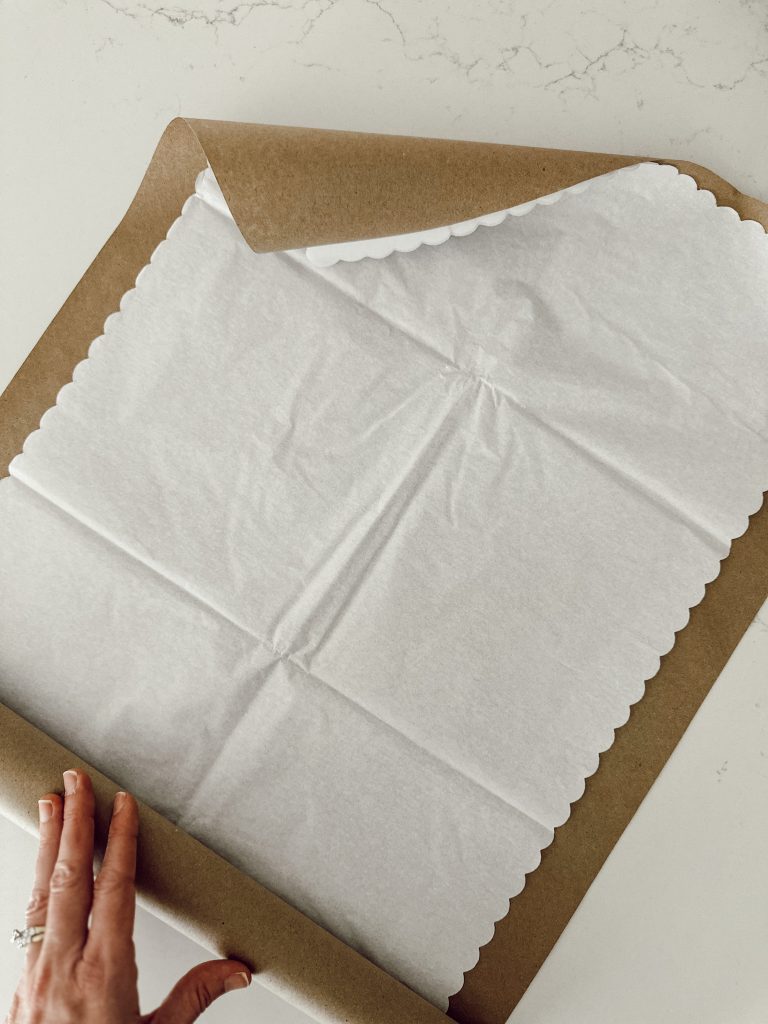
2. Wrap Flowers in Tissue Paper & Brown Paper
On a flat surface, place 2-3 sheets of the tissue paper on in the inside of a 20″x26″ Kraft paper rectangle (depending on the size of your bouquet you may need a smaller or bigger piece of brown paper).
Turn the brown paper with the tissue paper inside diagonally so that a point is on top.
Place the flowers on the tissue paper diagonally, so that the top of the flowers are slightly above the top point.
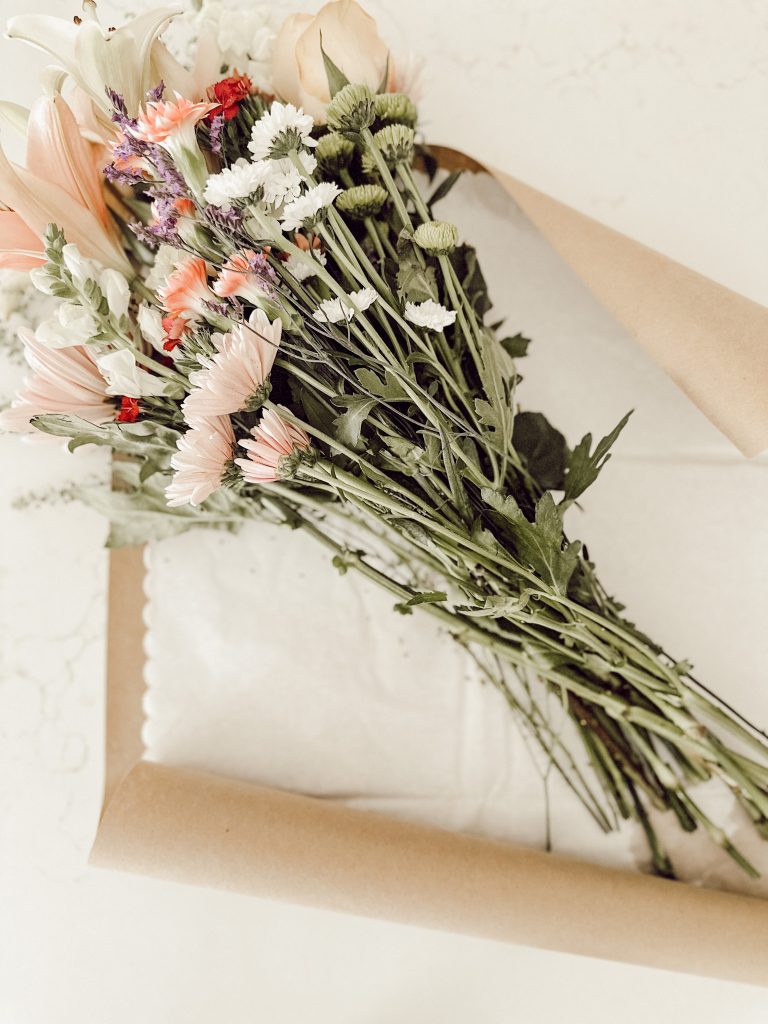
Double check the position of the flowers in your bouquet and make any necessary adjustments.
Before you wrap the flowers, cut a 12″ length of ribbon and place to the side.
Take the right side of the brown paper and wrap it over the bouquet of flowers.

Hold in position, then take the left side of the brown paper and wrap that around the bouquet making sure not to crinkle the paper too much.

Pro Tip: When wrapping your bouquet, be mindful of the tension you apply. Avoid wrapping it too tightly since this can crush the delicate petals and stems. Alternately, wrapping it too loosely may cause the flowers to shift and become disorganized. Aim for a snug but gentle wrap to ensure your bouquet stays secure until it’s ready to be given.
3. Tie the Bouquet With a Ribbon & Add a Gift Tag
Tie a tight knot in the ribbon of your choice right around the middle of the flower stems (this is what will hold the whole bouquet together).

At this point you can choose to leave the brown paper covering the ends of the flower stems, or you can trim it to expose the bottom of the bouquet.
I liked the rustic look of the exposed stems, so I trimmed the bottom of the paper.
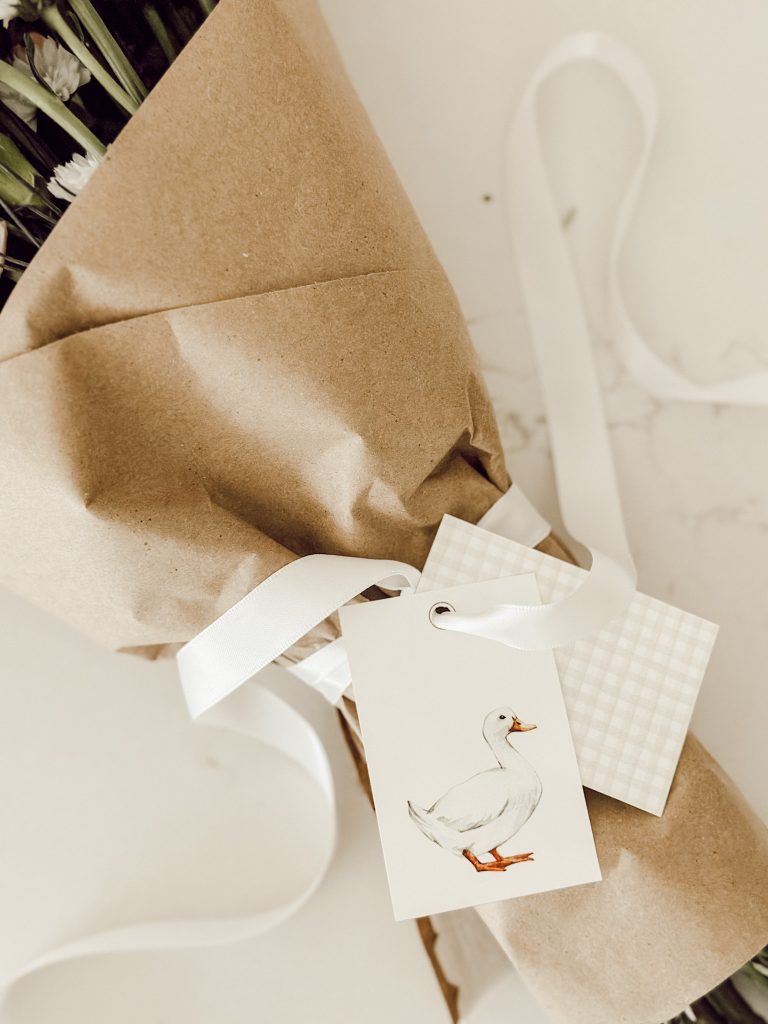
Thread the gift tags onto the ribbon, then tie the ribbon into a simple bow.

free downloads
Printables, eBooks, and More!
Become an Eleanor Rose Home insider to receive new blog posts and our weekly newsletter delivered right to your inbox! You’ll also receive access to our freebie library which includes free printables, eBooks, these spring watercolor gift tags, and much more.
Trim the ends of the ribbon to finish the bouquet.
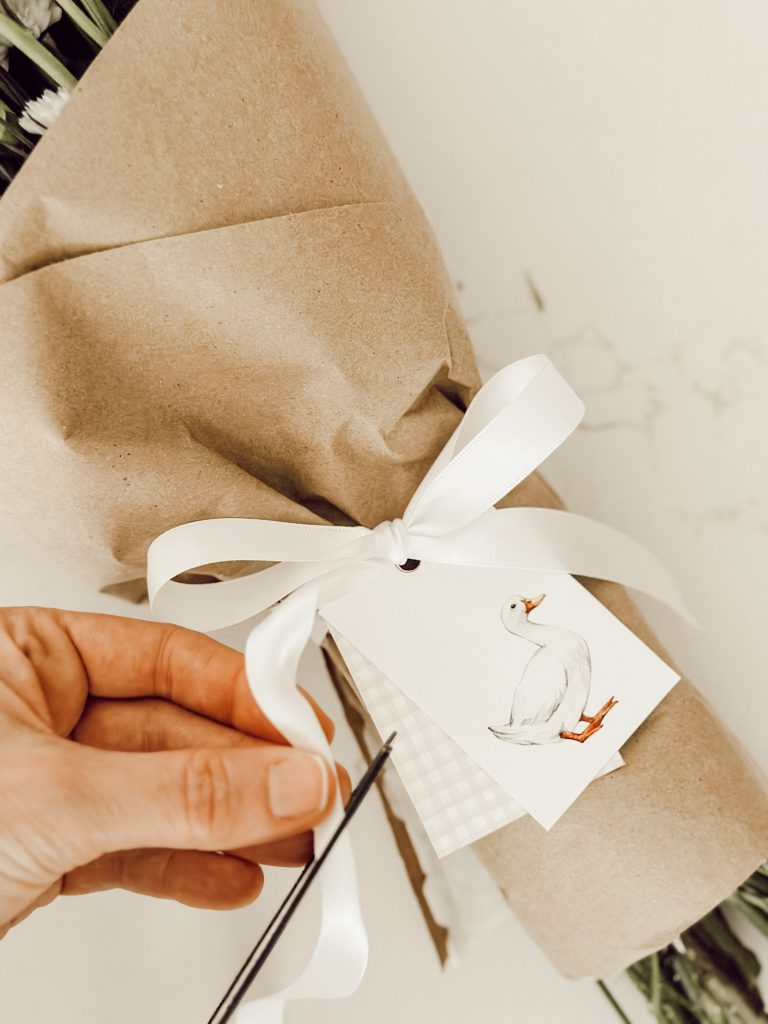

Your flowers are now ready for gifting!

Tips
- Before you start wrapping, trim the stems of your flowers at an angle and remove any excess leaves. This ensures a clean presentation but helps the flowers absorb water more effectively once they’re in a vase.
- Experiment with different wrapping styles and techniques. Try folding the paper in different ways or tying the ribbon in various knots to create a unique look for each bouquet.
- Make your bouquet extra special by adding personal touches like a handwritten note attached to the ribbon. Littlest details can make the biggest impact!
- Choose wrapping materials and flower arrangements that reflect the season. For example, choose bright, cheerful colors for spring and summer and rich, warm tones for fall and winter.
- Don’t worry if your first few attempts don’t turn out exactly as you imagined. Practice makes perfect.
Can I use this same wrapping technique with flowers from my garden?
You most certainly can!
In fact, garden fresh flowers can add an extra special touch to your bouquet, as they are often more vibrant and fragrant than store bought blooms.
Choose a variety of flowers from your garden with different colors, shapes and sizes for your bouquet.
Remember to trim the stems when arranging them and remove any excess leaves before wrapping them.
you might also
Enjoy These Posts
Shop My Favorite Products
Shop my favorite home decor & lifestyle products, my LTK sources, and my Amazon Storefront. By making a purchase with one of my affiliate links, I earn a small commission which helps me continue to create meaningful content for you!
I look forward to sharing more of my home with you and inspiring you to have a well loved home! Follow me on Facebook, Instagram, Pinterest, and LIKEtoKNOW.it.
xoxo, heidi
Don’t forget to pin this for later…
shop the post


Thank you!
Great Guide! I love how you broke down the steps for wrapping flowers. I never knew it could be so easy and stylish!