
DIY Air Dry Clay Flower Frogs: Easy Craft for Flower Lovers
Transform any vessel into a vase with DIY air dry clay flower frogs. Follow this step by step guide to make your own decorative flower frogs for easy flower arranging.
I’ve had DIY air dry clay flower frogs on my list of things “to-do” all spring.
But, you know how life goes. You get busy, and then other things on the to-do list end up taking priority.
Well, this flower frog project moved to the top of the list a couple of weeks ago when my friend Stephanie of Returning Grace shared flower frogs that she DIY’d.
Her creations were so beautiful, that it inspired me to get my butt in gear to make my own.
I’m so glad I did!
These versatile flower arranging tools are actually really easy to make, and they add such a cozy, charming touch to any floral arrangement.
I’m excited to share the simple step-by-step process of crafting your own DIY air dry clay flower frogs that can literally transform any container (ok, just about any container) into a beautiful vase.
Let’s get crafting!

What are flower frogs?
Flower frogs are inserts used to arrange flowers in a vase or container. They hold the stems in place when creating floral arrangements.
The use of flower frogs actually dates back to ancient times, with some of the earliest versions found in Japanese Ikebana flower arranging.
In the 16th century, Japanese floral artists used flower frogs to create intricate arrangements that are still admired today.

Flower frogs gained popularity in the west during the late 19th and early 20th centuries when flower arranging became a popular hobby among the middle and upper classes.
Vintage flower frogs from this era, often made of glass or metal, are now highly collectible.
In recent years, flower frogs have become popular once again especially among DIY enthusiasts for their practicality, combined with the charm & ease of creating personalized arrangements at home.
What you’ll love about this DIY:
Materials You’ll Need to Make DIY Air Dry Clay Flower Frogs
Gather these supplies to create your own air dry clay flower frogs…
SUPPLIES YOU’LL NEED

*If you make a purchase using one of these links, I may receive a small commission. This does not add any cost to you, but helps me to continue to create & share meaningful content. Thank you for supporting my small business!
How to Make DIY Flower Frogs Using Air Dry Clay
Creating your own flower frogs using air dry clay is a simple and fun project that adds a personalized touch to your floral arrangements.
With a few basic materials and a little creativity, you can craft unique and functional pieces to enhance any vessel.
Step 1: Roll Out the Clay
Take a handful of air dry clay (I’m using white Crayola air-dry clay for this project) and knead it until it’s soft and pliable.

On a flat surface covered with wax paper or a silicone mat, use a rolling pin to flatten the clay to about 1/8″- 1/4″ thick.
The thickness will ensure your flower frog is sturdy enough to hold the stems in place.

Step 2: Emboss the Clay (Optional)
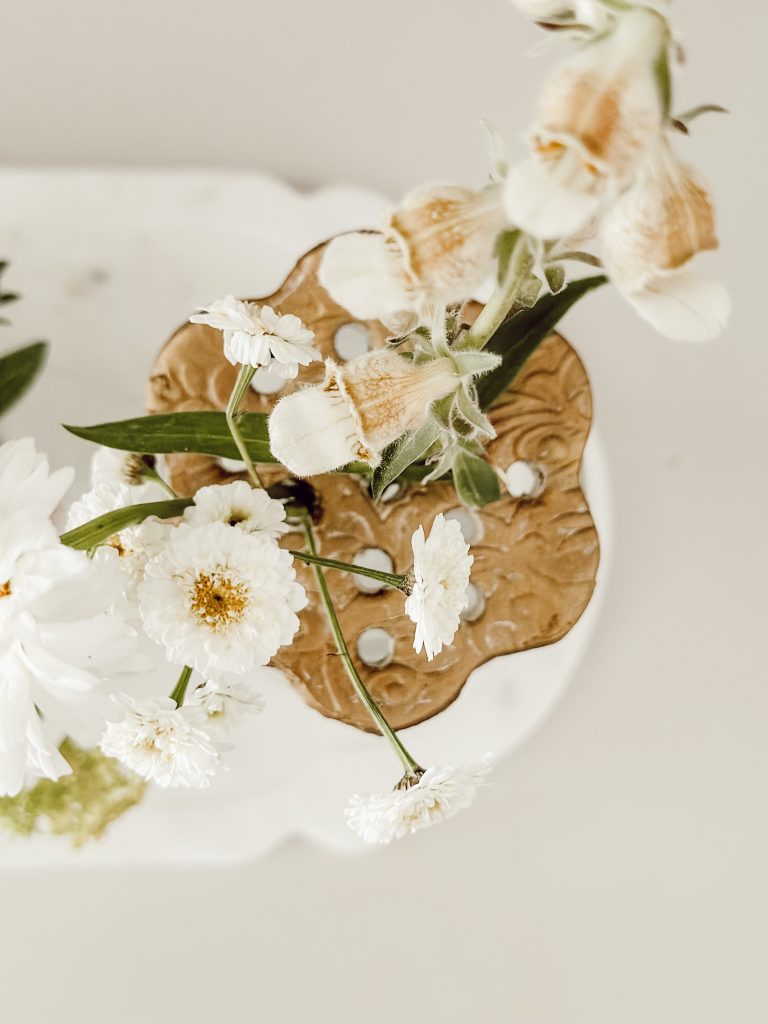
If you want to add a little something extra to your flower frog, roll the embossed rolling pin over the flattened air dry clay to imprint the design.
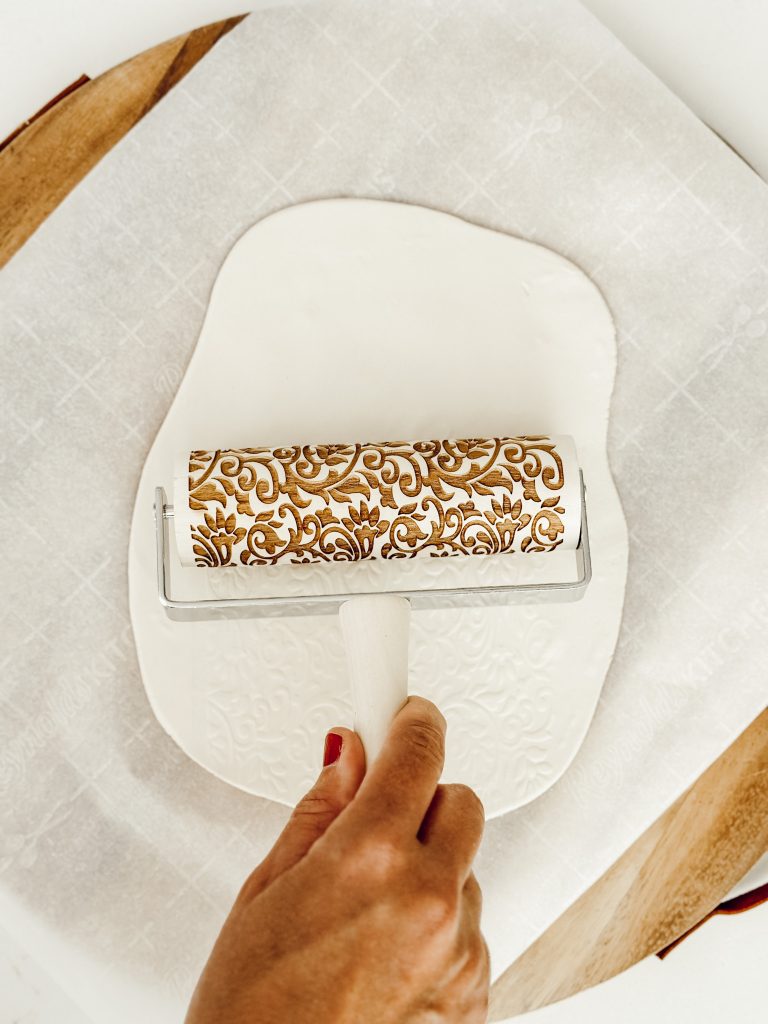
This step is completely optional, so feel free to skip it if you prefer a smooth surface.
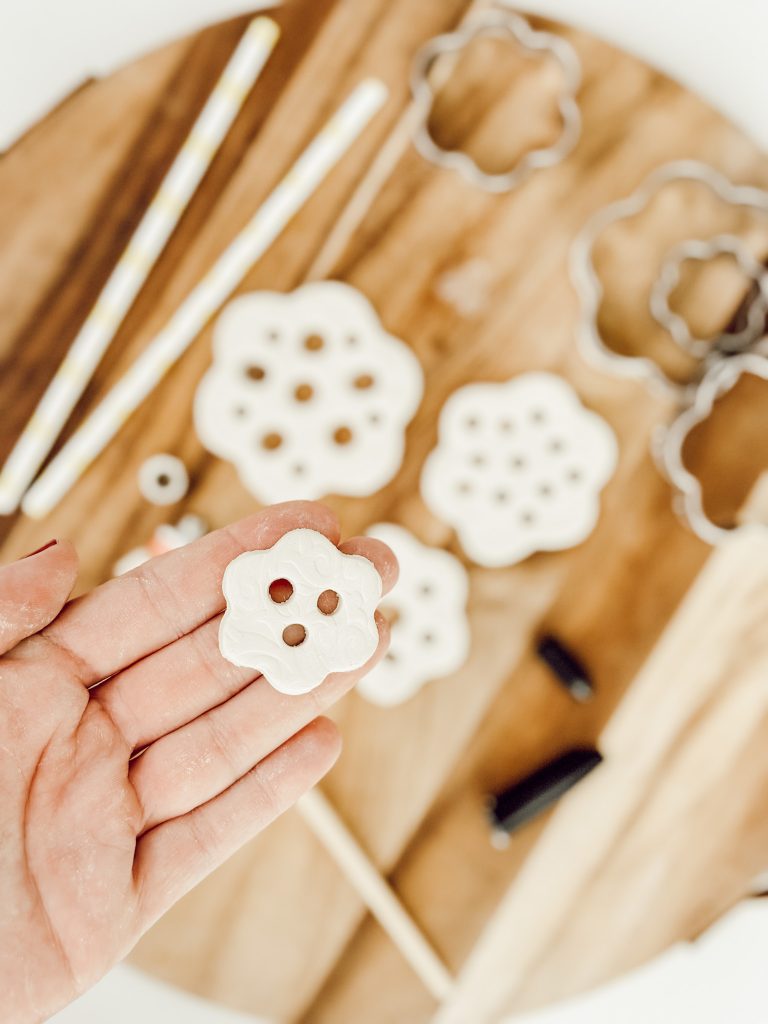
Step 3: Shape Your Flower Frog
With a cookie cutter, cut out the flower frog.

I used these flower shaped cookie cutters, but you can also use a bowl or small plate as a cutting guide depending on the size and shape you want your flower frog to be.
Carefully lift the flower frogs (I found a spatula to be helpful here) from your work surface so you can clean up the edges.
Using your fingers smooth out the edges and fix any imperfections.
Download Your Free Cozy Magazine
Step 4: Create Holes
Next, use a pen, straw, marker cap, or even a toothpick to create holes in the white clay.
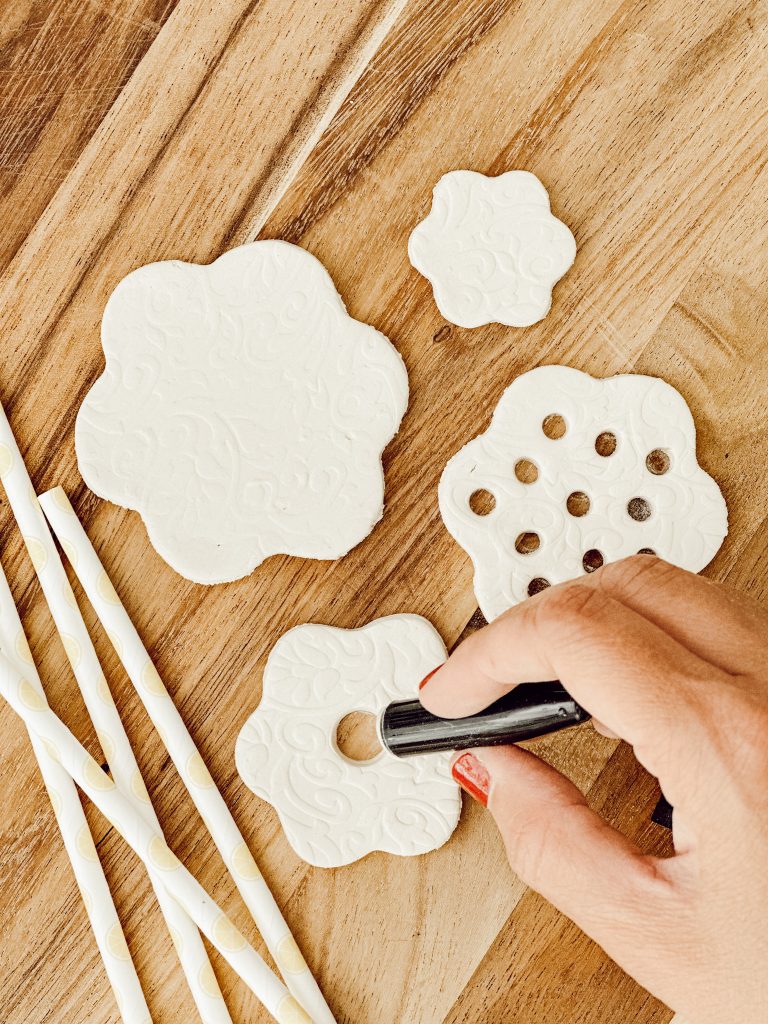
These holes will hold the stems of your flowers, so make sure they are spaced evenly and are wide enough to be able to stick stems through them easily.
Step 5: Allow Flower Frogs to Dry
Lay the flower frogs on a flat, non-stick surface to dry for about 1-2 days.
The drying time will depend on the thickness of the clay and the humidity of your home.
I flipped my DIY flower frogs about every 12 hours to make sure they would dry out evenly.
Step 6: Paint & Display
This is where you can get creative and let your imagination run wild.
Once your flower frog is dry, you can leave it as is for a natural, rustic look or paint it with Antique Gold Rub ‘n Buff or any color acrylic paint you like.
If you embossed your flower frog, the Paint or Rub ‘n Buff will help the embossed pattern to stand out.

Allow the paint to fully dry and then your flower frog is ready for flower arranging!
best Tips
- Air dry clay can dry out quickly, so it’s best to work in small batches to prevent it from becoming too hard. Keep unused clay wrapped in plastic wrap or stored in a resealable tub.
- To ensure your flower frog is sturdy and dries evenly, aim for a consistent thickness of about 1/8″-1/4″ when rolling out the clay.
- If you notice cracks or rough edges on your clay, use a small amount of water on your fingers to smooth them out. Be careful not to use too much water since it can weaken the clay.
- Gently lift your cut out shapes with a spatula to avoid stretching or distorting them.
- Use different elements like lace, leaves, flowers or textured stamps to create unique patterns.
- Make sure the holes you create are evenly spaced and wide enough to fit flower stems.
- Turn the flower frogs occasionally to ensure even drying and to prevent warping.
- Allow them to dry completely before painting.
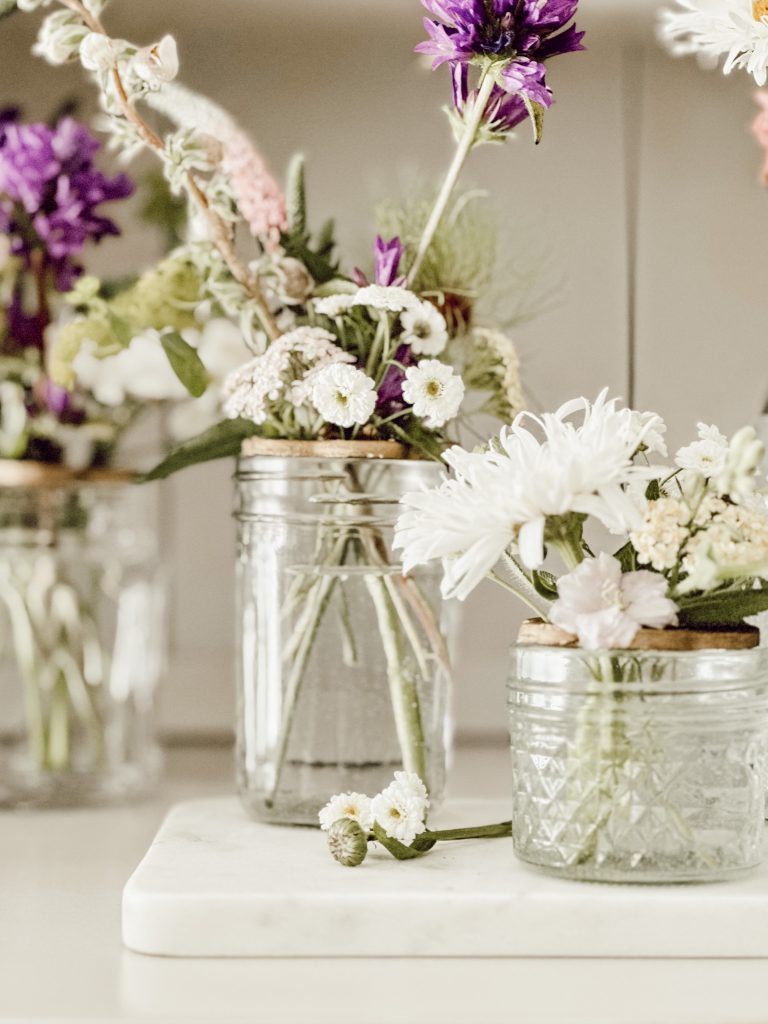
How to Use Flower Frogs
Flower frogs are an awesome tool for transforming any vessel into a vase and they make flower arranging so much easier, especially when it comes to flowers with heavier blooms.
Here’s how to use them…
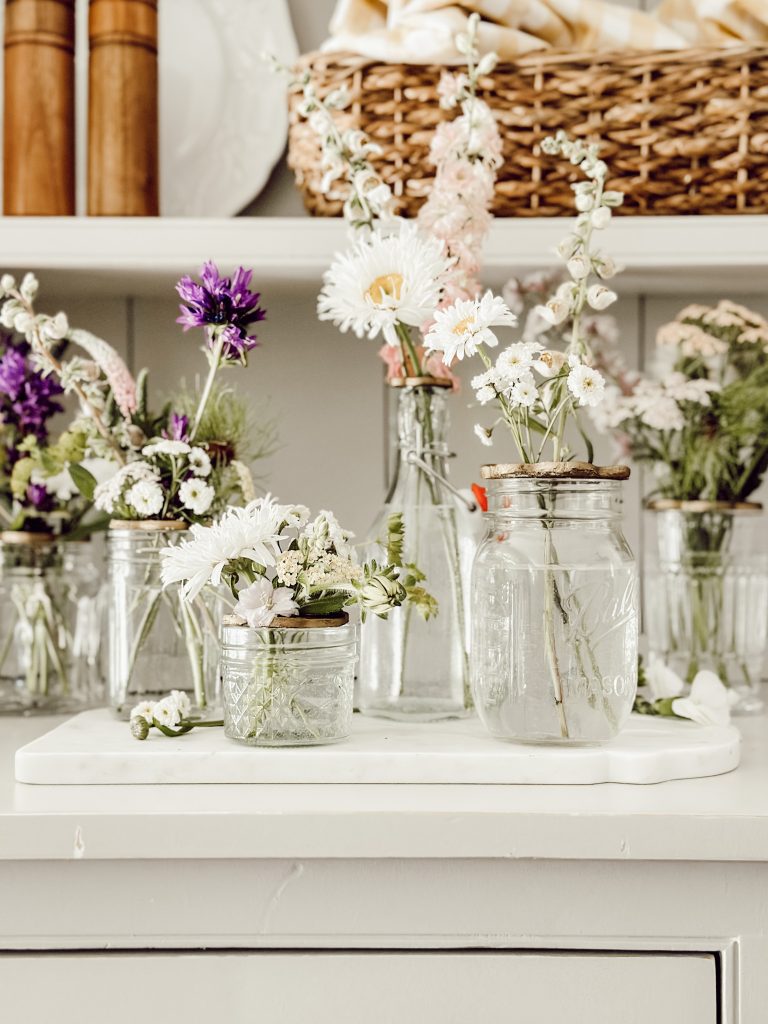
Choose Your Vessel
To start, select the vessel you want to create an arrangement in.
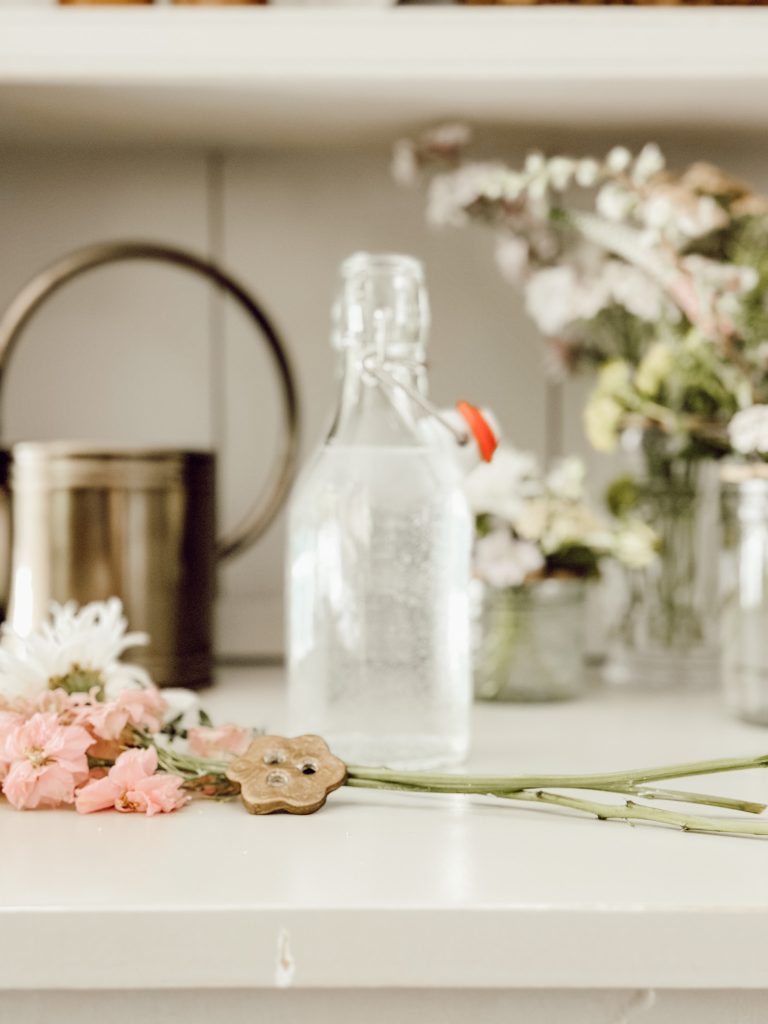
Flower frogs can transform any container into a vase, so get creative with your choice.
You can use jelly jars, mason jars, cups, mugs, carafes, pitchers…I think you get the picture that basically anything goes!
Add Water
Fill the container with water about 3/4’s of the way full.
Place the Flower Frog
Position your flower frog on the top of the vase or container.
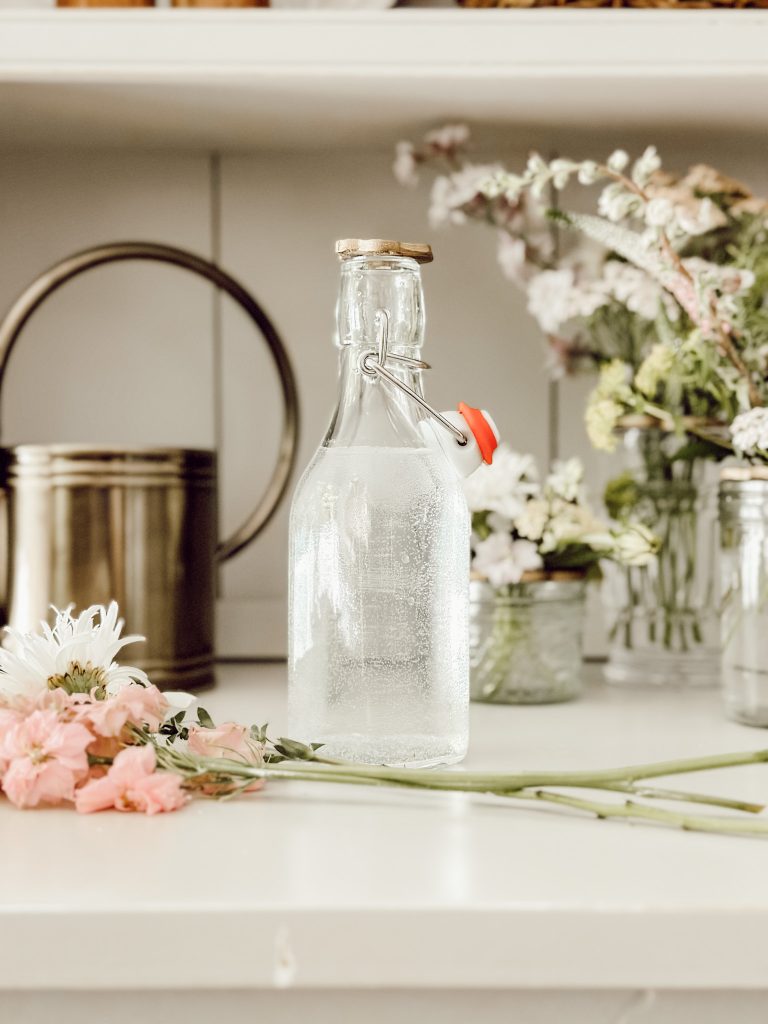
It’s ok if the flower frog is slightly larger than the vase opening, I think it adds to the charm of the arrangement.
Prepare the Flowers
Trim the stems of your flowers at an angle to make sure they drink up as much water as possible.
Remove any leaves or foliage that will be below the water line to prevent rotting and to keep the water clean.
Hey friend! What can I help you find?
Search our entire site!
Insert the Flowers Into the Flower Frog
Insert the stems of your flowers into the holes of the flower frog.
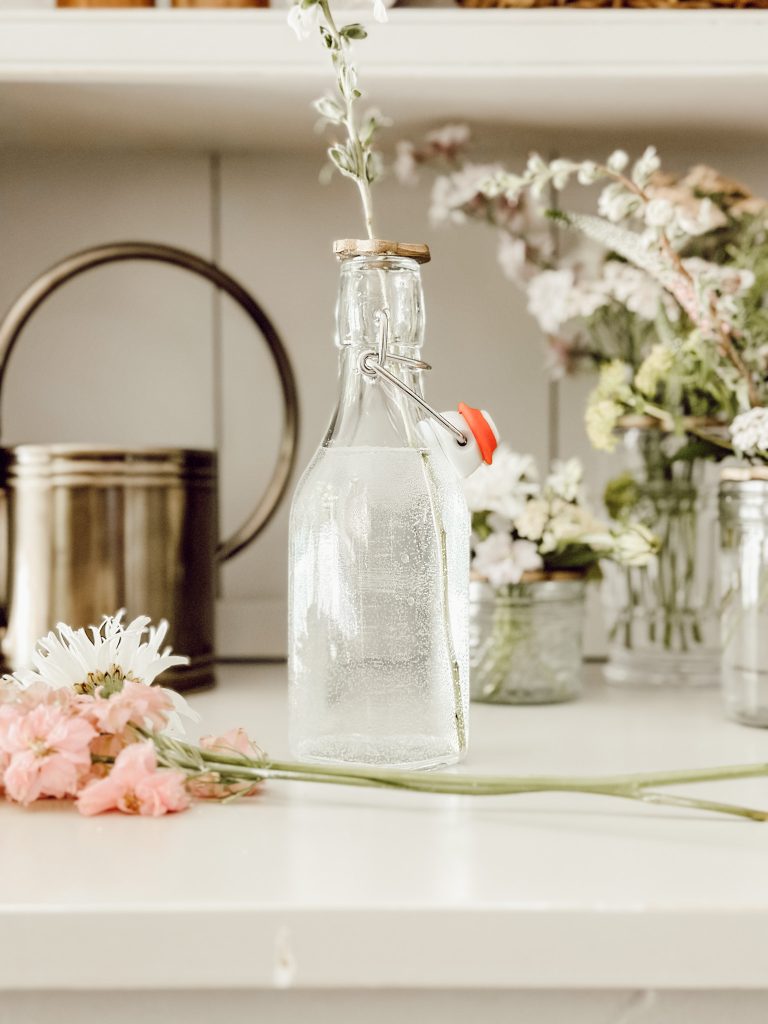
The frog will hold them securely in place, allowing you to position each flower precisely where you want it.
Start with the larger focal flowers, then add filler flowers and greenery to create a balanced arrangement.
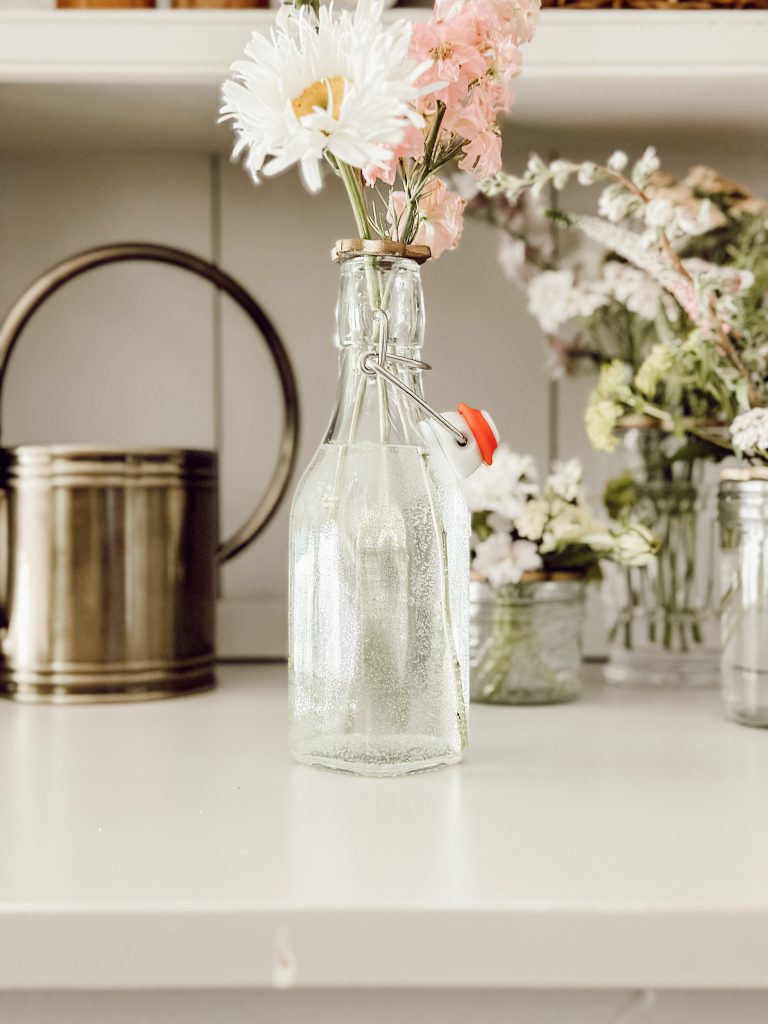
Adjust & Perfect
Once all your flowers are in place, step back and look at your arrangement from all angles. Adjust the positioning of the stems as needed.
The flower frog makes it super easy to move stems around without disrupting the entire arrangement.
And that’s it!
Wasn’t it so easy to create a pretty flower arrangement with the help of a flower frog?!
FAQ’s: DIY Air Dry Clay Flower Frogs
How long does it take for the air dry clay to dry completely?
Drying time can vary depending on the thickness of the clay and the humidity of your home. Generally, it takes 24 to 72 hours for air dry clay to dry completely.
What should I do if the clay cracks while my flower frog is drying?
Minor cracks can be smoothed out with a damp finger before the clay dries completely. For larger cracks, you can try filling them with a small amount of fresh clay and gently smoothing it out.
Can I make flower frogs in different shapes and sizes?
Absolutely! Use cookie cutters or a knife to create various shapes and sizes. This allows you to customize the flower frogs to fit different vases and arrangements.
What is the best way to clean an air dry clay flower frog?
Clean your clay flower frog by gently wiping away any dirt or debris with a damp cloth.
You can also use a Q-Tip to wipe away any plant material that might get stuck in the flower frog holes.
I don’t suggest submerging these flower frogs in water to clean them, unless you spray them with a waterproof sealant first.
DIY Flower Frogs Are a Great Gift Idea
Whether you’re celebrating a birthday, anniversary, housewarming, or simply want to brighten someone’s day, a vase of flowers with a DIY air dry clay flower frog is a wonderful and heartfelt gift idea.
It combines creativity, functionality, and personalization into one thoughtful package that your gift recipient will be sure to appreciate and admire.
You might also
Enjoy These DIY Projects
Shop My Favorite Products
Shop my favorite home decor & lifestyle products, my LTK sources, and my Amazon Storefront. By making a purchase with one of my affiliate links, I earn a small commission which helps me continue to create meaningful content for you!
I look forward to sharing more of my home with you and inspiring you to have a well loved home! Follow me on Facebook, Instagram, Pinterest, and LIKEtoKNOW.it.
xoxo, heidi
Don’t forget to pin this for later…
shop the post


Thank you Erin!
What a great idea! This is so much better than using tape to create a grid for flowers. Love it!
Thank you for covering this issue in such detail. Very informative
Thank you Rachel!
Heidi
These turned out so cute.
Thank you Cindy!
I love this! Each one turned out perfectly. So cute. pinned