
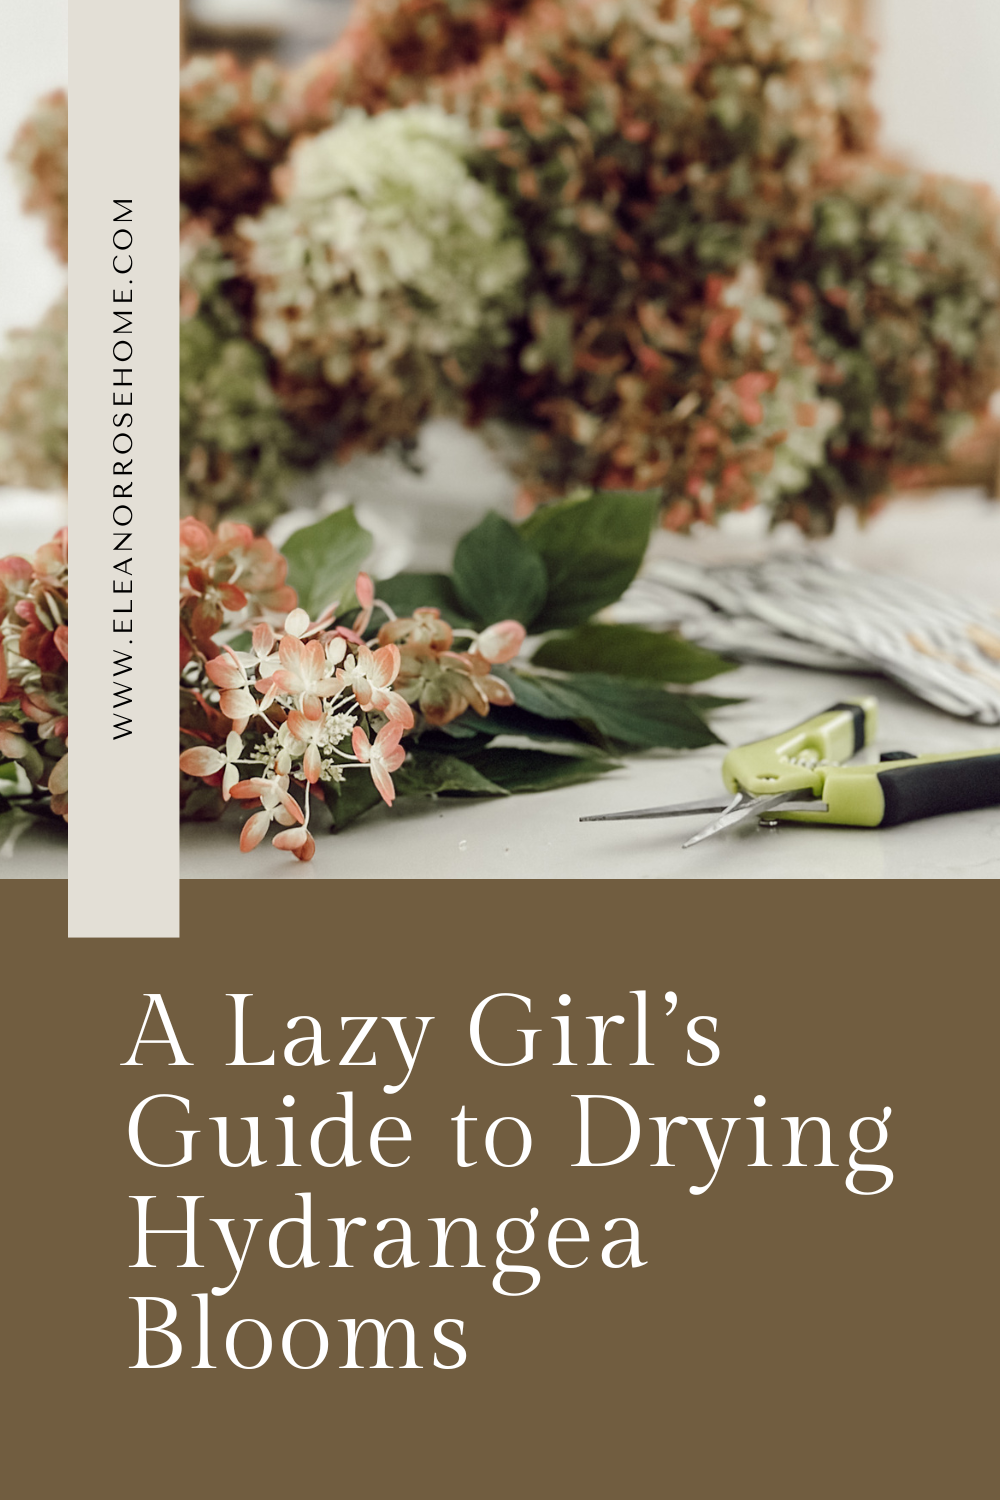
A Lazy Girl’s Guide to Drying Hydrangea Blooms
 Shop This Post

Learn the easy way for drying hydrangea blooms without any complicated steps. Just let nature do the work for long lasting beauty!
For years (yes, years) I’ve been trying to dry hydrangea blooms how others have suggested.
I can’t tell you the countless hydrangea drying techniques I’ve tried from hanging them upside down in a closet to adding just a small amount of water to a vase of hydrangea stems to allow them to slowly dry out.
You name it, and I’ve probably tried it.
And I’ve mostly ended up frustrated.
Some petals drooped, others turned brown too quickly, and I spent way too much time worrying about something that’s supposed to be simple.
Recently, I decided to throw all the complicated steps out the window and try a new approach.
I left the blooms right on the bush and let nature take its course.
No fancy hacks, no constant monitoring, just a little patience.
And to my surprise, it worked perfectly!
The petals dried in place, kept their shape, and I finally had hydrangea blooms that lasted for months.
So, I thought I would share my lazy girl method for drying hydrangea blooms if you love the look of dried flowers like I do, but don’t want any hassle.
Here’s how to do it…
Your One-Stop-Hydrangea-Shop
Why Dry Hydrangeas
Dried hydrangeas aren’t just pretty, they’re incredibly versatile and bring a touch of natural beauty into your home in ways fresh flowers sometimes can’t.
Here’s why I love them (and why you might too!):
- Unlike fresh blooms that fade in a week, dried hydrangeas can last for months, even years if cared for properly. This means you can enjoy them well beyond the summer season.
- Once they’re dry, hydrangeas require virtually no maintenance. No water, no deadheading, no daily attention. You can arrange them in a vase, tuck them into a wreath, or add them to a centerpiece and basically forget about them.
- Dried hydrangeas can be used for multiple seasons. Their muted, papery tones pair perfectly with fall pumpkins, winter greenery, spring pastels, or summer decorations.
The Best Time to Dry Hydrangeas
Timing is key when it comes to getting beautifully dried hydrangea flowers, even if you’re taking the lazy girl approach.
Knowing when to let your blooms naturally dry on the bush will make all the difference in color, shape, and longevity.
Wait Until the Blooms are Mature
The best time to start drying hydrangeas is after the flowers have fully matured and reached their peak size.
At this stage, the petals are strong enough to withstand drying without wilting too quickly.
Blooms that are still small or tightly closed won’t dry well, they may shrivel or lose their shape.
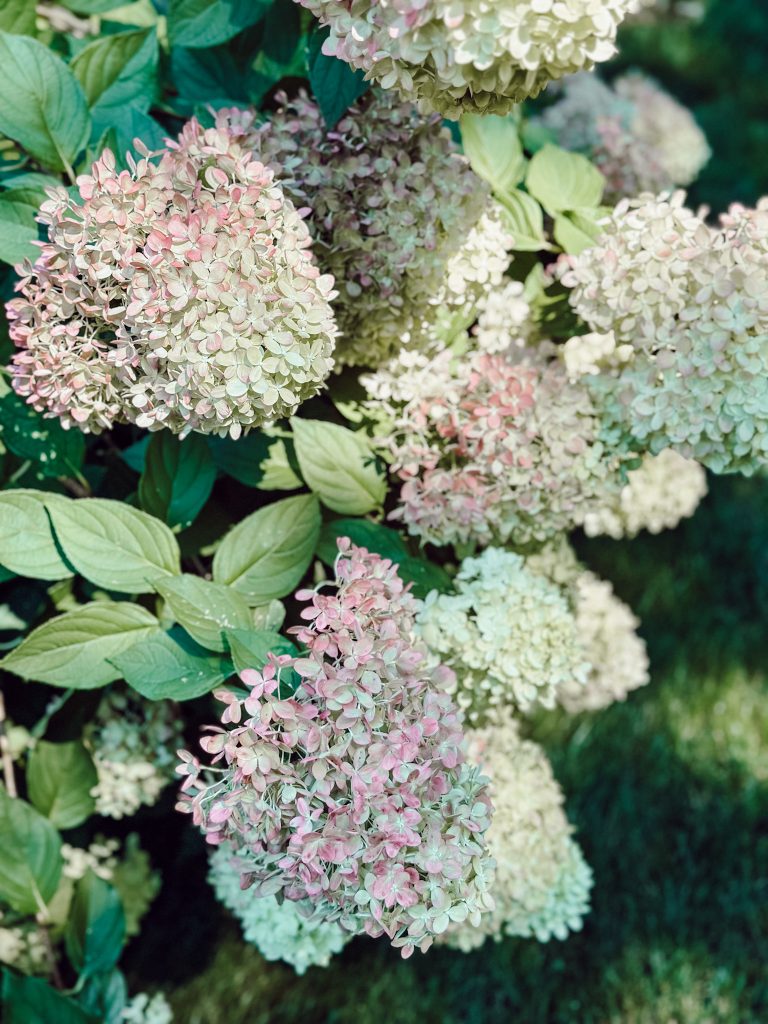
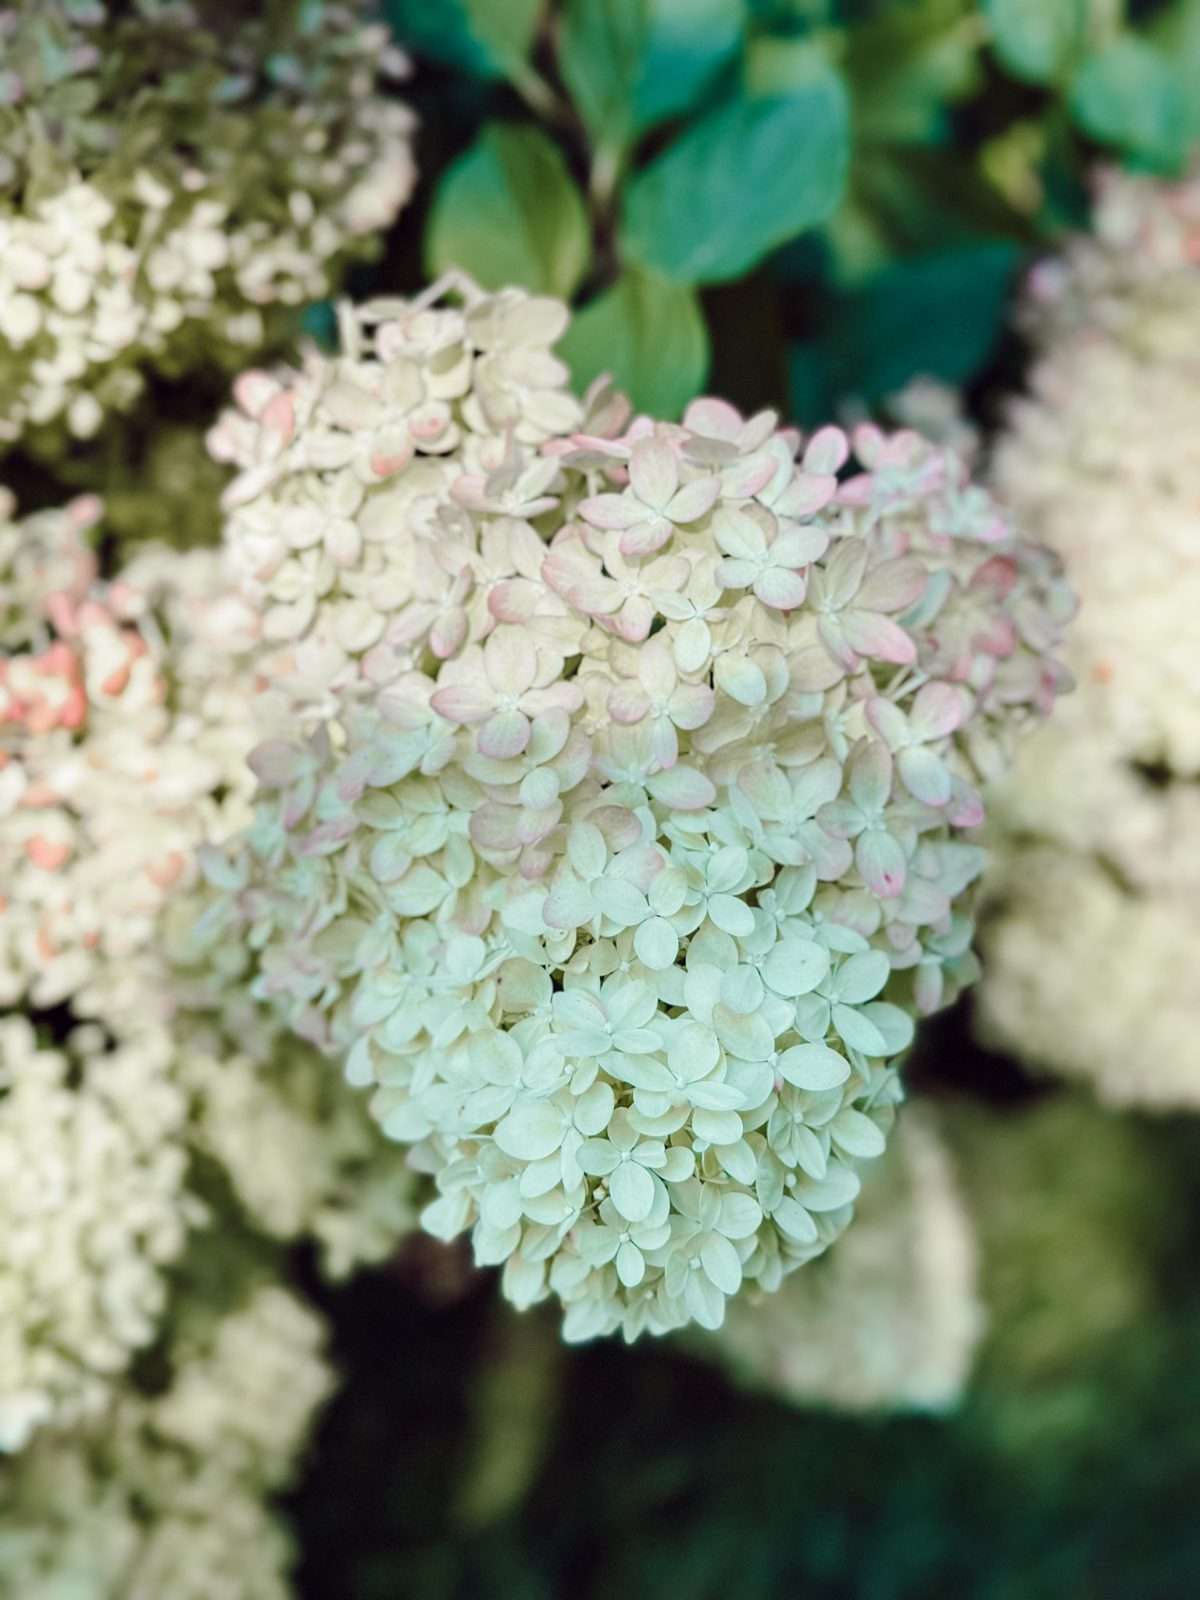
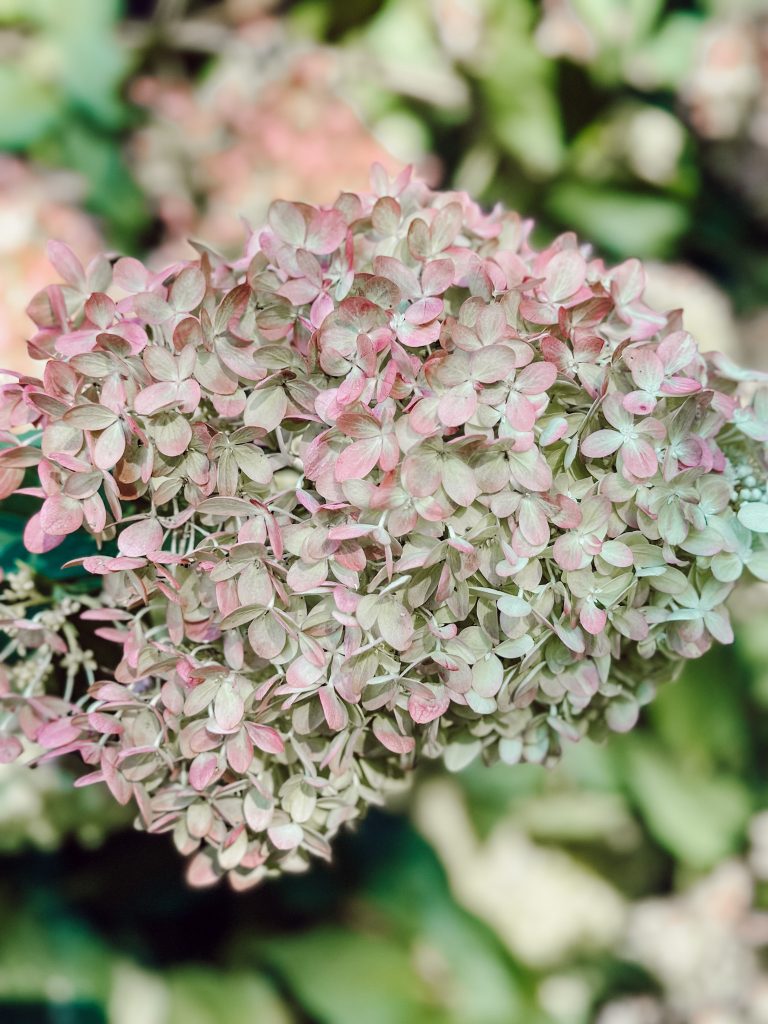
Look for Natural Color Changes
Hydrangeas naturally start to change color as the season progresses. Depending on the variety:
- Limelights: Start bright lime green in early summer, but by late summer and early fall, they’ll shift to a subtle pink or blush tone (perfect for drying).
- Pink Hydrangeas: Fade to dusty rose or mauve as they mature.
- Blue Hydrangeas: Turn powdery slate or lavender.
- White Hydrangeas: Take on creamy ivory or beige.
These muted colors are the hallmark of perfectly dried hydrangeas.
For the lazy girl approach, this is your cue: leave the blooms on the bush and let them dry naturally.
End of Growing Season
For most climates, the ideal time to harvest is late summer to early fall, after the peak bloom period.
At this point, the flowers are mature, the plant is winding down, and the weather is typically drier.
Avoid Overly Wet or Frosty Conditions
If your area is experiencing heavy rain or early frost, it’ll interfere with the drying process.
Too much moisture can cause flowers to mold, while frost can damage the petals.
If this happens, bring your selected blooms indoors to a cool, dry spot with good airflow and let them finish drying naturally.
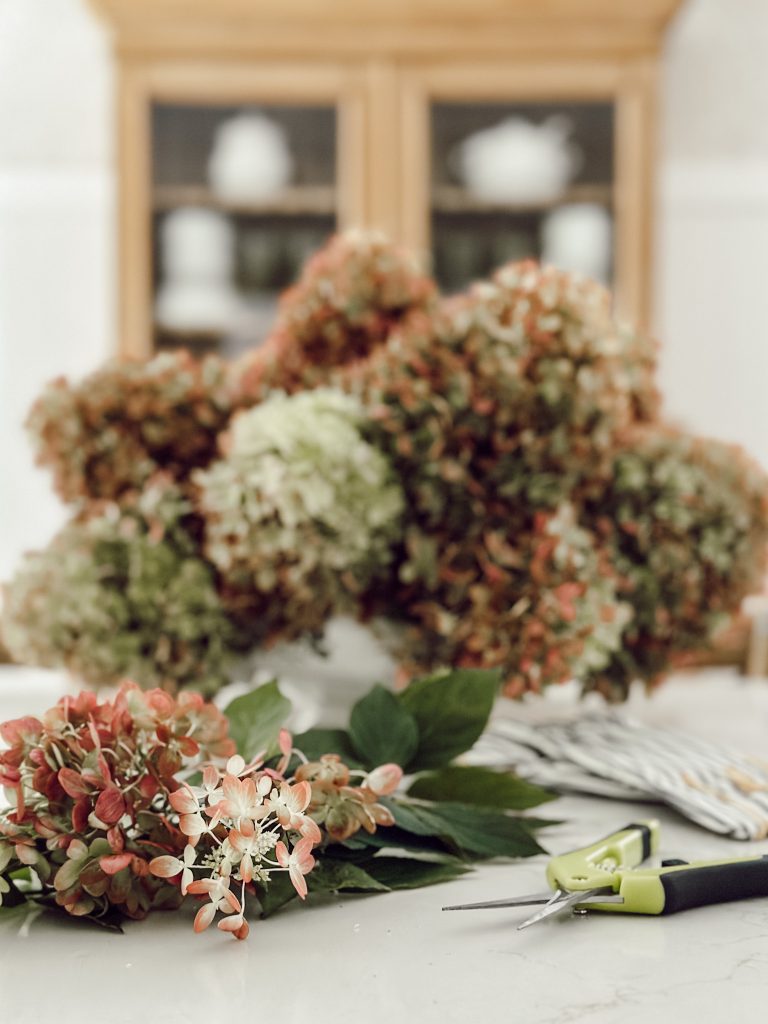
Step-by-Step Lazy Girl Method for Drying Hydrangeas
Drying hydrangeas doesn’t have to be complicated (man I wish I knew that sooner), and this lazy girl method proves it.
The secret is to let nature do most of the work while you step back and enjoy the process.
I’m Heidi, the heart and hands behind Eleanor Rose Home.

I’ll show you that your home can become a place of warmth, comfort, and style with practical tips, creative ideas, and my own journey to help you create a space that feels like you…welcoming, personal, and full of charm.
Choosing the Right Blooms
Start by identifying the right blooms to dry.
You’ll want fully opened, mature flowers that are healthy and mostly free from any damage.
For Limelight hydrangeas, pay attention to their natural color changes, bright lime green in early summer slowly softens to chartreuse in mid-summer and then fades to creamy white with blush tips by late summer or early fall.
Waiting for these color shifts ensures your dried blooms will have the soft, muted tones that make them so beautiful.

Letting the Blooms Dry on the Bush
Next, leave the blooms on the bush and allow them to dry naturally.
This is the essence of the lazy girl approach.
Late summer to early fall is ideal for harvesting, as the flowers are mature and the weather is drier.
cozy inspiration delivered to your inbox
When you join our newsletter!
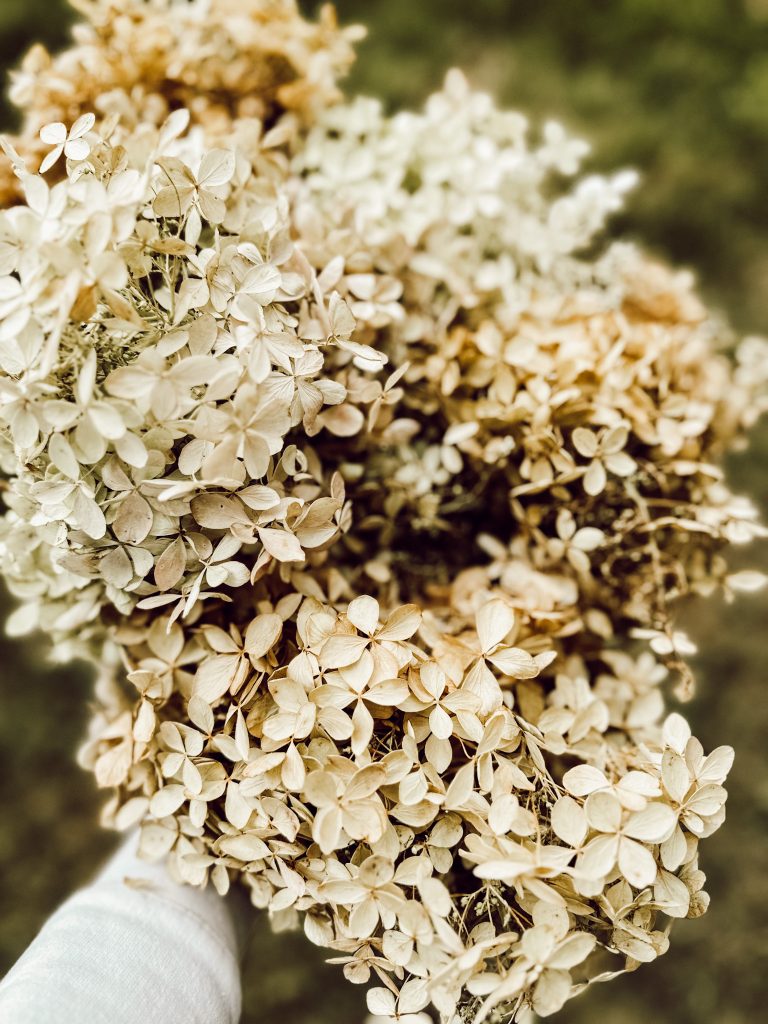
Cutting the Hydrangea Blooms at the Right Time
Once the blooms feel dry to the touch but still slightly flexible, it’s time to cut them.
Use clean, sharp pruners to avoid crushing the hydrangea stems.
How long should I cut the stems?
When cutting your hydrangea stems, it’s best to leave them a little longer than you think you’ll need. Longer stems give you flexibility for arranging in vases, wreaths, or other displays, and you can always trim them later if needed.
Preparing Hydrangeas Before You Bring Them Inside
Before you bring your dried hydrangea blooms indoors, give them a gentle shake to remove any loose seeds, dirt, insects, or petals.
Next, carefully strip away most of the leaves.
Leaves can hold moisture and may cause the flowers to mold or discolor over time, so removing them helps your hydrangeas last longer and keeps them looking fresh.
Lazy Girl Hydrangea Drying Tips
Displaying Your Dried Hydrangeas

Once your hydrangeas are dried, the fun part begins…finding the best way to show them off!
The easiest option is a simple arrangement.
You can place a few longer stems in a tall vase or cluster shorter stems in a small container (remember the blooms are dried so there’s no need to add water).
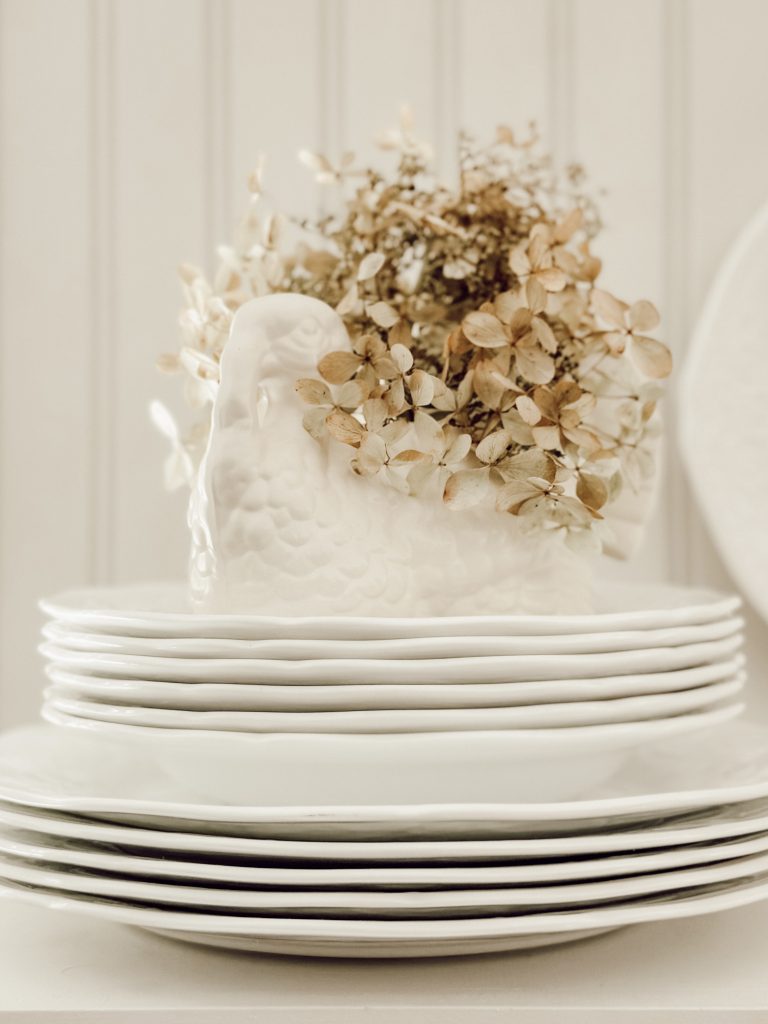
But, dried hydrangeas aren’t just for arrangements.
They’re perfect for wreaths, garlands, seasonal centerpieces, and so much more.
I’ve even tucked dried hydrangea flowers into our Christmas tree!

You do want to make sure to keep the dried hydrangeas out of direct sunlight to preserve the color, and dust them lightly with a soft brush or a quick blast from a cool hairdryer to keep them looking fresh.
Dried Hydrangea Decorating Ideas
- Vase Arrangements
- Wreaths
- Vignettes
- Terrariums or Cloches
- Garlands
- Tablescapes
- Centerpieces
- Present Toppers
- Fireplace Mantel
- Mixed Dried Floral Bouquets
- Christmas Tree Decor
How to Store Hydrangeas You’ve Dried
If you want to put away your dried hydrangeas, proper storage is key to keeping them looking beautiful.
Start by choosing a cool, dry spot away from direct sunlight, humidity, or drafts since these can cause the petals to fade, curl, or become brittle.
Keep the blooms upright if possible, either in a tall vase, a box, or wrapped loosely in tissue paper.
Avoid stacking them too tightly, as the petals are delicate and can easily crush.
For extra protection, you can place a layer of soft tissue or packing paper between blooms.
You can also give dried hydrangeas a light mist of hairspray to reduce shedding and help preserve their shape.
When stored properly, your blooms can last for many months or years, ready to bring cozy charm to your home whenever you’re ready to display them.
Hey friend! What can I help you find?
Search our entire site!
What to Do if You Cut Hydrangea Blooms Too Early
Sometimes, you might cut a hydrangea flower before it’s completely dry.
Don’t panic!
There are simple ways to rescue it and still enjoy their beauty…
- Display Them: Place cut stems in a vase with water to enjoy fresh blooms, or add just a small amount of water and let them dry naturally once the petals start to feel firm.
- Finish Drying Indoors: Place the stems in a cool, dry area with good airflow. A countertop, shelf, or even a spare corner of a room works great. Keep them upright in a vase without water or lay them on a tray with paper towels.
- Check Regularly and Rotate: Gently turn the stems or shift the blooms every few days. This encourages uniform drying and prevents one side from curling or discoloring.
- Keep Away From Moisture and Sun: Avoid areas that are humid or exposed to direct sunlight. Moisture can cause mold, while sunlight can fade colors.
- Be Patient: Even if the petals feel a little soft at first, they may firm up and become long-lasting over the next week or two.

Drying Hydrangeas Frequently Asked Questions
Can all hydrangea varieties be dried?
Most hydrangea types dry beautifully, including Limelight, Annabelle, and mophead varieties. Some smaller or lacecap blooms may shrink more, but they can still work well in arrangements.
What supplies do I need to dry hydrangea blooms?
The great thing about drying hydrangeas the lazy girl way is that you don’t need much! All you need are hydrangea blooms and a pair of sharp pruning shears. You may also want a light mist of hairspray to reduce shedding once you bring them inside.
Is there a right or wrong way to cut the stems from the hydrangea bush?
Yes. Use sharp gardening shears to make a clean cut, ideally just above a leaf node or side branch. Cutting too low or snapping stems can damage the plant. For the lazy girl method, it’s also helpful to cut the stems longer than you think you need, this gives you flexibility for arranging the blooms.
How do I know when hydrangea blooms are fully dry?
Fully dried hydrangea blooms feel papery and lightweight. The petals should be firm, not soft, and the stems sturdy. You’ll notice the bloom colors will turn darker starting late summer and early fall.
What are some other methods for drying hydrangeas?
While the lazy girl method of leaving blooms on the bush is my favorite, there are several other ways to dry hydrangeas. You can hang stems upside down in a dark, dry, well-ventilated space. Some people use silica gel to dry individual blooms quickly and preserve their color. Finally, some try leaving a tiny amount of water in a vase and letting the blooms dry slowly, however I have tried this approach, and have not had much success.
You Might Also Enjoy
-
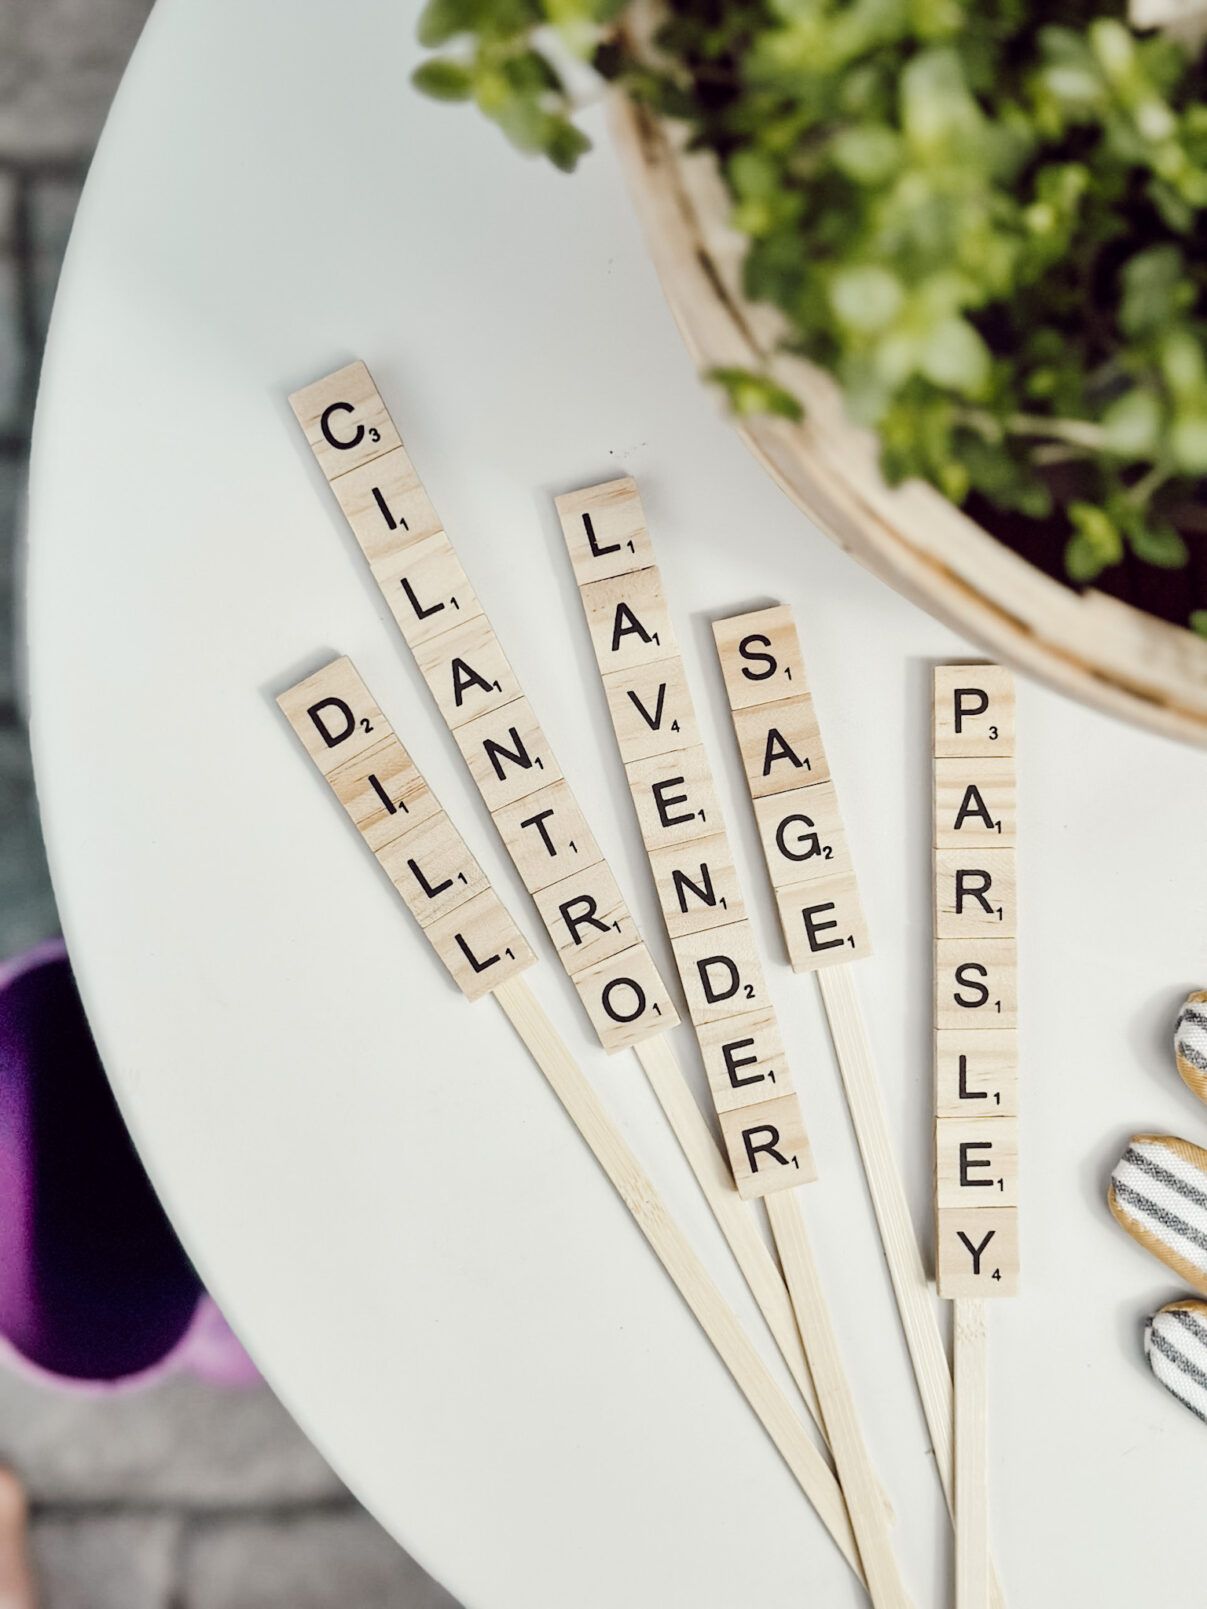
DIY Plant Labels for the Garden Using Scrabble Tiles
These DIY plant labels made with Scrabble tiles are one of the easiest and most budget-friendly garden projects you’ll ever…
-
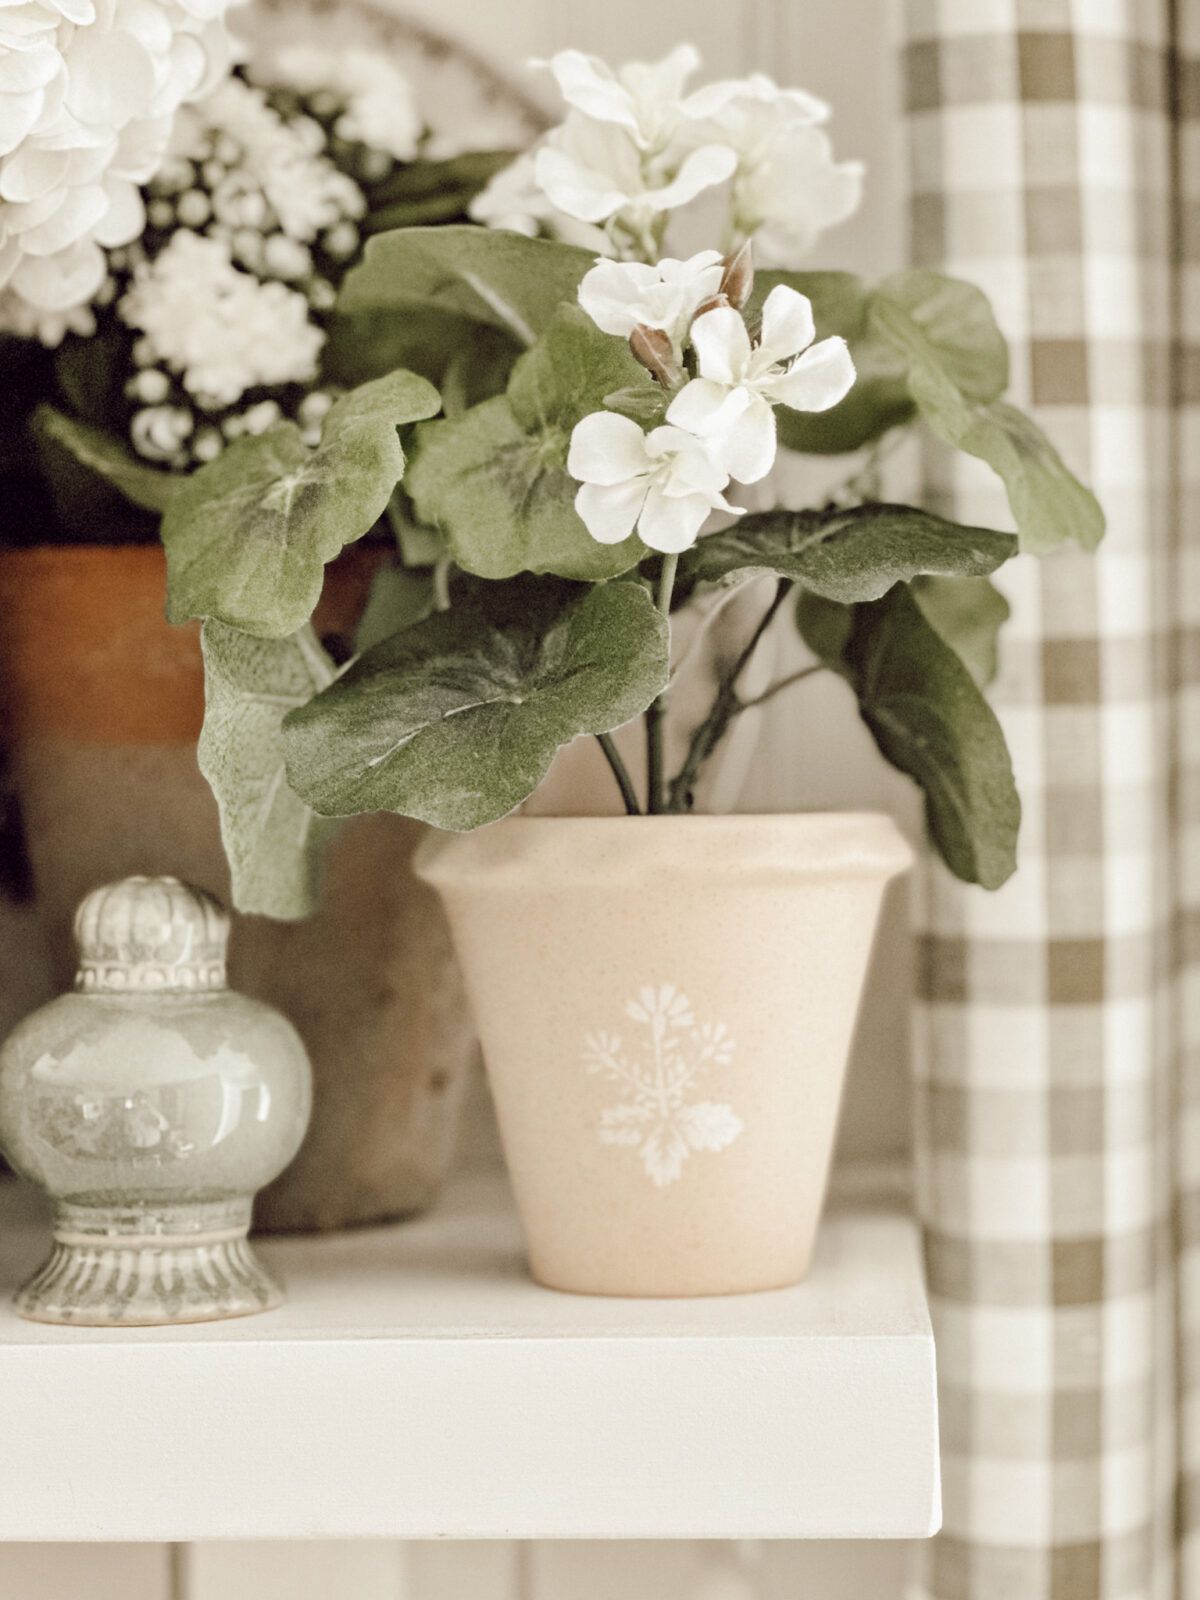
Easy DIY Stenciled Flower Pots You Can Make in 10 Minutes or Less
Easy DIY stenciled flower pots made with this simple tutorial. Perfect for customizing pots for spring, patios, or indoor plants….
-
Little Lime vs Limelight Hydrangea: What’s the Difference?
If you’re deciding on whether to plant little lime vs limelight hydrangea, we’ll break down the differences in size, color,…

Shop My Favorite Products
Shop my favorite home decor & lifestyle products, my LTK sources, and my Amazon Storefront.
By making a purchase with one of my affiliate links, I earn a small commission which helps me continue to create meaningful content for you!
I look forward to sharing more of my home with you and inspiring you to enjoy simple cozy living!
Follow me on Facebook, Instagram, Pinterest, and LIKEtoKNOW.it.
xoxo, Heidi


Don’t forget to pin this for later!
Shop this post


