
DIY Easter Candy Jar for Gifts, Decor, and Spring Treats
 Shop This Post

Create a DIY Easter candy jar with this easy spring craft idea. Perfect for filling with treats, decorating your home, or gifting.

Easter is one of my favorite holidays.
It was always a special time as a child, which is why I think I still love Easter today.
It’s so fun adding pastel colors and rabbit figurines to our home’s decor.
And think about it, what other time of the year are eggs used as decorations?!
Easter decor is light and refreshing, which is exactly how I want our home to feel heading into spring.
Recently, a friend on Instagram shared the cutest DIY where she took plain old glass storage jars and affixed ceramic figurines to the top.
For some reason it reminded me of my favorite Easter book as a child, “The Country Bunny and the Little Gold Shoes.”
Did you read that book too?
You guys know I love anything nostalgic, so when I saw this adorable DIY, I knew I had to create something similar in our home for Easter.
These candy jars are simple, inexpensive, and absolutely adorable.
Let me show you how easy this Easter craft is to make!
5-Stars From Our Readers
Such an adorable craft, Heidi!! I love how easy this is and that you can use any kind of animal figurine for the top. So many ways you could style this pretty jars. – Rachel
What You’ll Love About These Easter Candy Jars
Supplies You’ll Need to Make These DIY Candy Jars
This project cost me less than $20 to make and took less than one hour to complete (that includes time to allow the spray paint to dry).
If you’re looking for an adorable, inexpensive, and easy Easter DIY…this one is for you!

materials you’ll need
*If you make a purchase using one of these links, I may receive a small commission. This does not add any cost to you, but helps me to continue to create & share meaningful content. Thank you for supporting my small business!
I’m Heidi, the heart and hands behind Eleanor Rose Home.

I’ll show you that your home can become a place of warmth, comfort, and style with practical tips, creative ideas, and my own journey to help you create a space that feels like you…welcoming, personal, and full of charm.
Step by Step Guide on How to DIY an Easter Candy Jar
Here’s the simple tutorial on how to make this fun and festive Easter DIY!
cozy ideas delivered to your inbox
When you join our newsletter!
Step One: Add the Animal Figurine to the Jar Lid & Spray Paint
Make sure to start this project with clean, dry jars and lids.
Place a small dab of adhesive on the bottom of the animal figurine and a small dab of glue in the center of the lid.
Place the animal figurine in the center of the lid, pressing down firmly to make sure the figurine is attached to the lid.
Allow the glue to dry for about 5-10 minutes.
In a well ventilated area, spray paint the animal figurine and the lid (this may require 2 coats of spray paint).
Allow the spray paint to dry for at least 30 minutes.

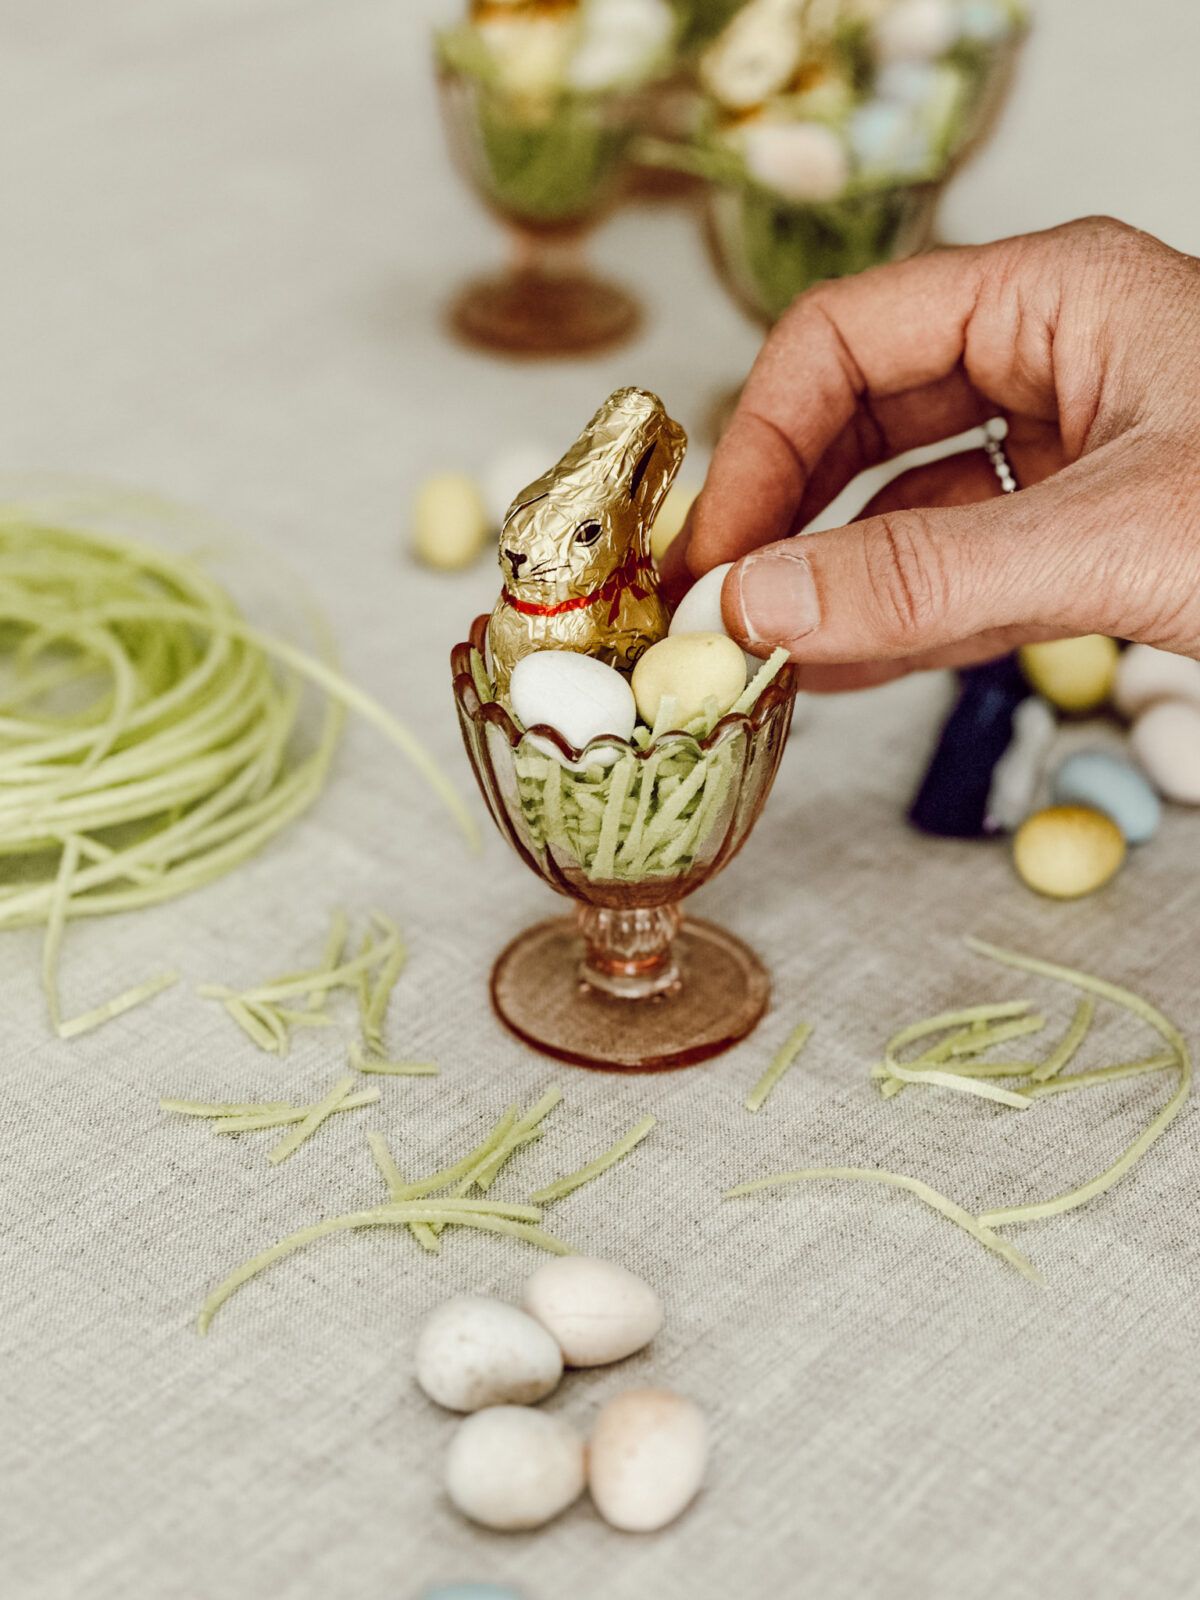
Step Two: Fill the Glass Candy Jars
While the spray paint drys on the lids, add a small amount of Easter grass to the bottom of each jar.
If you’re using different sized jars, you may want to add more grass to the larger jars and less to the smaller jars.
Place the Easter candy inside each jar on top of the Easter grass (you want the inside of the jar to resemble a nest with eggs inside).
Once the lids are dry, screw them on top of the glass jars for the cutest Easter candy jars!


Helpful Tips
- If you are using old lidded jars, clean them thoroughly before starting. Removing any labels and adhesive residue will ensure a smooth surface for painting and decorating.
- Use a strong adhesive like Gorilla Glue or super glue to attach the animals securely to the lids. Make sure that they are centered and firmly adhered to avoid any accidental detaching.
- When spray painting, work in a well ventilated area and wear protective gloves and a mask.
- Fill the jars with other anything you want! Homemade treats, assorted chocolates, or even small toys can be placed inside the jars for gifting.
Variations and Substitutions to Easily Customize Your DIY Easter Candy Jars
Here’s a few ideas on how to change up this easy Easter craft to make it your own…
Hey friend! What can I help you find?
Search our entire site!
- Spray paint the figurines and lids white or any pastel Easter color.
- Any size glass jar will work for this craft. You can keep all the jars the same size or different for an eclectic look.
- Tie a bow around the animal figurines neck for a whimsical touch.
- Jelly beans, wrapped chocolate eggs, or malted milk eggs would be great candy options in these candy jars.
- These jars can be used for more than just candy. How cute would these jars be on a bathroom shelf with cotton balls or Q-tips inside!

Frequently Asked Questions
What kind of paint should I use for this DIY?
Spray paint works best for an even finish, especially on jar lids and figurines. Metallic antique gold creates a vintage look, but white or pastel colors like pink, blue, and yellow are perfect for Easter. Be sure to let the paint dry fully before handling.
Are DIY Easter candy jars food safe?
Yes, as long as the interior of the jar is not painted. Since the paint and glue are applied to the outside lid only, the inside of the glass jar remains food safe.
What kind of jars work best?
Mason jars, jelly jars, and recycled food jars with screw on lids all work well. Using different jar styles actually adds charm and makes each Easter candy jar unique.
What candy should I put inside?
Cadbury mini eggs are a classic choice, but jelly beans, chocolate eggs, pastel M&M chocolate candies, or any favorite Easter candy will work.
Can I use this candy jar as a gift?
Absolutely! These jars make adorable Easter basket additions, teacher gifts, hostess gifts, or spring table decor.
Did you make this craft?
Mention us @eleanorrosehome or tag us using #eleanorrosehome so we can see your creations. You can also leave a comment below!
You Might Also Enjoy
-
15+ Easy DIY Easter Crafts You Can Make in an Afternoon
Over 15 quick and easy DIY Easter crafts that are simple, affordable, and great for decorating your home for spring…
-
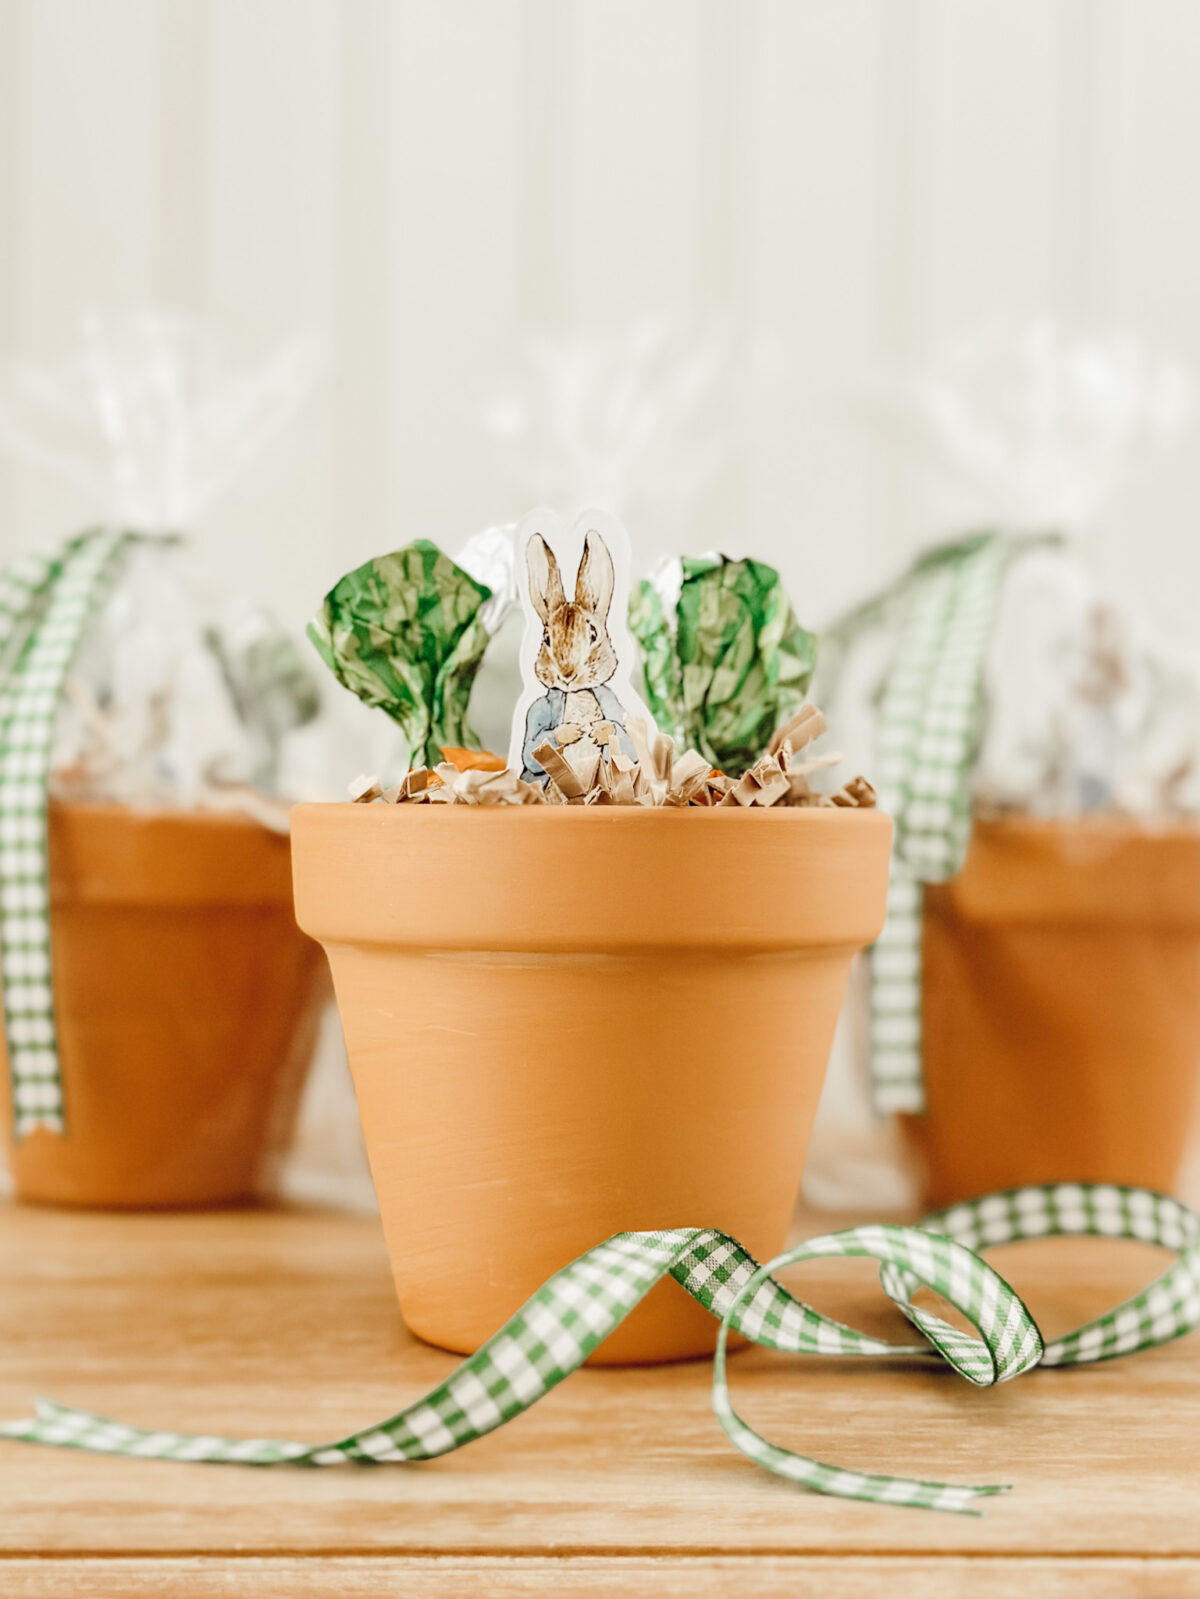
DIY Easter Gift: Peter Rabbit Chocolate Carrots in Terracotta Pots
Make a simple DIY Easter gift using Peter Rabbit cutouts and chocolate carrots placed inside small terracotta pots. If you’re…
-
Free Printable Easter Wall Art for Cozy Cottage Style Decor
Free printable Easter wall art to decorate your home for spring. These cozy cottage inspired designs are great for frames,…

Shop My Favorite Products
Shop my favorite home decor & lifestyle products, my LTK sources, and my Amazon Storefront.
By making a purchase with one of my affiliate links, I earn a small commission which helps me continue to create meaningful content for you!
I look forward to sharing more of my home with you and inspiring you to enjoy simple cozy living!
Follow me on Facebook, Instagram, Pinterest, and LIKEtoKNOW.it.
xoxo, Heidi
Don’t forget to pin this for later!

Shop this post


Thank you so much!
Amazing! Really like your post
Thank you so much Cindy! I will see you this week!!!
These are the sweetest candy jars! Thanks for sharing. I’m excited to tell you that this post will be featured in Tuesday Turn About Link Party this week! Thanks so much for linking up and we hope to see you this week! Pinned ?
Thank you! Yes these could be customized for any season!
I LOVE this DIY! I’ve always wanted to make jars with animals on top — these are a great way to do it! Thanks for sharing at Vintage Charm. xo Kathleen
Thank you Rachel!
Such an adorable craft, Heidi!! I love how easy this is and that you can use any kind of animal figurine for the top. So many ways you could style this pretty jars. Pinned!
Thank you Cindy, I appreciate that so much!
Thank you for linking up on Farmhouse Friday. I loved these so much I’m featuring them tomorrow! Seriously, so stinkin’ cute! pinned again!
Hi Lynn! My pleasure, thank you!
This is such a great idea! Thank you so much for sharing it with the Fabulous Friday Link Party!
Thank you Michele, I appreciate that so much!
So cute Heidi! We will be featuring your post on the Fabulous Friday Link party this week.
Thank you Anna! I love that idea too!
This is such a cute idea! It would be adorable on a place setting for Easter. Thank you for sharing the step by step tutorial
Thank you MaryJo!
These are adorable! What a great idea. XO- MaryJo
Thank you so much Cindy! I was very happy with how the candy jars turned out, I can’t wait to give them out as gifts Easter weekend!
My gosh, if these aren’t the cutest things since the color pink, I don’t know what is! So clever. Love the color you chose (instead of a pastel). Your home always looks amazing. And I’ve loved your picnic series too. Yum!
Thank you Renae!!!
Such a cute idea! I love it!
Thank you Charity!
Thank you Kelly! This group is amazing, I’m so excited to be a part of it!
I absolutely love this Easter Candy Jar project! I need to make a few myself too! Thanks so much for sharing, they are too cute!
Heidi your Easter candy jars turned out so well! Goodness they are pretty and charming and I love how your creative brain thinks. Thankful for this group!
Thank you Kim!
Thank you Jennifer! I am loving these, quite possibly my favorite Easter DIY to date!
Thank you Jennifer!!!
Thank you Nicolle! I am so excited for this new group, it’s going to be so fun each month! Thank you for including me!
What a fun collab! Your candy jars are so cute, Heidi!
Oh my gosh. These are so dang cute!
Such a good idea, they look so pretty! Love this group of gals, this will be fun to follow!
Heidi these jars are just beautiful!!! They would make a great hostess gift for Easter! And I also loved The County Bunny when I was little. I’m so happy to be doing this series with you!