
Decoupage Oyster Shells With Napkins: DIY Trinket Dish
Create beautiful DIY trinket dishes with this easy tutorial on how to decoupage oyster shells with pretty paper napkins.

This DIY craft was not on my radar until I was browsing Homegoods and found the sweetest paper napkins featuring the coziest little cottage scene.
I’ll let you in on a little secret of mine (please keep this between me and you), I always check the napkin section when I’m at Homegoods.
Even if I’m there for something completely different, I can’t help but to take a peek.
They’ve got the prettiest seasonal designs, and I’ve learned that a napkin can be used for so much more than setting the table.
So when I spotted this particular set with soft pastel colors, tiny little cottages, and adorable farm animals, I knew they were too special to keep hidden in a drawer.
I didn’t know exactly what I was going to make, but I was determined to turn them into something beautiful.
That’s when inspiration struck…why not decoupage them onto oyster shells?!
With a little paint and Mod Podge, ordinary oyster shells can become elegant, one-of-a-kind trinket dishes.
They’re the perfect little catch-all for jewelry, keys, or keepsakes.
Oh, and they make the most charming handmade gifts especially for Mother’s Day, birthdays, or holidays.
If you’re ready to get a little crafty and a whole lot cozy, I’ll show you how simple it is to transform oyster shells and pretty napkins into something really special.
What is decoupage?
If you’re new to decoupage, don’t worry, it’s actually much easier than it sounds!
Decoupage is the art of decorating a surface by gluing paper cutouts such as napkins, tissue paper, or printed designs onto an object and then sealing it with layers of glue or varnish.
It’s a simple, budget-friendly technique that can completely transform everyday items into something beautiful and unique.
You might remember the block print pumpkin or the Easter eggs I made using just napkins and Mod Podge.
In this post, we’re using decoupage to turn seashells into small trinket dishes.

What you’ll love about this diy:
Supplies You’ll Need to Decoupage Shells
Here’s everything you’ll need to turn oyster shells into decoupaged keepsake dishes….
materials you’ll need

*If you make a purchase using one of these links, I may receive a small commission. This does not add any cost to you, but helps me to continue to create & share meaningful content. Thank you for supporting my small business!
I’m Heidi, the heart and hands behind Eleanor Rose Home.

I’ll show you that your home can become a place of warmth, comfort, and style with practical tips, creative ideas, and my own journey to help you create a space that feels like you…welcoming, personal, and full of charm.
How to Make a Decoupage Oyster Shell Trinket Dish
Now that you’ve gathered your supplies, here’s the simple step-by-step tutorial on how to decoupage shells…
simple cozy living
Want more inspiration to make your home feel cozy and inviting?
Check out our collection of home decor ideas for creative tips and stylish touches you’ll love!
01
Prep Your Shells
The first step is starting with clean, dry oyster shells.
If they’re dirty, give them a quick rinse to remove any grit.

02
Paint the Inside White
Using a small paintbrush, apply white acrylic paint to the inside of the seashell.
This will create a clean base for your napkin design to pop against.
Let the paint dry completely.

A couple of pro tips…
- Start this DIY with a shell you don’t love. That way, you can get a feel for the process and practice applying the napkin without the pressure of perfection.
- You may want to apply two coats of paint if you’re using a light colored napkin and the muscle scar inside the oyster shell is very dark.
03
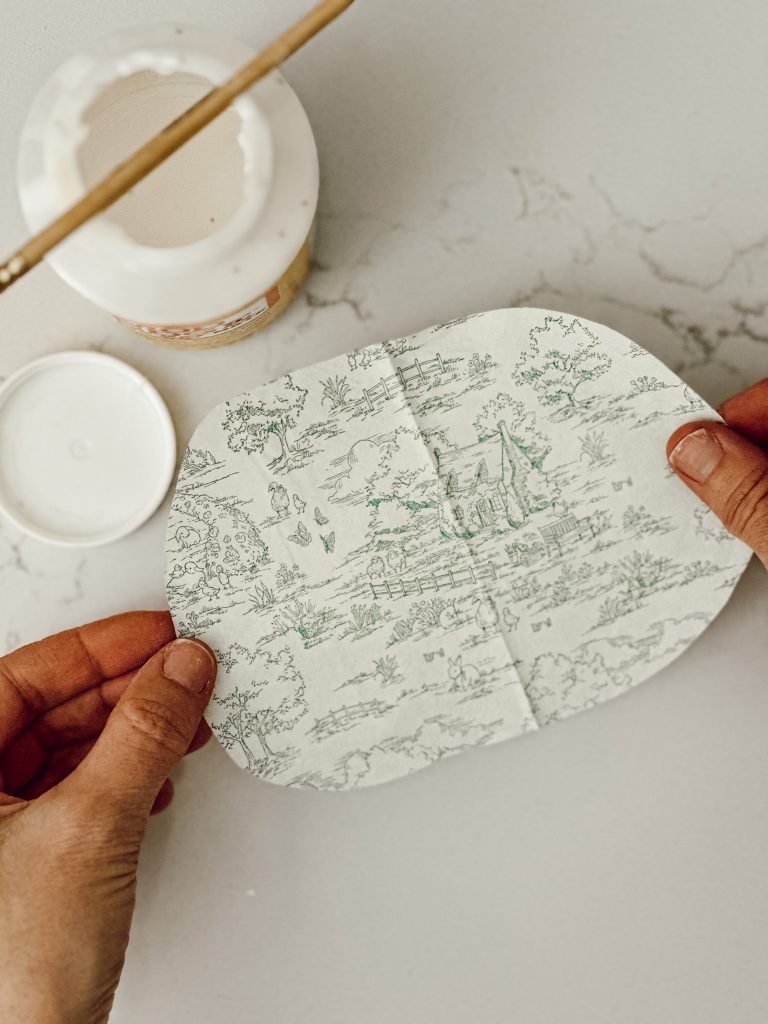
Separate the Napkin Layers
Most decorative napkins are 2 or 3-ply, so gently peel away the thin printed layer from the backing.
You only want to use the top printed layer.


04
Apply Mod Podge & Napkin
Brush a thin, even layer of Mod Podge onto the painted interior of the shell.
Cut out the section of napkin you’re going to use, carefully lay your napkin on top of the shell, then press it down gently with a soft brush to smooth it out and remove air bubbles.
Don’t worry if there are a few wrinkles, that’s what adds character!
Allow to dry for at least 15-20 minutes.


More Mod Podge projects we love!

Glitter Pumpkins

Air Dry Clay Coasters

Christmas Tree Ornaments
05
Seal the Top
Once the napkin is dry and firmly in place, brush another layer of Mod Podge over the top to seal it.
Let that layer dry completely.

06
Trim Any Excess & Seal the Edges
Use sharp scissors (or you can use a nail file to gently sand away) any napkin overhang around the edges.
Then apply a light coat of Mod Podge around the trimmed edges to seal them and prevent any lifting or fraying.
Let dry thoroughly before using or gifting.


Helpful Tips
- Make sure your shells are clean and dry before you start because any leftover grit or residue will show through.
- A small, soft paintbrush will help you apply Mod Podge evenly and prevent tearing the napkin.
- Roughly cut or tear your napkin to the general shape of the shell before applying it.
- Be patient between layers of Mod Podge. If you apply the next layer too soon, the napkin can wrinkle or lift.
- If bubbles or wrinkles appear, do not panic! Lightly press them out with your fingers or the flat edge of a dry brush.
Where can I find oyster shells for this project?
You can find clean oyster shells on Amazon which is where I found mine, at local seafood restaurants (ask if they’ll save some for you), or collect them yourself if you live near the coast.

How do I clean oyster shells before crafting with them?
Soak the shells in a solution of water and bleach (about 1 part bleach to 10 parts water) for a few hours.
Scrub off any remaining residue, rinse thoroughly, and let them dry completely before painting.
Can I use another kind of seashell?
Oyster shells are perfect for their size and shape, but you can definitely use other types like clam, scallop, or mussel shells.
Just make sure they have a smooth interior surface for the napkin to adhere to.
Larger shells work best if you want to use them as trinket dishes, but smaller ones can still be adorable for decorative purposes.
Hey friend! What can I help you find?
Search our entire site!
Can I use regular paper instead of napkins?
You can, but napkins are ideal because they’re thin and mold easily to the curves of the shell.
Thicker paper may wrinkle or not adhere as smoothly.
Should I use matte or glossy Mod Podge?
Either will work.
I used matte for a softer, more subtle finish, but you can also use glossy for a little bit of shine.
Choose whichever look you prefer!
Did you make this craft?
Mention us @eleanorrosehome or tag us using #eleanorrosehome on Instagram or Facebook so we can see your creation. You can also leave a comment below!
You May Also Like
-
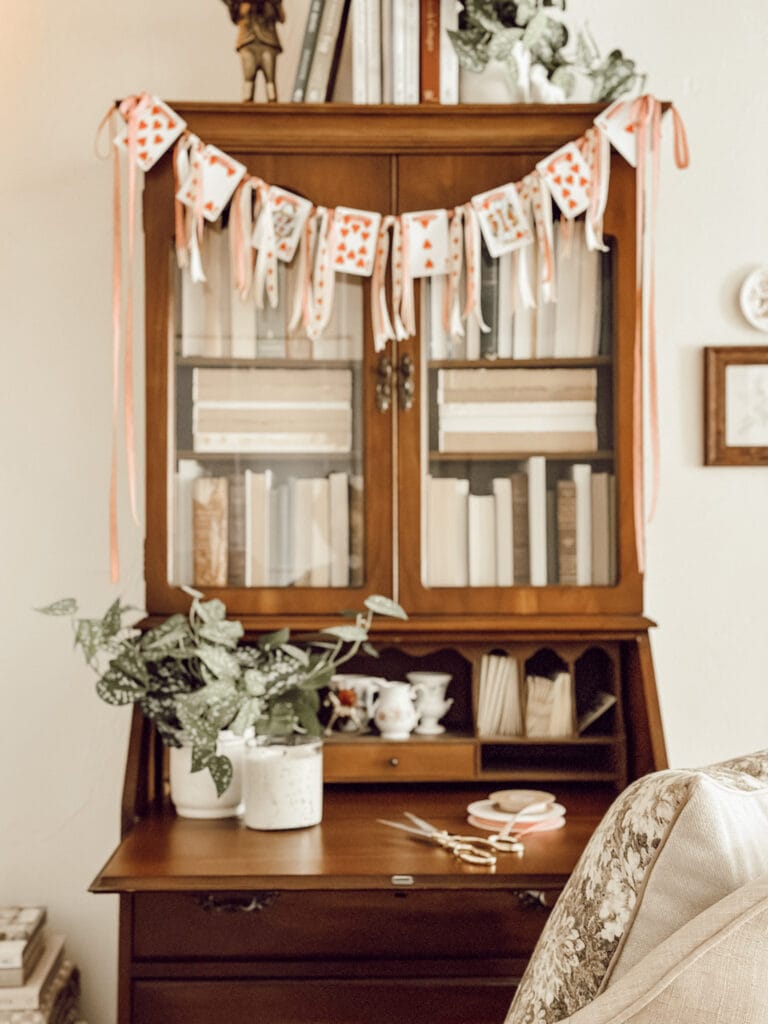
DIY Valentine Heart Playing Card Garland With Ribbon
This DIY valentine heart playing card garland is an easy way to decorate for Valentine’s Day using ribbon and heart…
-
Free Spring Printable Art for Cozy Seasonal Decorating
Download our free spring printable art to cozy up your home this spring. These high-quality PDF prints are perfect for…
-
How to Create a Soup Tureen Centerpiece: Cozy Decorating Idea
Discover how to create a soup tureen centerpiece using a vintage tureen and fresh florals for an easy, cozy table…
Shop My Favorite Products
Shop my favorite home decor & lifestyle products, my LTK sources, and my Amazon Storefront.
By making a purchase with one of my affiliate links, I earn a small commission which helps me continue to create meaningful content for you!
I look forward to sharing more of my home with you and inspiring you to enjoy simple cozy living!
Follow me on Facebook, Instagram, Pinterest, and LIKEtoKNOW.it.
xoxo, heidi

Don’t forget to pin this for later!

shop the post


Thank you Vicki! I agree, decoupage is very relaxing!
What a cool project! I am totally with you on the napkin selection at Home Goods/TJMaxx, they are so pretty and hard to resist. I actually have several packages in my stash that I need to put to use. Decoupage is such a relaxing craft (I think). Thanks for sharing!