
How to Make a Charming DIY Easter Wreath for Spring
With just a few supplies and a couple dozen speckled eggs, you can bring the beauty of spring into your home with this charming DIY Easter wreath.

I have spring fever.
Yes, I know it’s only the middle of February but for whatever reason, I am craving spring…big time.
Maybe it’s because Punxsutawney Phil predicted an early spring, or maybe it’s because the days are getting noticeably longer, or it could be that the winter chill has lingered just a bit too long for me.
Whatever the reason, the anticipation of warmer days, blooming flowers, and the pastel colors of spring have me craving ways to infuse spring into our home.
With Easter about six weeks away (It’s early this year, yay!), what better way to embrace the spring season than by creating an easy Easter wreath?
It’s the perfect way to channel my spring fever energy into something tangible and visually delightful. And…crafting more DIY wreaths was on my bucket list for 2024!
So, join me as we transform a simple straw wreath into a beautiful Easter creation that will not only brighten my home but yours too.
Let’s start to welcome in the next season together with creativity, a touch of whimsy, and a whole lot of springtime charm.
What you’ll love about this DIY:
How to Make This Easy Easter Wreath
With just a few supplies found at your local craft store and a little bit of creativity, crafting your own Easter wreath is an enjoyable and rewarding project.
Whether you’re a seasoned crafter or trying your hand at DIY for the first time, the simplicity of this DIY means you’ll have a charming wreath to display in your home in no time.
The Materials You’ll Need
MATERIALS YOU’LL NEED

Easy Easter Egg Wreath Step by Step Tutorial
Now that you have the wreath making materials, let’s dive into the easy steps to create a wreath that embodies the beauty of springtime and Easter celebrations.
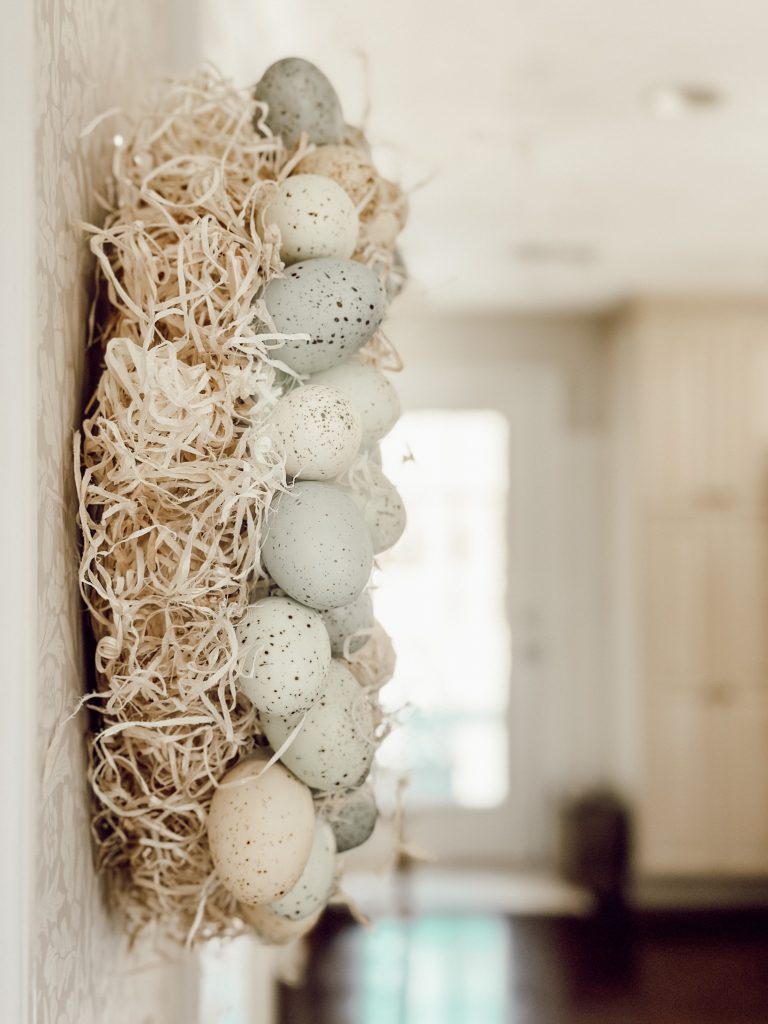
Cover the Straw Wreath Base With Excelsior
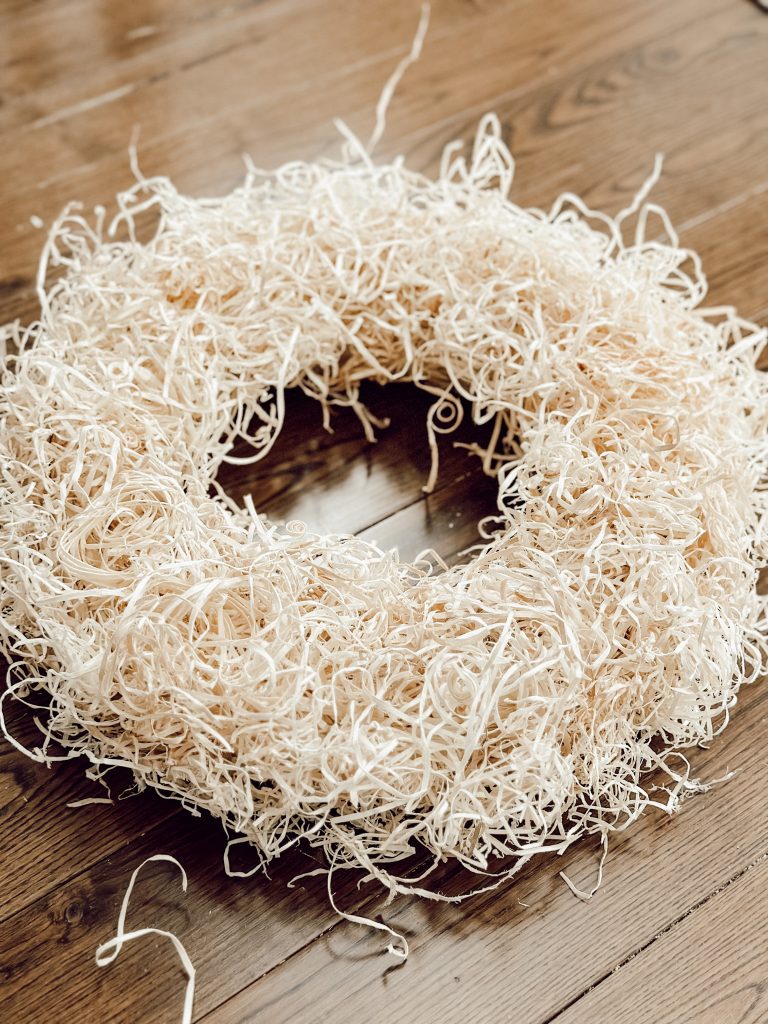
The first thing you’ll need to do is remove the plastic wrap from around the straw wreath and discard.
Then, take clumps of the natural Easter grass/Excelsior and begin placing it around the wreath base.
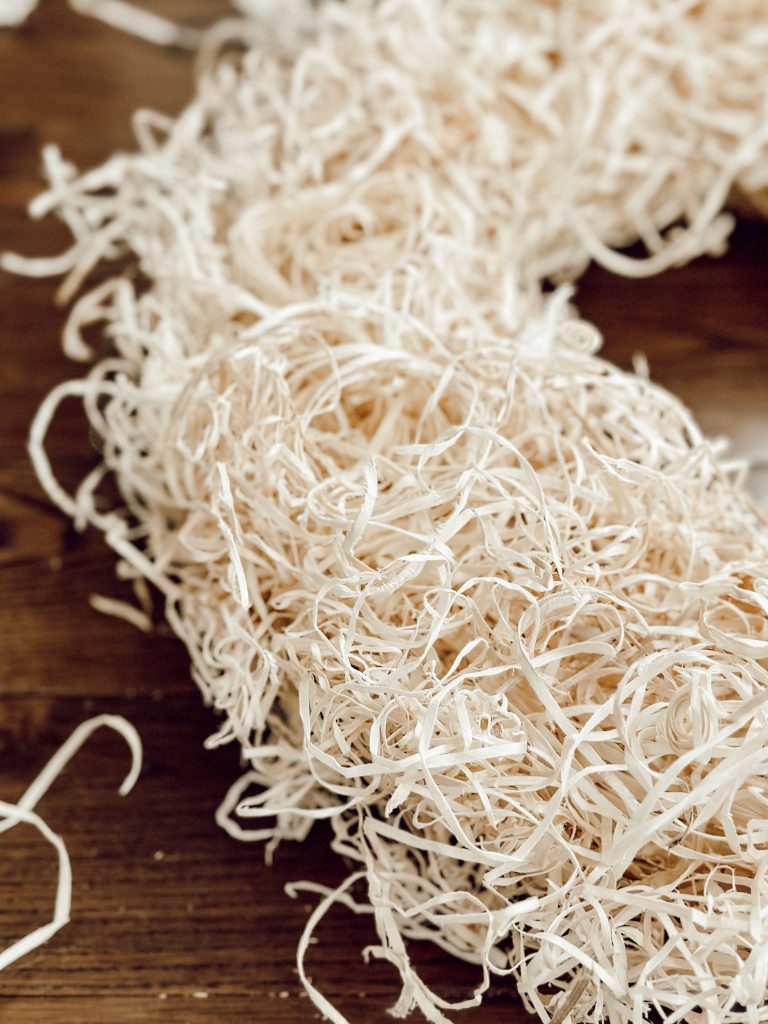
This is the messiest part of this DIY wreath, but that’s the fun in crafting…right?!
Secure the grass on the wreath base using hot glue, making sure that the whole thing is evenly covered including the outside and inside of the wreath.
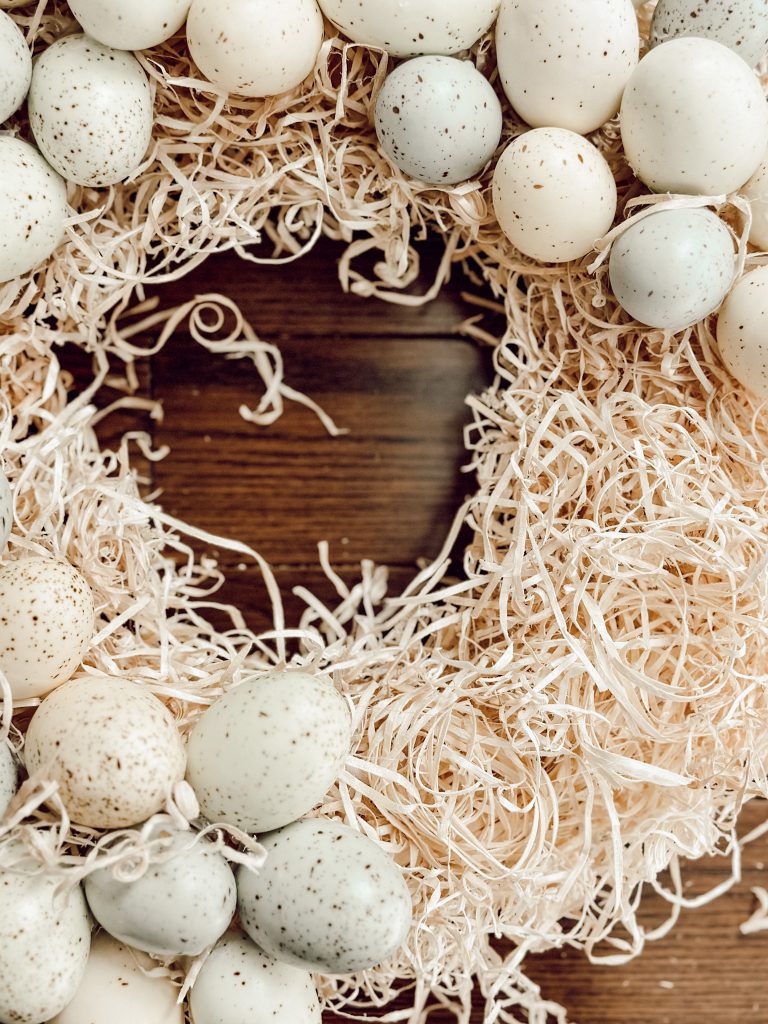
Nestle in the Faux Speckled Eggs
Arrange the speckled eggs strategically on top of the grass, varying the larger eggs with the smaller eggs and mixing colors for visual interest.
Use hot glue to secure each egg to the wreath.
Download Your Free Cozy eBook
Hang the Finished Wreath
Once all of the speckled eggs have been hot glued the entire way around the wreath, it’s ready for hanging!

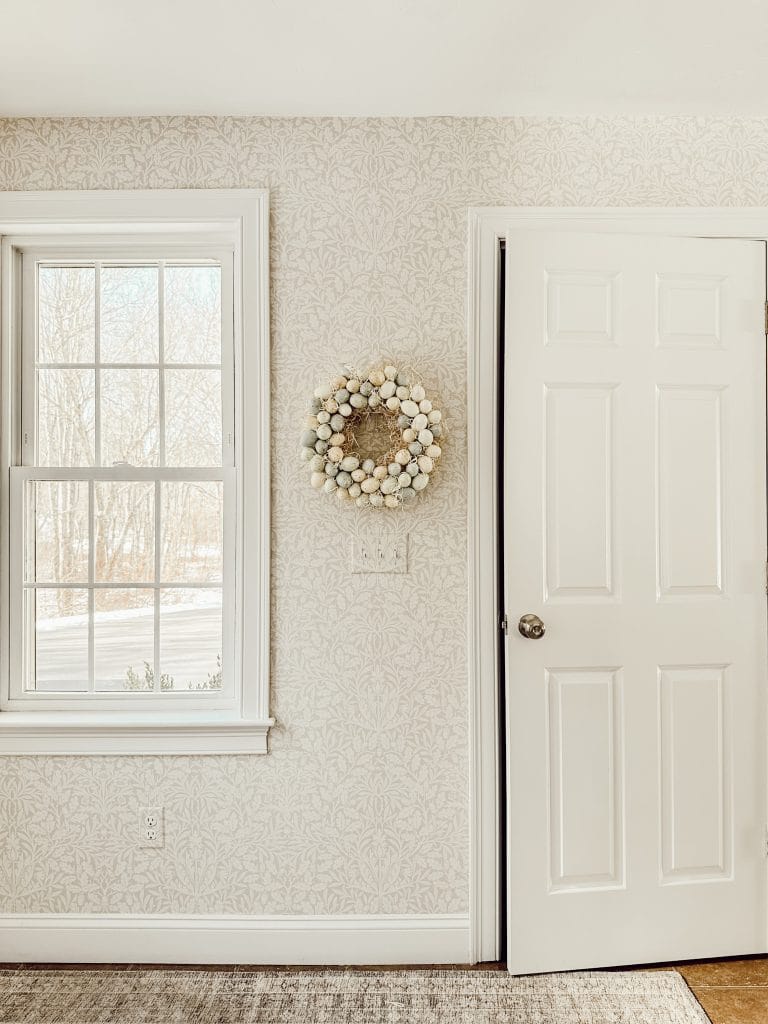
To hang our wreath, I simply added a small piece of floral wire to the back of the wreath to hang it in our entryway.
But, you could also use ribbon to hang the wreath by looping it around and then tying it in a bow.
This gingham ribbon would be a really pretty way to hang this Easter wreath.
Tips
- Before you start hot gluing, imagine the design you want for your wreath. Think about the placement of grass, eggs, and the overall design.
- Adding the natural Easter grass can get messy. It might be a good idea to cover your workspace with an old tablecloth or drop cloth to make cleanup easier. You’ll probably want to have a vacuum nearby too.
- For a more natural look, vary the size and color of the plastic Easter eggs. Distribute them evenly around the wreath, paying attention to balance and symmetry.
- Use plenty of hot glue to secure each element in place.
- Add personalized touches such as colorful eggs, small faux flowers, tiny nests, or other spring themed accents to make your wreath uniquely yours.
Where can I hang my beautiful Easter wreath?
You’ll want to keep your Easter wreath inside where it won’t be exposed to the elements.
Think about hanging your Easter wreath on the interior side of a front door, above a fireplace, on a hook in the kitchen, or on a blank wall in an entryway like I did.

Basically, this wreath can be hung anywhere in your home where you want to add a little springtime charm!
Could I use a grapevine wreath as the base for an Easter wreath?
Absolutely!
Using a grapevine wreath as the base for this Easter wreath will add a different texture and a rustic charm to your creation.
Grapevine wreaths are readily available at craft stores, are versatile, and provide a natural and organic look that is perfect for this spring wreath.
Other Simple Easter Wreath Form Ideas
- Styrofoam Wreath: A lightweight and versatile alternative.
- Wire Wreath Form: An airy and minimalistic base for an Easter wreath.
- Foam Wreath: A lightweight option and provide a soft surface for attaching materials.
- Embroidery Hoop: You can get creative with an embroidery hoop for a unique and modern twist.
What are some ways to customize an Easter wreath to make it my own?
Customizing your DIY Easter wreath allows you to add your personality and creativity to the project.
Here are some ideas to help you make the wreath uniquely yours:
- For a pop of color, experiment with different color schemes that your personal style or existing spring decor.
- Add extra elements such as faux flowers, small nests, or butterflies to enhance the charming spring theme.
- Incorporate dried flowers, herbs, or even spanish moss for more texture.
- Add ribbon to your wreath. Opt for a ribbon with a pattern that resonates with your decor style like gingham, polka dots, stripes, or a floral pattern. Burlap ribbon is another great, natural option.
- Wrap LED fairy lights around your wreath for a warm and inviting glow.
Remember, DIY projects are meant to be fun!
Feel free to mix and match these ideas or come up with your own, to create a unique Easter wreath that reflects your individual style and taste.
Hey friend! What can I help you find?
Search our entire site!
What is the best way to store this wreath after the Easter season?
Store your Easter wreath in a cool, dry place away from direct sunlight and humidity.
Hang the wreath on a hook in storage or in a closet rather than storing it flat so it maintains its shape.
Also, store the wreath in a spot where it won’t be compressed or squeezed by other items to make sure it retains its original shape and charm for seasons to come.
you might also
Enjoy These DIY Easter Decorations
Shop My Favorite Products
Shop my favorite home decor & lifestyle products, my LTK sources, and my Amazon Storefront. By making a purchase with one of my affiliate links, I earn a small commission which helps me continue to create meaningful content for you!
I look forward to sharing more of my home with you and inspiring you to have a well loved home! Follow me on Facebook, Instagram, Pinterest, and LIKEtoKNOW.it.
xoxo, heidi
Don’t forget to pin this for later…
shop the post


Thank you Kim!
This is the cutest Easter wreath Heidi. I absolutely love it!
Thank you Cindy! It’s such a fun wreath to make!
I love the added grass! Such a beautiful wreath and who doesn’t adore a speckled egg?! Hoping to make one of these soon. So cute. Thanks for the great idea. pinned