
DIY Easter Garland
Create your very own adorable DIY Easter garland for under $5 with wooden bunny cut outs from the Dollar Tree and a roll of bakers twine.

This DIY Easter garland is so easy & inexpensive to make it’s almost silly! However, when I shared a few views of this space last week in my Easter Home Decor on a Budget post, I received so many positive comments on this bunny garland, I knew it deserved it’s own dedicated blog post.
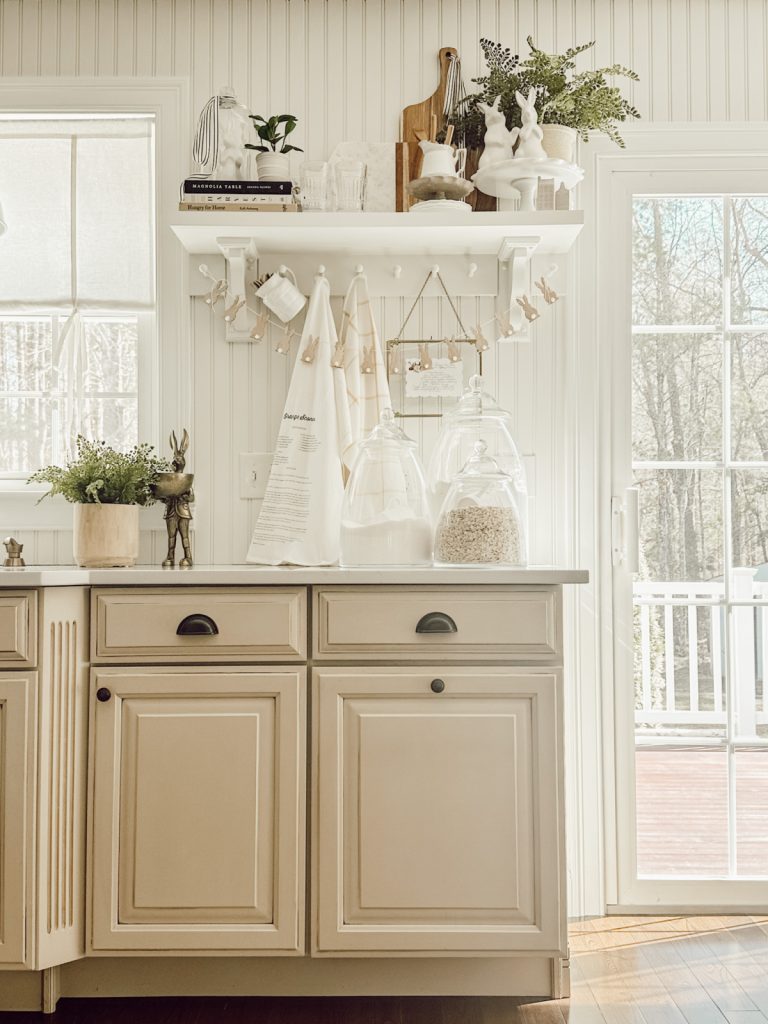
One of the things I love the most about our open kitchen shelf is the pegs below it. I love the ability to hang garlands from the pegs to style this space according to the season. I made this DIY ghost garland for Halloween and it looked absolutely adorable hanging in our kitchen, so I knew I wanted to make more DIY garlands for other holidays as well.
Can you believe this DIY Easter garland only required 2 things (well 3 if you include the drill) cost me less than $5 to make, and took less than 15 minutes to create?! Once you make this bunny garland you’ll think twice about purchasing one from the store. Yours will be so much cuter and will cost you a fraction of what you would pay for an Easter garland at the store.

How to Make a DIY Easter Garland
Easter Garland Supplies
These are the exact counts & sizes of the materials I used for this garland. You can make a shorter or longer Easter garland by adjusting the amount of bunnies & length of twine. You could also place the bunnies closer together on the garland, which would require more wooden cut outs. Here’s what you’ll need:
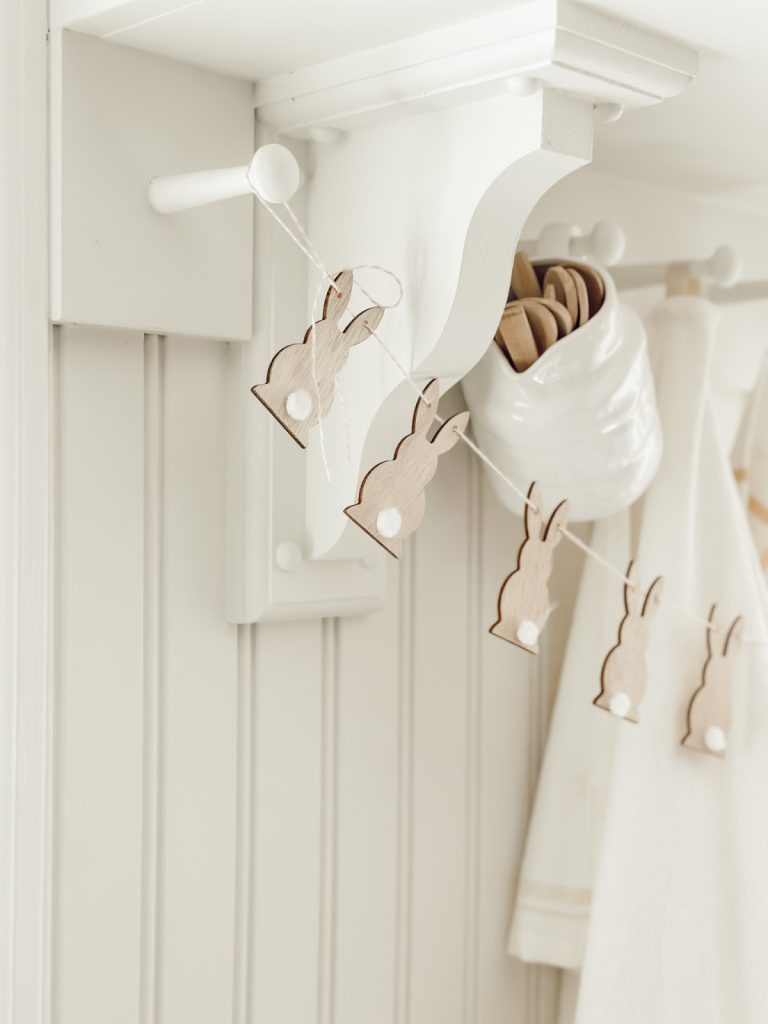
- 14 Wooden Bunny Silhouettes with Pom-Poms: I found these wooden bunny cut outs at the Dollar Tree. I purchased 2 bags of wooden cut outs which had 12 bunnies in each one.
- 5′ Bakers Twine: I used a pink & white twine for this garland, however you could also use blue & white, purple & white, or keep it neutral with a cream & white bakers twine for Easter.
- Drill & 3/32nd Drill Bit
Mr. ERH drilled the holes in the bunnies ears to string the twine through. If you are not comfortable drilling holes (or don’t know how to like me) you could also use hot glue to adhere the wooden bunny cut outs to the twine.

Creating a DIY Easter Garland
Step 1
Determine the amount of the twine you will need for your garland, then determine how far apart you want the bunny cut outs spaced on the garland. This will tell you how many wooden cut outs you will need for your Easter garland.
For my DIY garland, I used 5″ of twine & 14 bunny cut outs.

Step 2
Drill the 3/32 holes into the wooden rabbits ears.
This size hole was the ideal size with the twine I used. It wasn’t too big and wasn’t too small. We drilled the holes somewhere in the middle of the ears. This step does not need to be perfect, just eyeball each hole you drill so they are somewhat similar.
If you don’t have a drill or don’t know how to drill, skip this step and just use hot glue instead. Place a dab of hot glue on the backside of the wooden bunny cut out, and secure that to the twine evenly spacing the bunny cut outs.

Step 3
With holes drilled into all of the bunnies, begin threading one end of the twine through one side of the bunny ear and into the other.
Pull the bunnies all the way down to the other end of the twine, leaving a couple of extra inches at the end of the twine.
Continue adding the bunnies until all are on the DIY Easter garland.

Step 4
Once all the bunnies have been added to the twine. Pull the twine so it’s in a straight line on a flat surface. Now begin evenly spacing the bunny cut outs.
I left about 1-2″ between each bunny. Again, you can space out the bunnies as close or as far apart as you want.

Step 5
Tie a knot and then a bow at each end of the twine to finish the DIY Easter garland.
Your DIY bunny garland is ready for hanging!

DIY Easter Garland Tips & Tricks
- Instead of drilling holes into the wooden bunny cut outs use hot glue to adhere the bunnies to the twine.
- Paint the wooden cut outs instead of leaving them raw wood.
- Use your favorite Easter ribbon instead of twine to create this DIY Easter garland (you may need to drill bigger holes depending on the thickness of the ribbon you use).
- String the bunnies closer together or further apart for a different look to this DIY garland.
- Try using other wooden or fabric shapes like chicks or eggs for a completely different Easter garland.
Where can I hang an Easter garland?
I love this DIY Easter garland hanging in our kitchen. It adds the perfect amount of festive Easter decor without being too over the top.
This DIY garland would also look cute hanging from a mantle or shelf, on a wall or hooks, or even draped across the center of an Easter tablescape. The possibilities on where you could hang this garland are endless, just use your imagination!
More Easter Ideas
These DIY Easter candy jars have been a favorite here on the blog & social media. They are easy to make and are a great Easter gift idea.
This bunny bait is a delicious Easter treat and perfect for catching the Easter bunny.
Check out how I styled this Easter pillow in every room of our house!
Shop Our Home
Links to products featured in this post can be found in our Shop Our Home page. I hope this page makes shopping our home a little easier for you! I earn a small commission when you make a purchase from one of our LTK & Amazon Storefront links. Your support helps me continue to create meaningful content for you!
I look forward to sharing more of my home with you and inspiring you to have a well loved home! Follow me on Facebook, Instagram, Pinterest, and LIKEtoKNOW.it.
xoxo, heidi
Did you enjoy this post? PIN it for later!


Thank you Jen!
This little bunny garland is just the cutest darn thing. I LOVE it!
Thank you Renae!
Thank you Cindy!
This is such a cute idea. I love it.
Adorable and I like it plain instead of painting them. Pinned