How to Make a Homemade Dried Orange Slice Garland
Welcome the holidays with this dried orange garland recipe that will infuse your home with citrusy fragrance and vibrant colors. Learn how to create this charming decoration; a perfect blend of tradition and creativity.

We are a little more than a week out from Thanksgiving and all things Christmas are in full swing here at Eleanor Rose Home!
I decorated our home early last year and I’m following that same path this year. I love the cozy, warm vibes the holiday decorations give our home, so in my opinion the longer we can enjoy that, the better.
One of my favorite things about the holiday season and Christmas…the traditions. These are the things me and my family look forward to each and every year.
For someone who doesn’t like change and thrives on routines, traditions are comforting for me, knowing there is something I enjoy and can count on year after year.
The past couple of Christmas’s, a new holiday tradition I started was creating orange garlands with dried orange slices. It’s a simple and beautiful way to add Christmas cheer to our home while infuses it with the wonderful smell of citrus.
In this blog post I thought I would show you how to make my dried orange garland recipe. It’s easy to create, inexpensive, and adds the perfect amount of natural, outdoor decor to indoor Christmas decorations.
The Tradition of Oranges at Christmas
You may be like me and wonder, “Why are oranges synonymous to Christmas?”
Well it seems this citrus fruit has a rich history rooted in festive customs. Centuries ago oranges were a rare and precious treat, receiving one in the midst of winter was a cherished gift.
As global trade expanded, oranges became more accessible, yet they retained their aura of specialness.
In many cultures, placing an orange in the toe of a Christmas stocking became a tradition, symbolizing the simple joys of abundance and sharing during the holiday season.
Today, the presence of oranges in wreaths, garlands, and holiday recipes serves as a nostalgic reminder of the season’s simple pleasures, encompassing the spirit of giving, sharing, and celebrating togetherness.
Why create a dried orange slice garland?
Before we dive into the steps of creating this charming garland, let’s talk about why dried orange slices are the perfect choice for your holiday decorations.
Not only are oranges synonymous with the holiday season, evoking memories of warm, cozy evenings by the fireplace and the joy of giving and sharing. But by incorporating them into your Christmas decor, you adding a pop of vibrant color and infusing your home with a delightful citrusy fragrance.
What you’ll love about this recipe:
How to Make a Simple Dried Orange Garland
If you are looking to start a new Christmas tradition, try this fun and easy DIY to add holiday cheer to your home.
You don’t need to spend a lot of money to have beautiful, fresh Christmas decor in your home. Creating something from scratch makes this all the more special.
This Christmas dried orange garland is proof of that!
The Materials You’ll Need to Make This DIY Fruit Garland
MATERIALS YOU’LL NEED
your shortcode here
Step-by-Step Tutorial for This Orange Garland Recipe
Preheat Oven
Preheat oven to 200 degrees. Line cookie sheets with parchment paper.
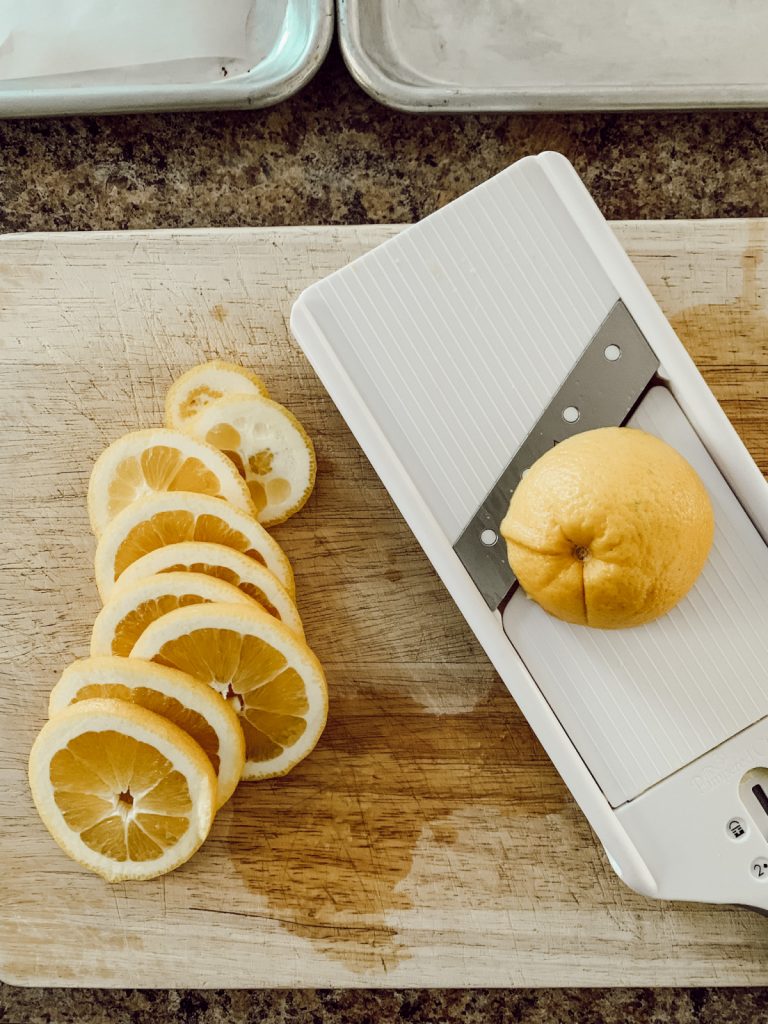
Slice the Oranges
Slice oranges using a mandoline slicer. I prefer using a mandolin because this creates uniformly sized orange slices thus allowing equal drying time in the oven.
Slice the oranges into about 1/8″-1/4″ thick slices. I have found this is the perfect size for proper drying.
Handy Tip: Prepare Ahead!
Prepare your dried orange slices well in advance, even weeks before the holidays. Stored in an airtight container in a cool, dark place, these dried slices will retain their vibrancy and fragrance. Making them ahead will save you precious time during the busy holiday season allowing you to focus on other aspects of your holiday preparations.
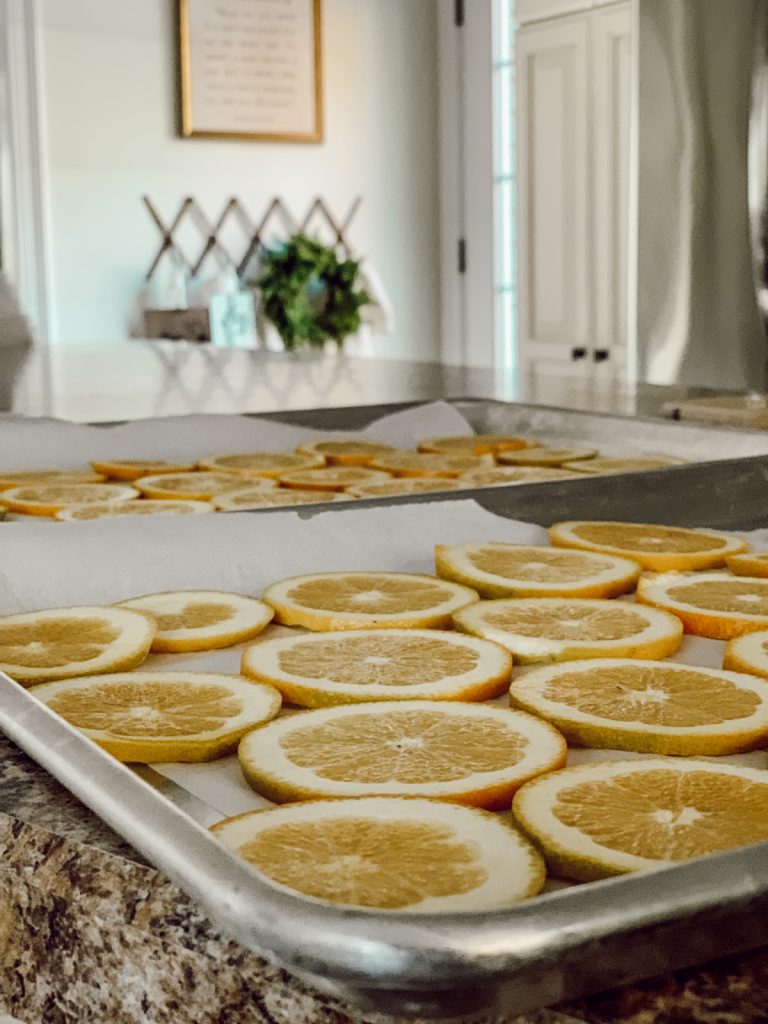
Place your sliced oranges in a single layer on the parchment lined baking sheets.
Once your baking sheets are full of orange slices, place one sheet on the top rack of the oven, and the second sheet on the lower rack.
Dry Orange Slices in the Oven
Bake orange slices for 2 hours.
Flip each orange slice, so that the top and bottom dry out evenly.
Then, take the baking sheet that was on the bottom rack and place on the top rack. Place the sheet that was on the top rack onto the bottom rack of the oven. Bake for another 2 hours.
Based on the thickness of your oranges, they are probably done at this point. If your orange slices are still sticky and floppy, bake them for another half-hour to hour.
Once the orange slices are done baking in the oven, place them on a wire racks overnight, just to air dry them for a little longer.

Now that your orange slices are dried out, it’s time to decorate with them! You can use them to make a garland, ornaments, or I even keep them in a little bowl for a little festive decoration too.
Assembling the Dried Citrus Garland
Measure how much twine you’ll need for the area you want to hang your garland.
Tie a thick knot on one end of the twine so oranges do not slip off the garland.
Use a large yarn needle to thread the twine through the oranges. I like to poke the needle through the pith (white part) of the orange so that the orange is a little more secure on the twine.
Hey friend! What can I help you find?
Search our entire site!
Continue threading the dried orange slices onto the twine, until the desired amount of orange slices have been added.
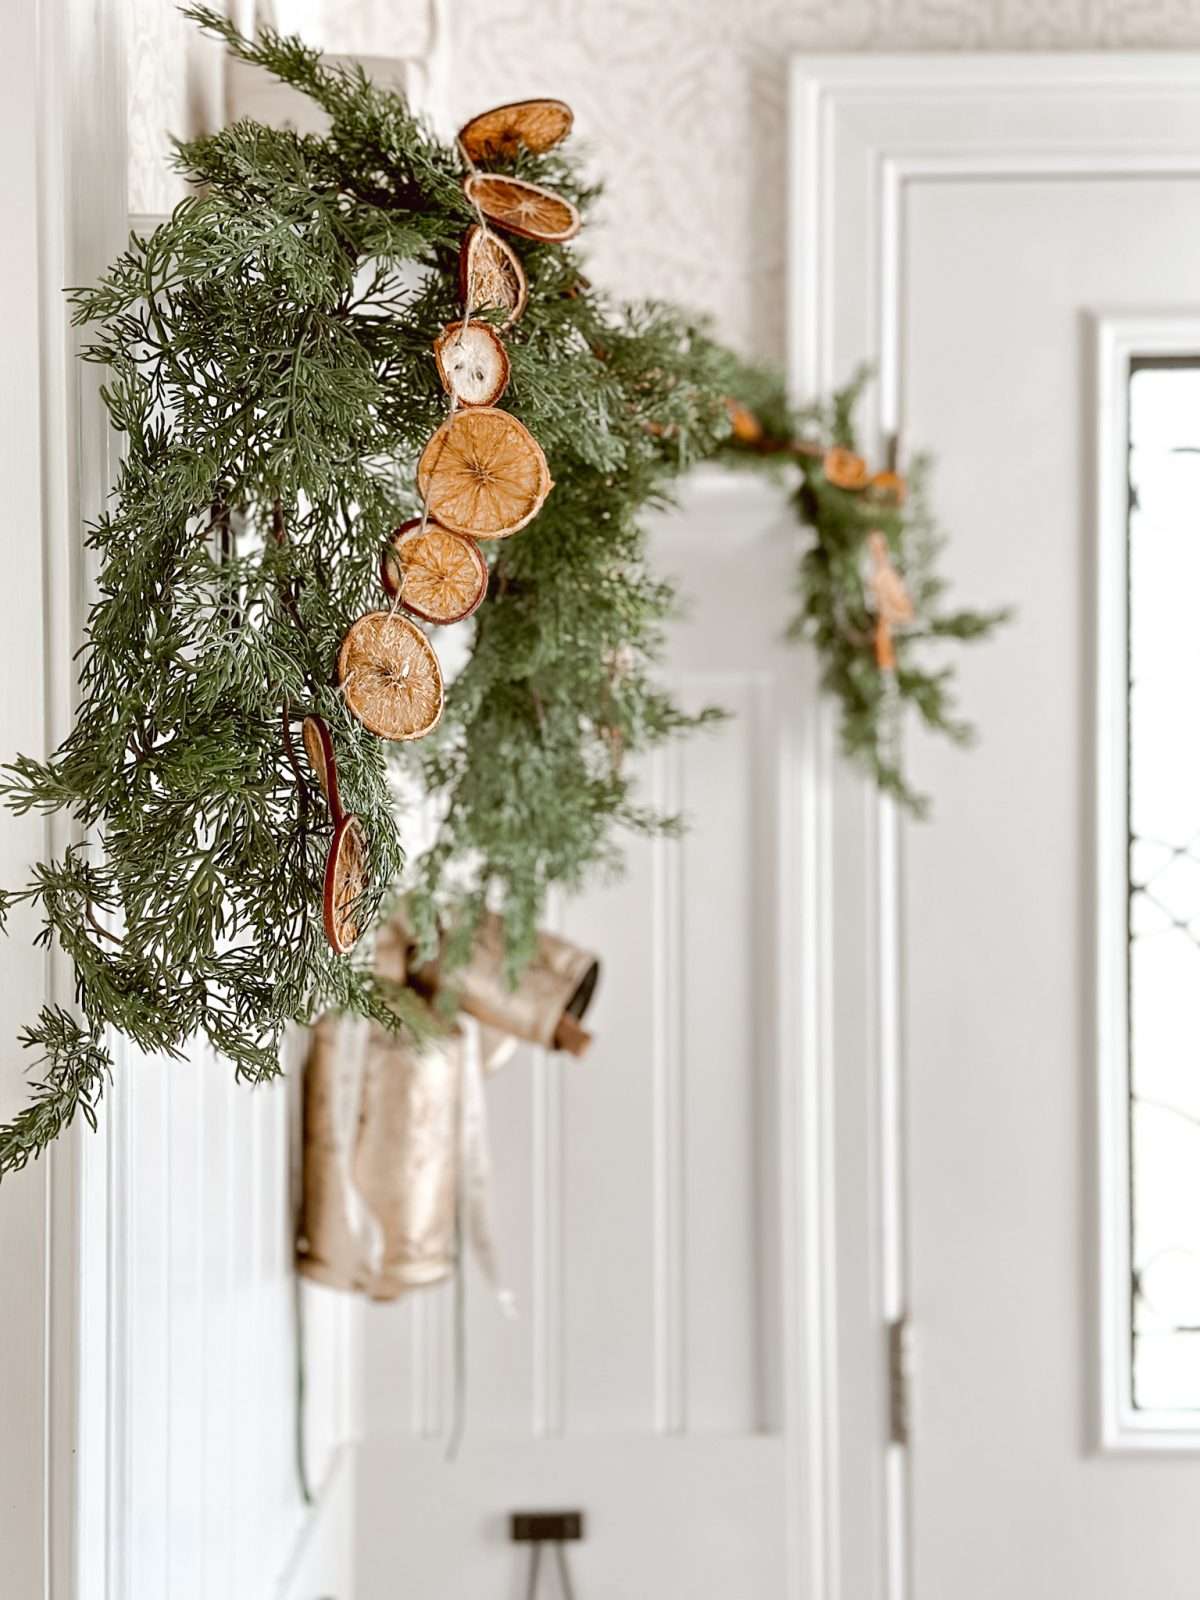
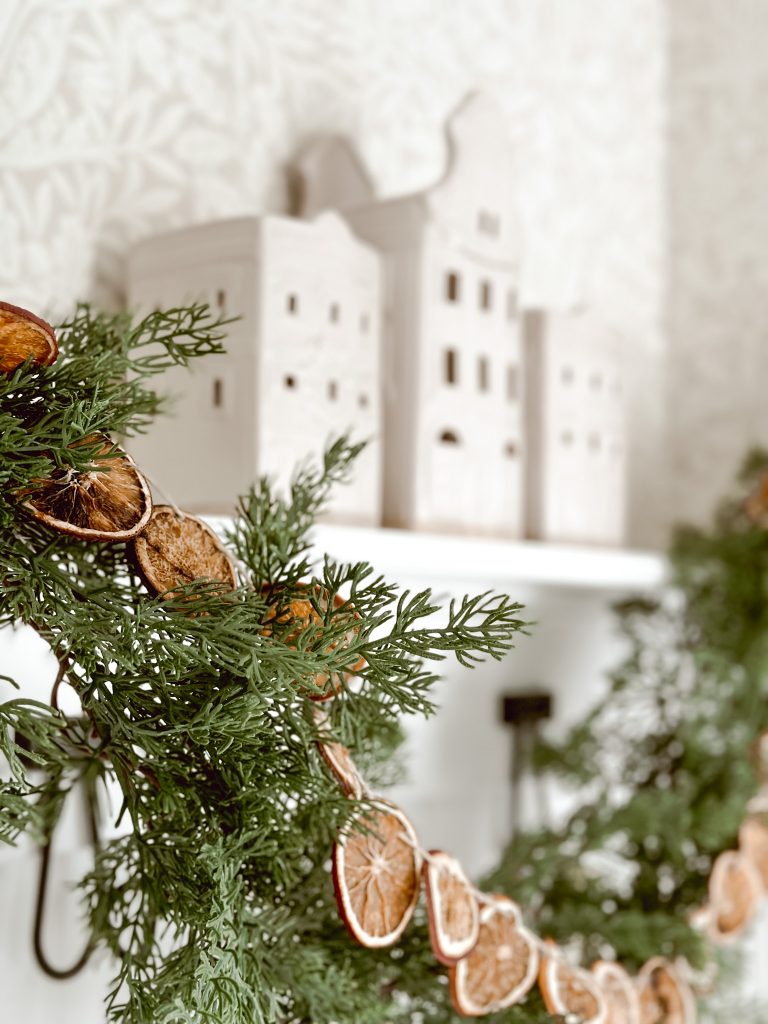
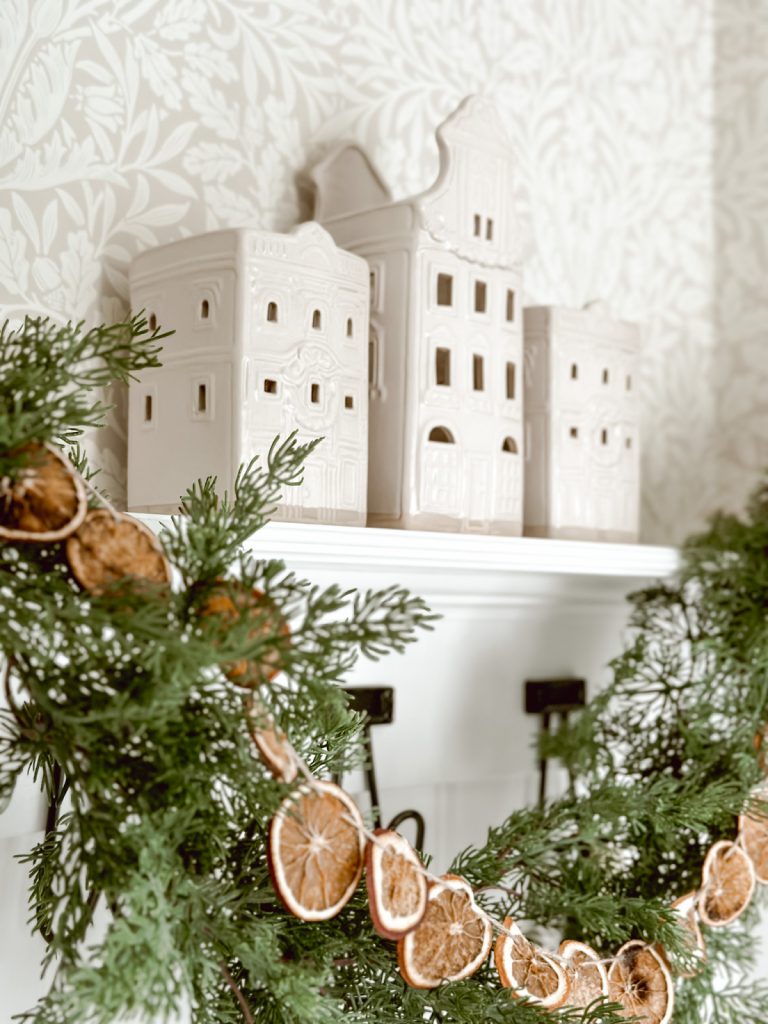
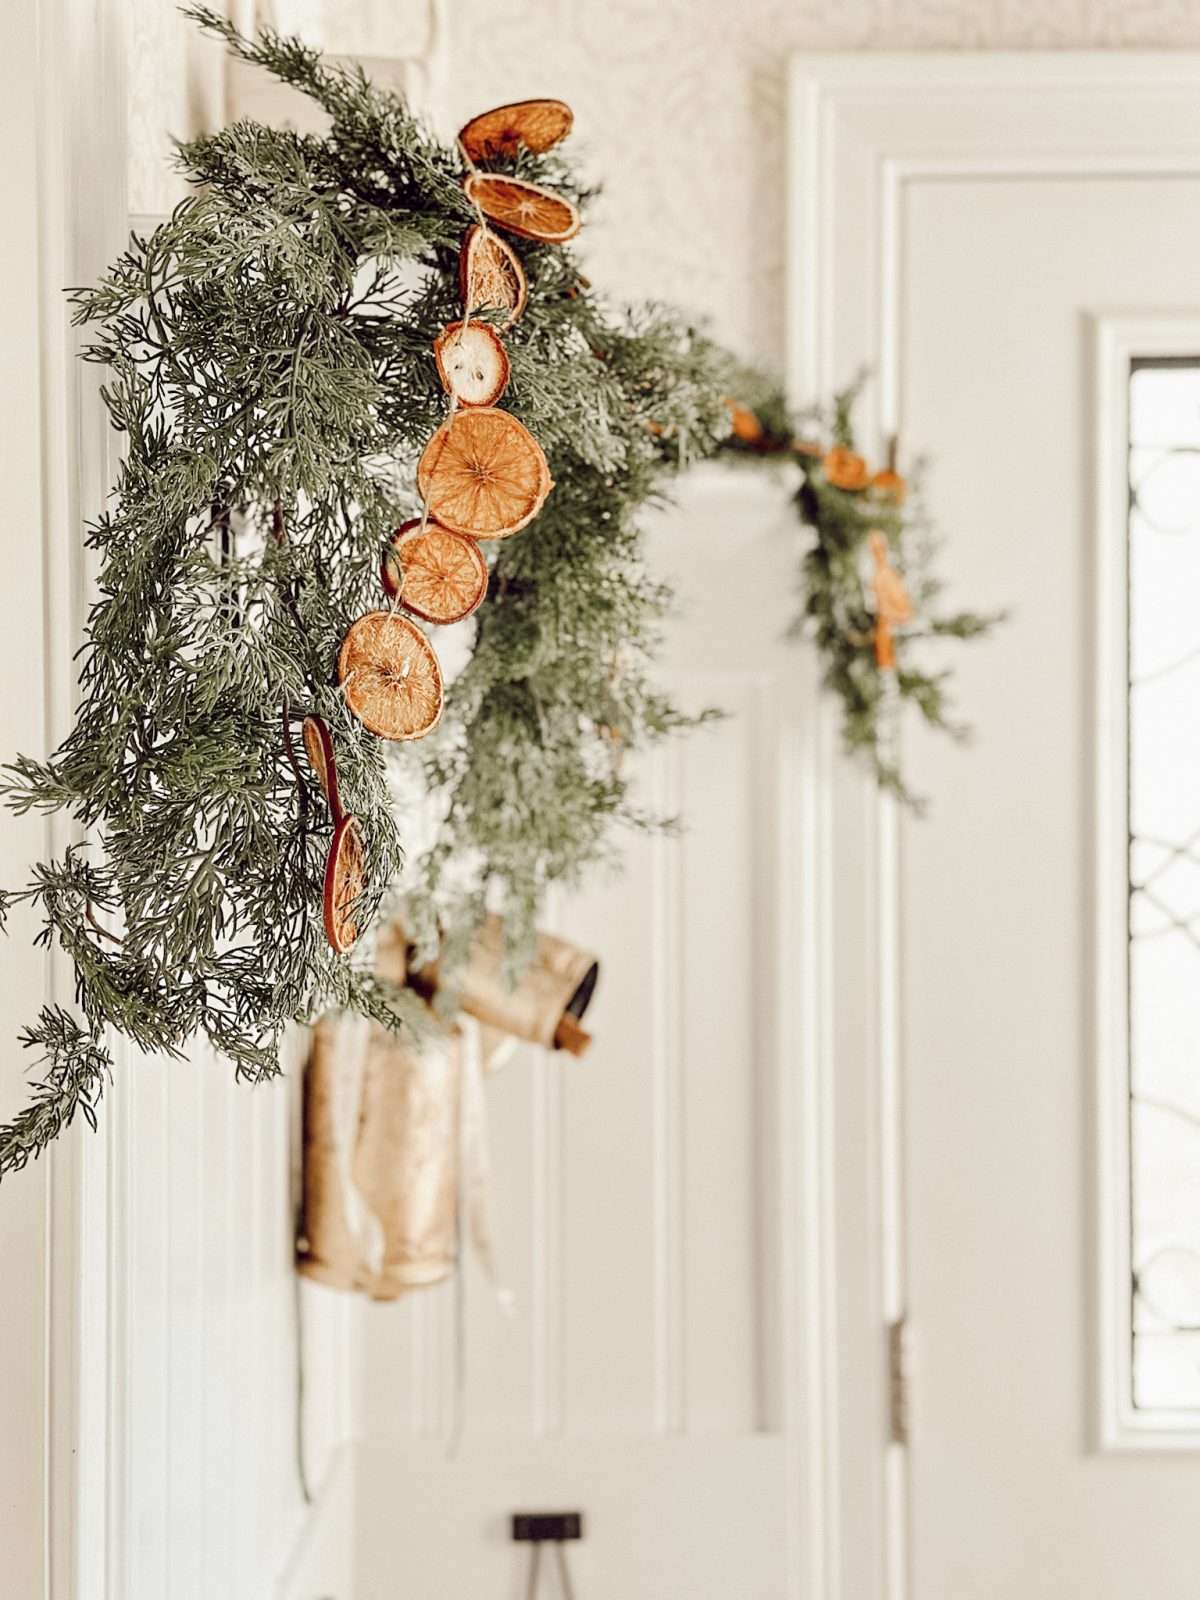
Your garland can be as full or as sparse as you like. I placed my orange garland on top of a faux cedar garland, added some ribbon, and voile!
You have a beautiful dried orange garland.
Tips
- Opt for oranges that are firm and fresh. Organic oranges are ideal, especially if you prefer an environmentally friendly option.
- Use a mandolin or a sharp knife to slice the oranges uniformly, ensuring consistent drying and a polished appearance for your garland.
- Pat the orange slices gently with a paper towel before baking to remove excess moisture. This step helps in efficient drying.
- Bake the orange slices at a low temperature (around 200°F or 95°C) for an extended period (2-3 hours). Drying them slowly helps preserve their color and aroma.
- To ensure even drying, rotate and flip the slices every hour during the baking process. This prevents sticking and ensures uniform drying.
- When stringing the slices, be gentle to avoid breakage. Use a needle or a small hole punch to create holes near the edges of the slices for easy threading.
- If you’re not using the garland immediately, store it in an airtight container away from moisture and sunlight to preserve its freshness.
- Feel free to personalize your garland by incorporating additional elements like dried flowers, pine cones, or cinnamon sticks for a unique touch.
How long will a dried orange garland last?
A well made dried orange garland, if stored properly, can last for several weeks to a few months.
Its lifespan depends on factors such as the thickness of the orange slices, the drying process, and the storage conditions.
To prolong its freshness, store the garland in a cool, dry place away from direct sunlight and moisture.
Regularly check for signs of mold or discoloration, and if properly maintained, your dried orange garland can adorn your home the entire holiday season.
Can I use other fruits to make a dried fruit garland?
Certainly, you can absolutely use other dehydrated fruit to create a unique and colorful garland.
Here are some other options:
- Apples: Thinly slice apples for a garland with a subtle, sweet fragrance and a slightly darker hue compared to oranges.
- Lemons: Lemons add a bright, zesty touch. Their yellow color contrasts beautifully with green herbs or red berries.
- Limes: Limes offer a vibrant green color, creating a garland that stands out. Their refreshing scent adds a unique twist.
- Cranberries: Dried cranberries provide a deep red color, bringing a festive vibe to your garland. They pair well with other fruits and greenery.
- Pears: Sliced pears offer a delicate aroma and a softer texture. They work wonderfully with cinnamon sticks or cloves for added fragrance.
When creating a garland with different fruits, ensure uniform slicing and drying to maintain a cohesive appearance. Experiment with combinations to achieve a stunning and aromatic masterpiece that suits your holiday decor theme.
Are there other ways to use dried orange slices?
Oh yes there is!
Dehydrated oranges are incredibly versatile and can be used in various creative ways.
- Potpourri: Combine dried orange slices with cinnamon sticks, cloves, and other natural elements to create a delightful homemade potpourri. Place it in bowls around your home to infuse the air with a warm, citrusy aroma.
- Gift Wrapping: Attach dried orange slices to gift packages for a charming and unique touch. They can be threaded onto ribbons or glued directly onto wrapping paper.
- Holiday Wreaths: Add dried orange slices to your holiday wreaths for a natural, rustic look. Combine them with pine branches, berries, and other dried fruits for an eye-catching decoration.
- Ornaments: Use dried orange slices as ornaments for your Christmas tree. Simply thread a ribbon through a hole in the slice and hang them alongside your other ornaments.
- Simmer Pots: Simmer dried orange slices, cinnamon sticks, and cloves in water on the stove to create a natural air freshener. The scent will fill your home with a warm, inviting fragrance.
Why This Tradition Matters
For me, this simple yet meaningful tradition captures the spirit of the holidays. It’s a reminder that the most cherished decorations are the ones crafted with love. Creating this orange garland recipe is a way to slow down, spend quality time with loved ones, and relish in the joy of the Christmas season.
So, this holiday season, gather your family and friends, put on some Christmas music, and start slicing those oranges.
Embrace the warmth of the oven, the scent of citrus wafting through the air, and the joy of crafting something beautiful together. As you hang your homemade dried orange slice garland, you’ll not only be decorating your home but also weaving sweet memories that will last a lifetime.
What are some of the traditions you and your family look forward to each Christmas? Let me know by leaving a comment, I would love to hear from you.
Our Favorite
Christmas DIY’s
Shop My Favorite Products
Shop my favorite home decor & lifestyle products here, my LTK sources here, and my Amazon Storefront here. By making a purchase with one of my links, I earn a small commission which helps me continue to create meaningful content for you!
I look forward to sharing more of my home with you and inspiring you to have a well loved home! Follow me on Facebook, Instagram, Pinterest, and LIKEtoKNOW.it.
xoxo, heidi
Don’t forget to pin this for later…


Thank you so much for the share!