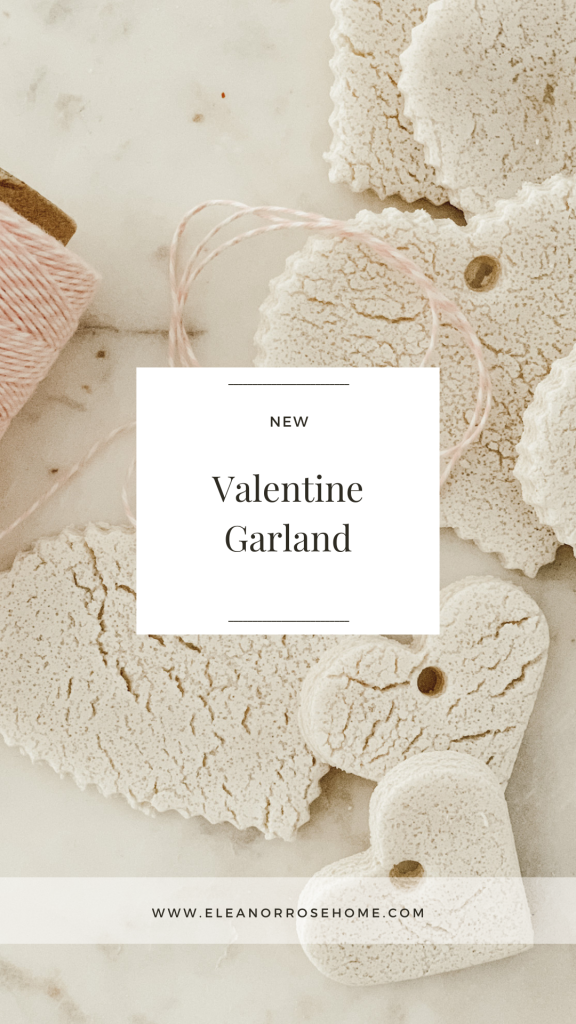
Valentine Garland
Salt dough ornaments made into a valentine garland is a sweet & easy way to decorate your home for Valentine’s Day.

Salt dough ornaments was one of the things on my “to do” list this past Christmas, however with the craziness of the holidays and time slipping through my fingers, I just ran out of time. I didn’t want to wait a whole year until next Christmas to make them, so I thought I would make salt dough ornaments for Valentine’s day and add them into my Valentine’s décor.
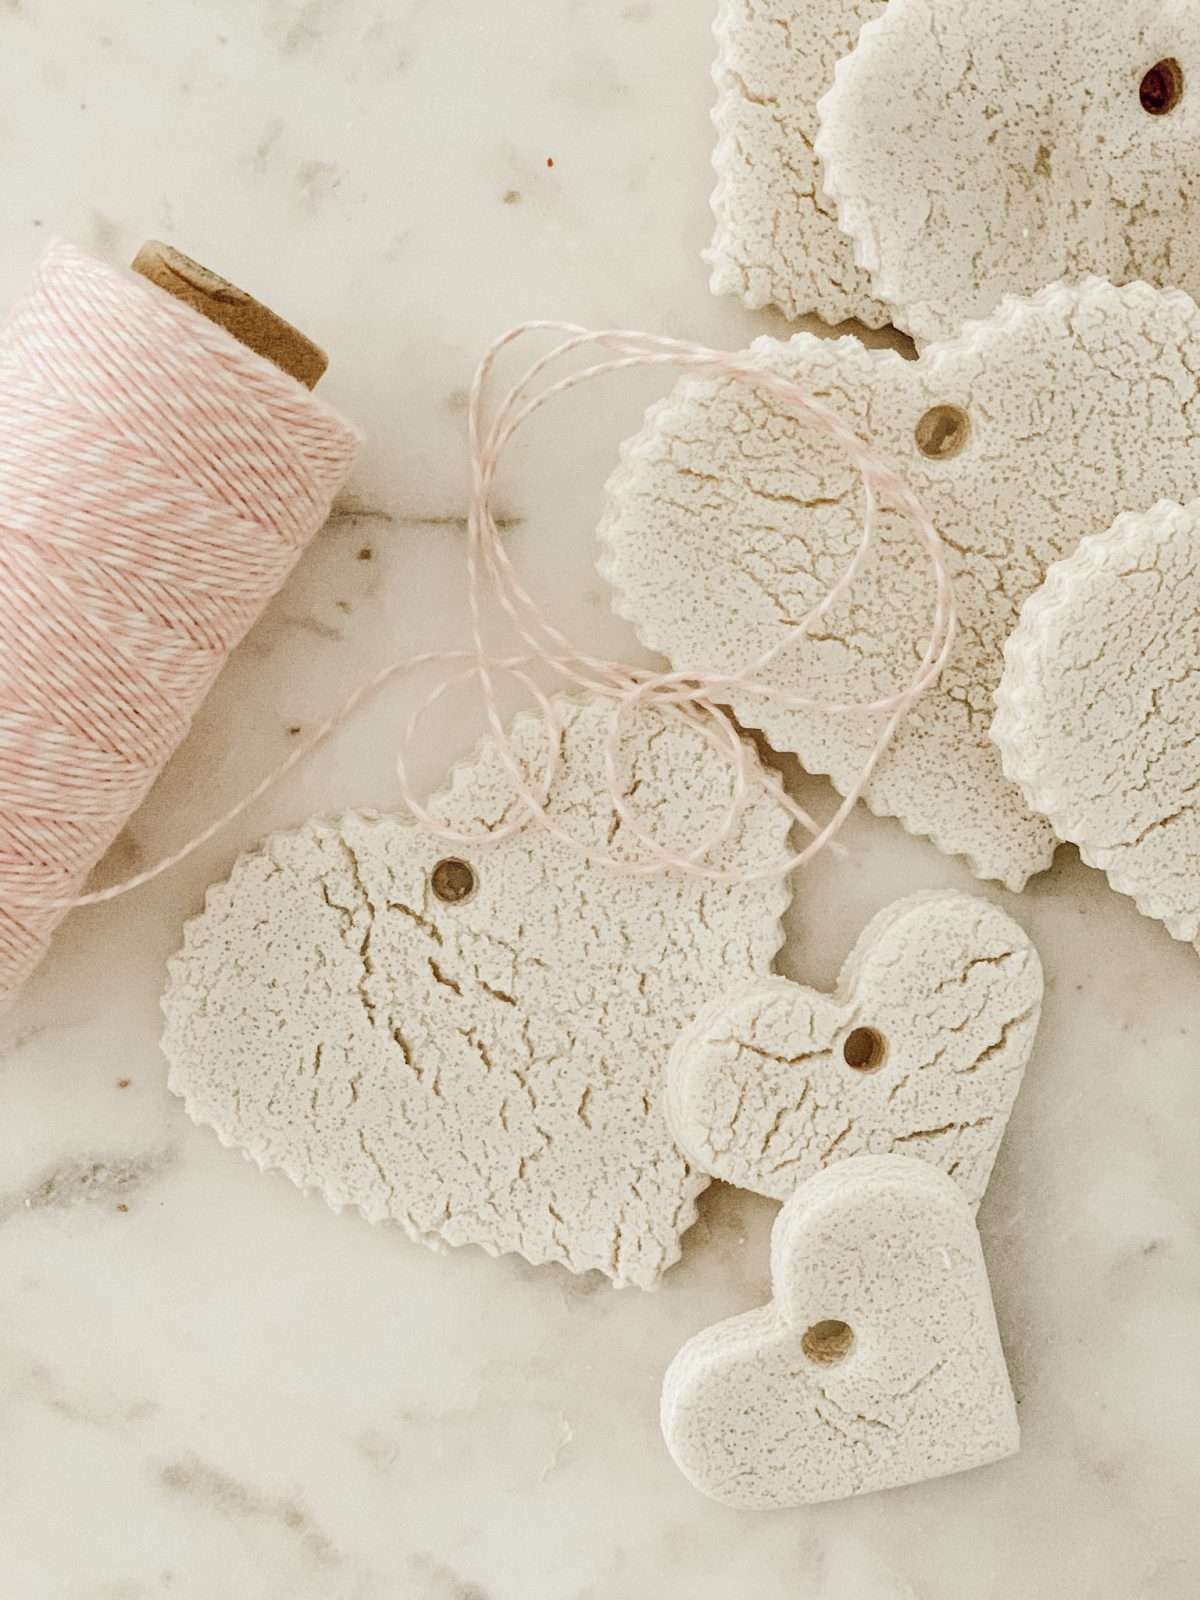
Instead of using these as ornaments, I decided to turn them into a valentine garland. This garland is an easy and inexpensive way to add a little valentine décor into your home. I would venture to guess you have all of the ingredients and supplies you need for this craft already in your home. Décor that doesn’t require a stop at the store or spending a ton of money, is a win in my book!
These ornaments are completely customizable, would be fun for little ones to help with, and these ornaments will last for years (due to the fact they are made mostly with salt) which means you can store them and reuse them year after year. This was my first time making salt dough ornaments, so it was a bit of trial and error. My first batch of salt dough was too wet, my second batch was too dry, but my third batch came out perfect. I hope you will give this recipe a try to make your own valentine garland, or maybe Christmas ornaments for next year!
What You Will Need to Make a Valentine Garland
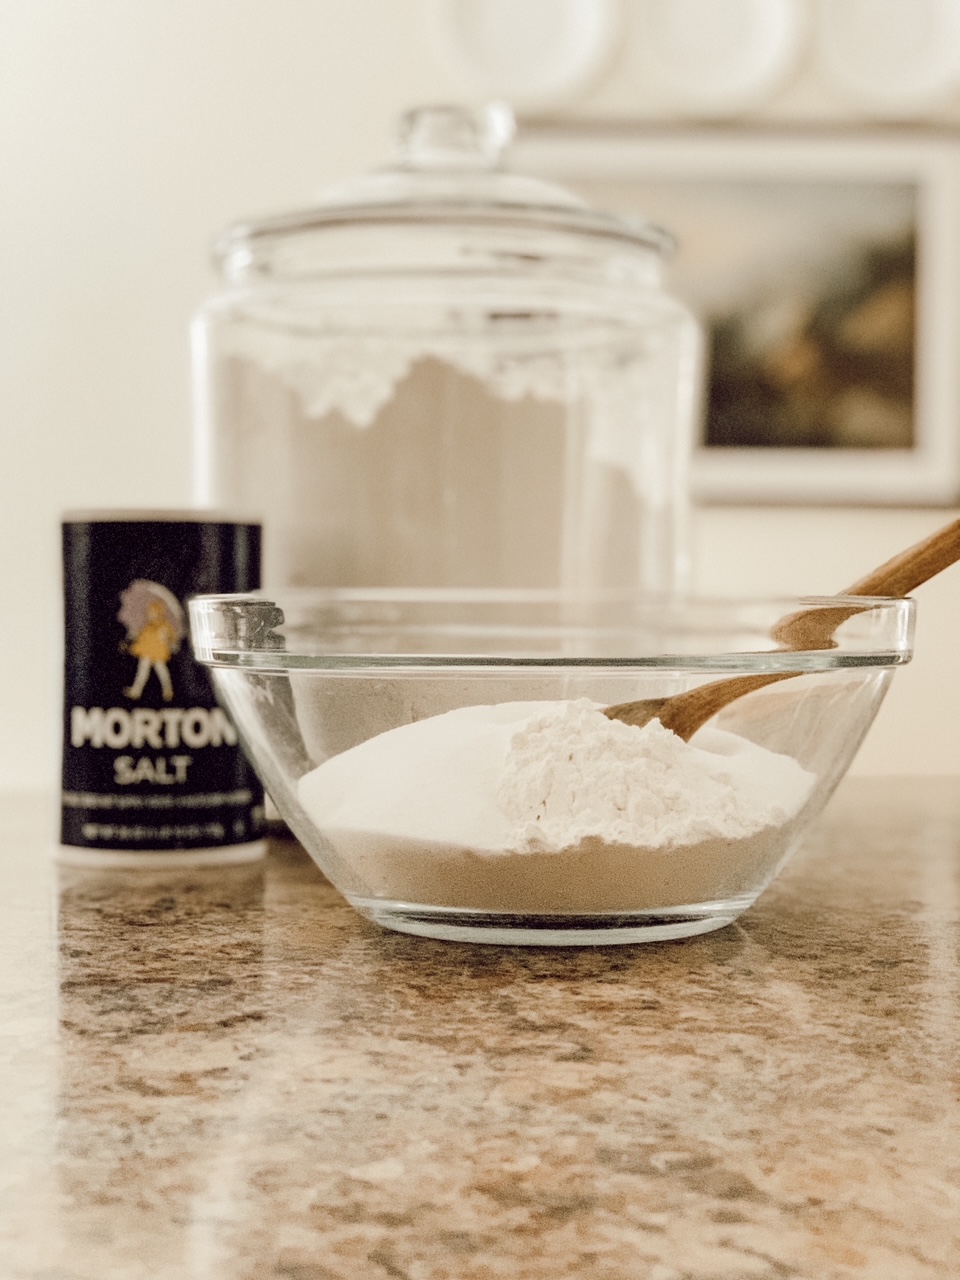
- 2 cups all purpose flour
- 1 cup table salt
- 3/4 cup water
- mixing bowl
- spoon or spatula
- rolling pin
- cookie cutters
- straw
- parchment paper
- baking sheets
- ribbon or twine
How to Make Salt Dough Ornaments for a Valentine Garland
Combine the salt and flour. Slowly add in the water, mix as you pour. If dough is dry, add in small amounts of water, only about a teaspoon at time. (If you add to much, the dough will be too wet and you will not be able to cut out ornaments. Too little water and the dough will be crumbly and will not stick together.)
Once the dough starts to form, knead with hands. The more you knead the dough the smoother the dough will become.
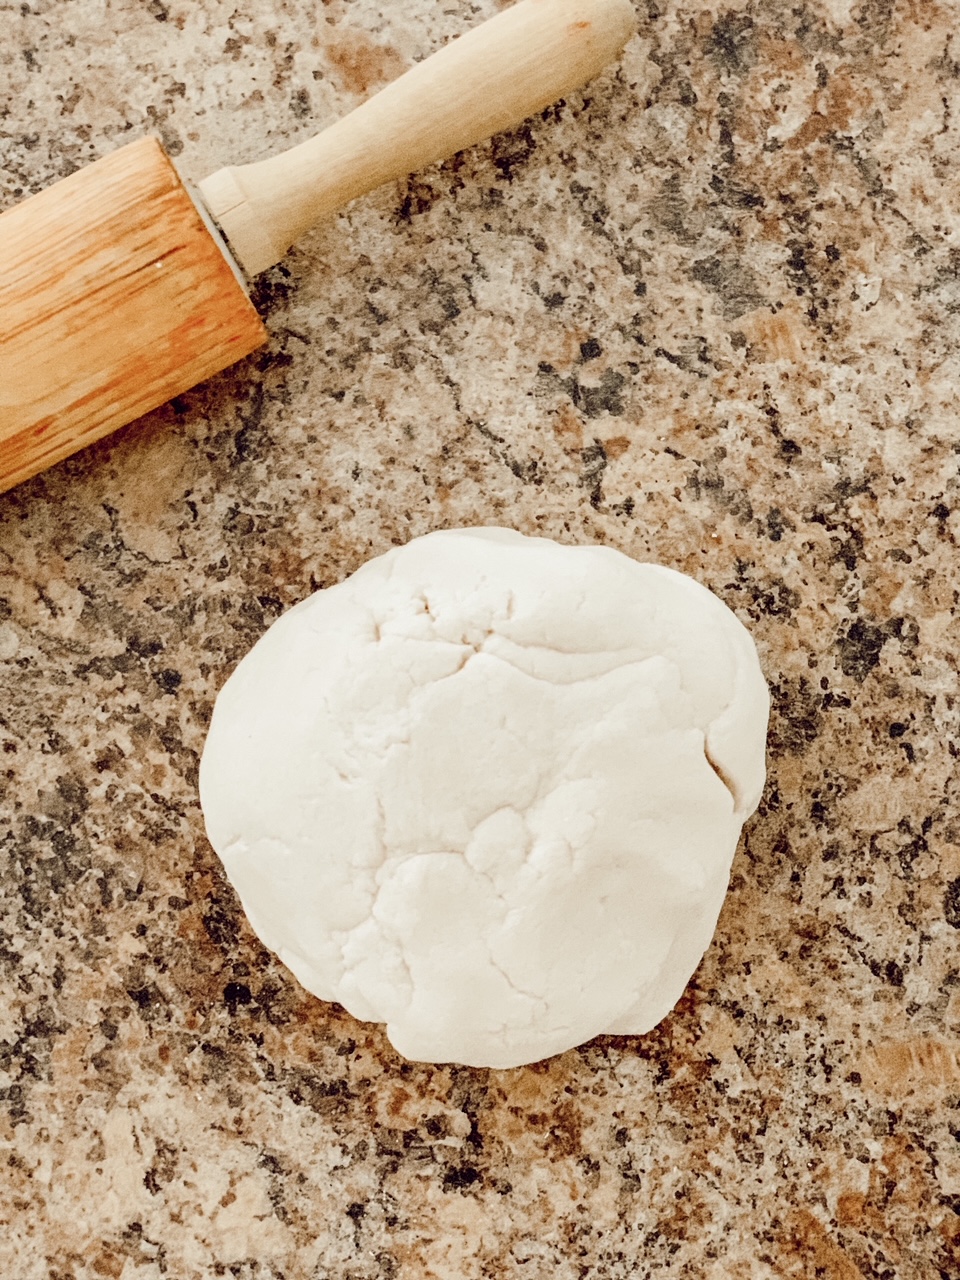
Place your dough ball on clean, flat surface and roll out the dough to about a 1/4″ thickness. You can keep the dough as thick or as thin as you like. However, the baking time will change depending on the thickness of your ornaments.
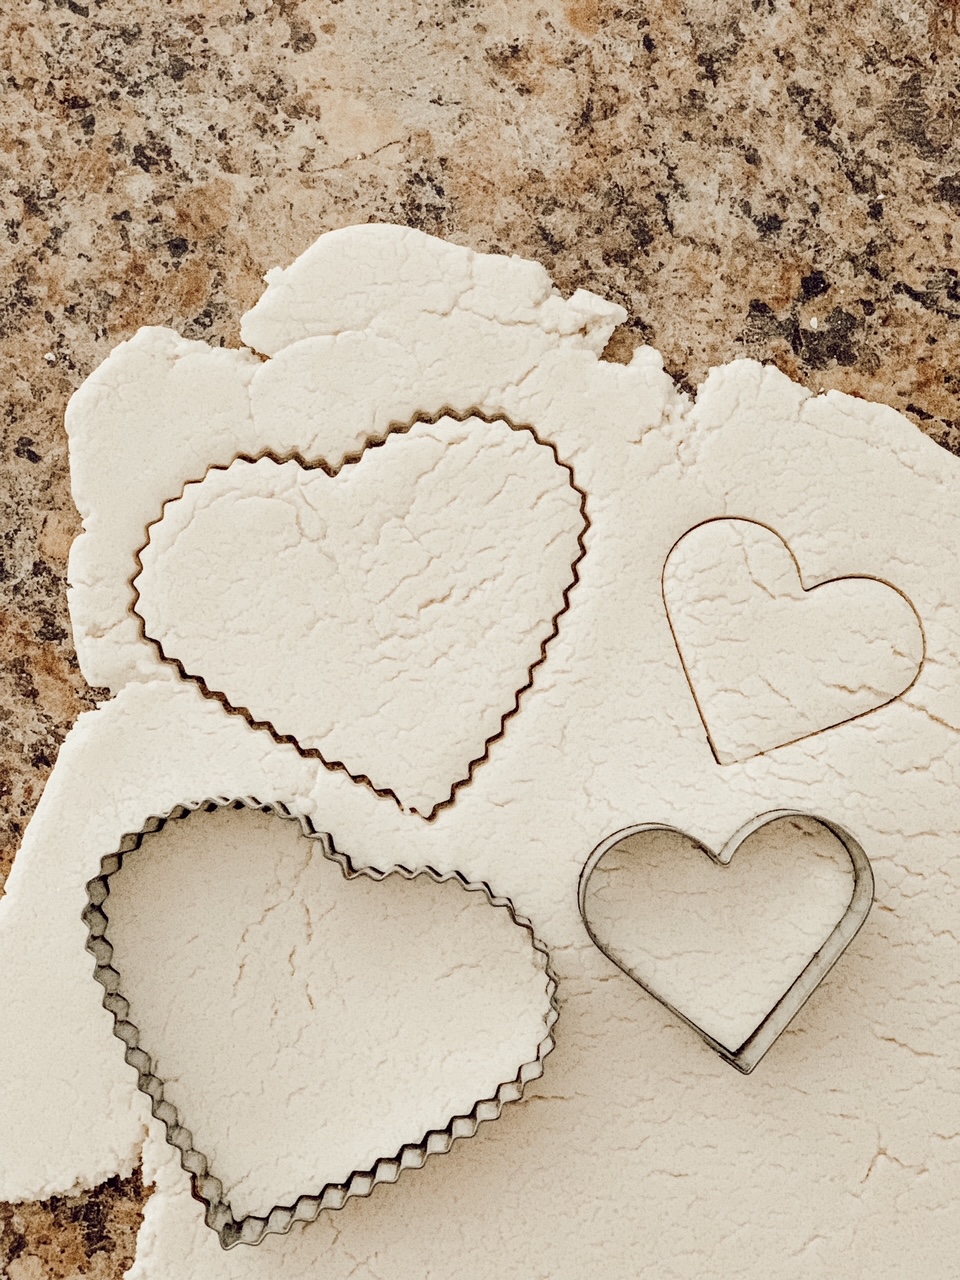
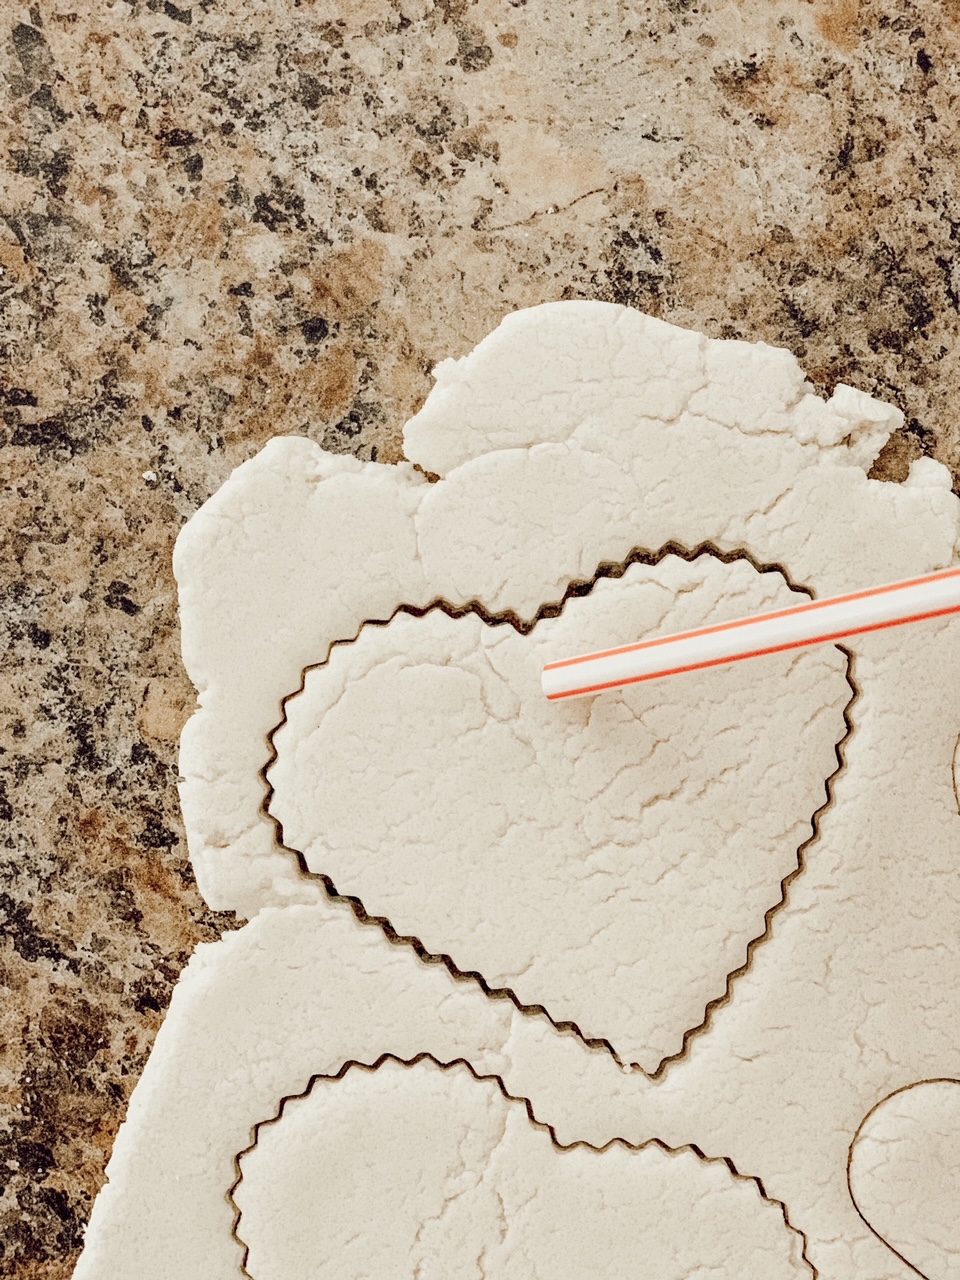
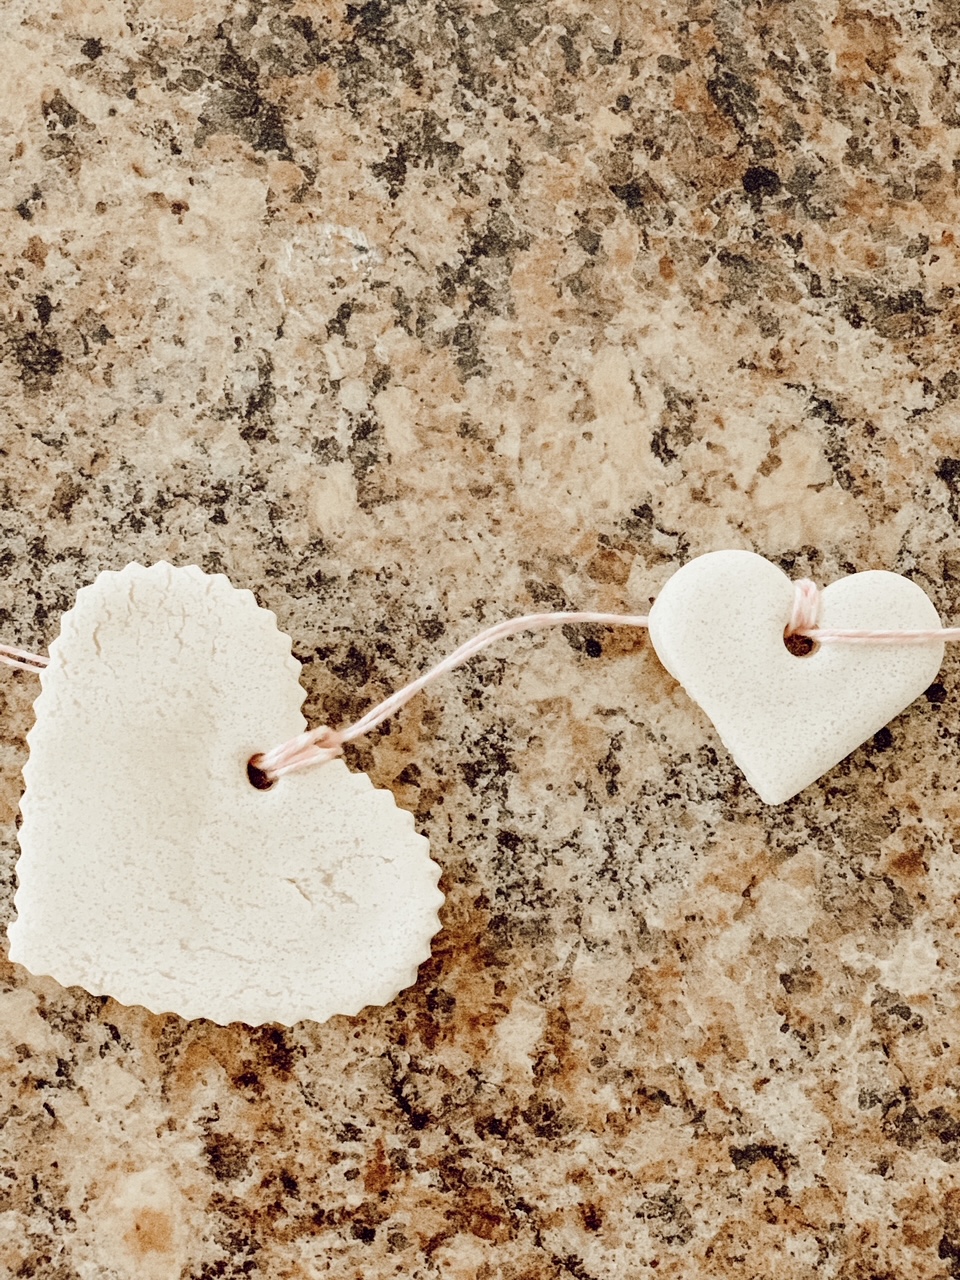
Cut out your shapes with your cookie cutters. Once your shapes are cut, take the straw and make a hole at the top of each ornament so a ribbon or twine can be strung through.
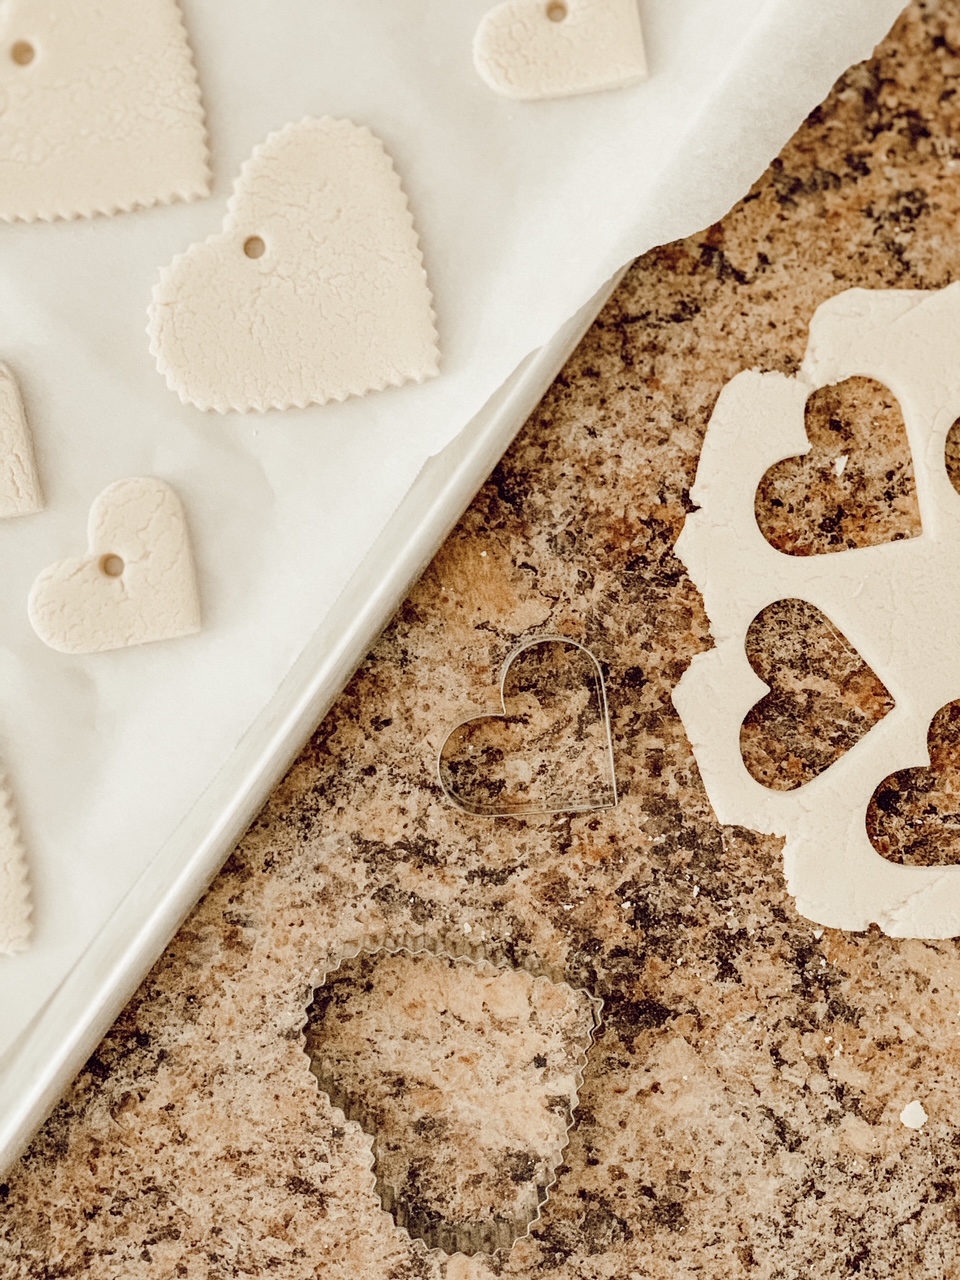
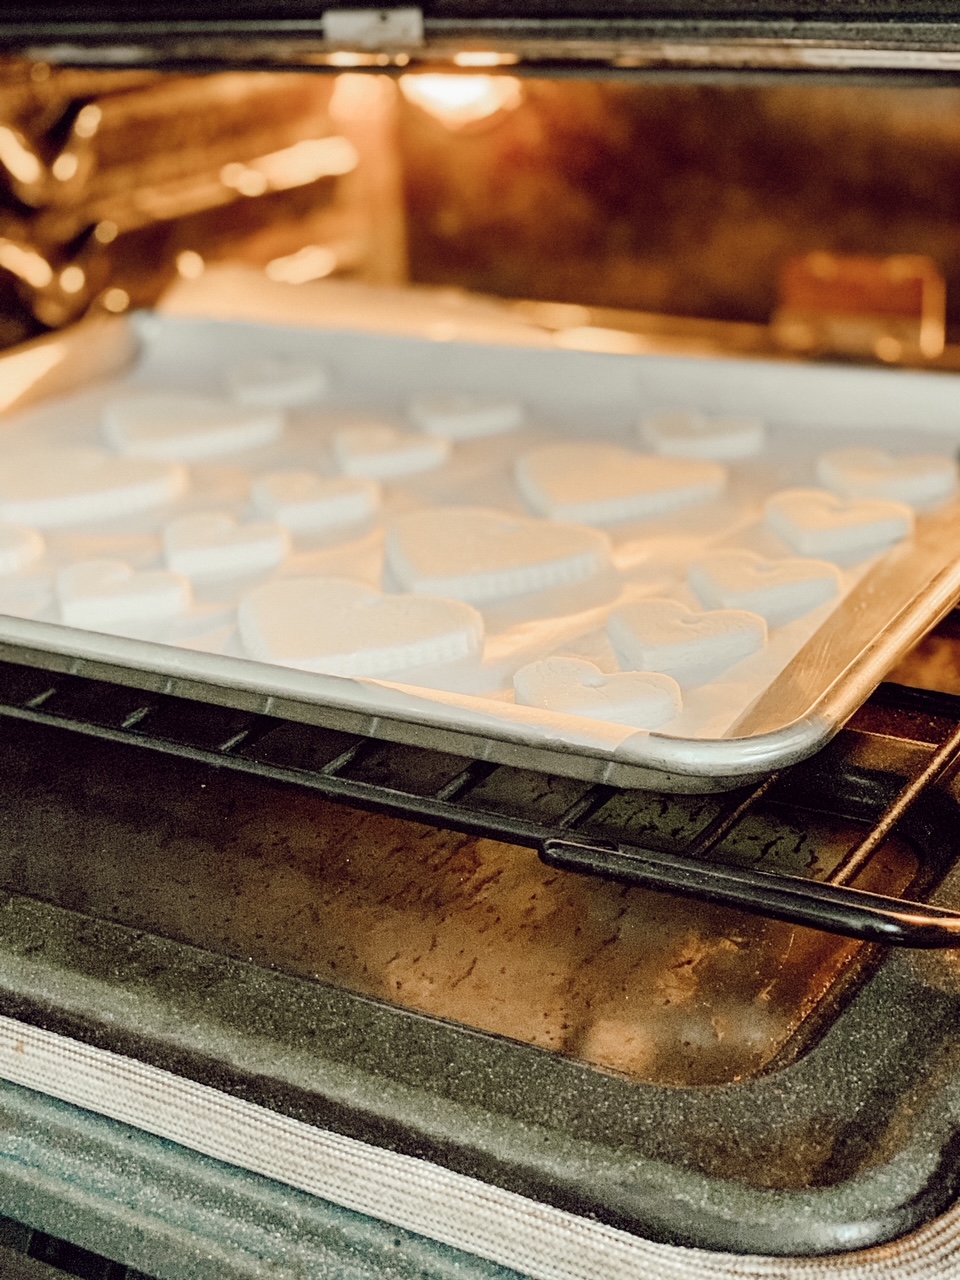
Slowly peel the excess dough away from the cut out shapes and place the shapes on a parchment lined baking sheet. Once your baking sheet is filled with ornaments, place into a 200 degree oven for 20 minutes. (Please do not judge my dirty oven! It needs to be cleaned desperately!)
After 20 minutes, flip the ornaments and bake for another 10 minutes.
Note: If your ornaments are not fully dried out, keep in the oven for 10-15 minute increments, checking occasionally, until the ornaments are completely dry.
For no bake ornaments, simply leave your ornaments out in a warm, dry place for 3-7 days, and allow them to completely dry and harden.

Assembling the Heart Ornaments into a Valentine Garland
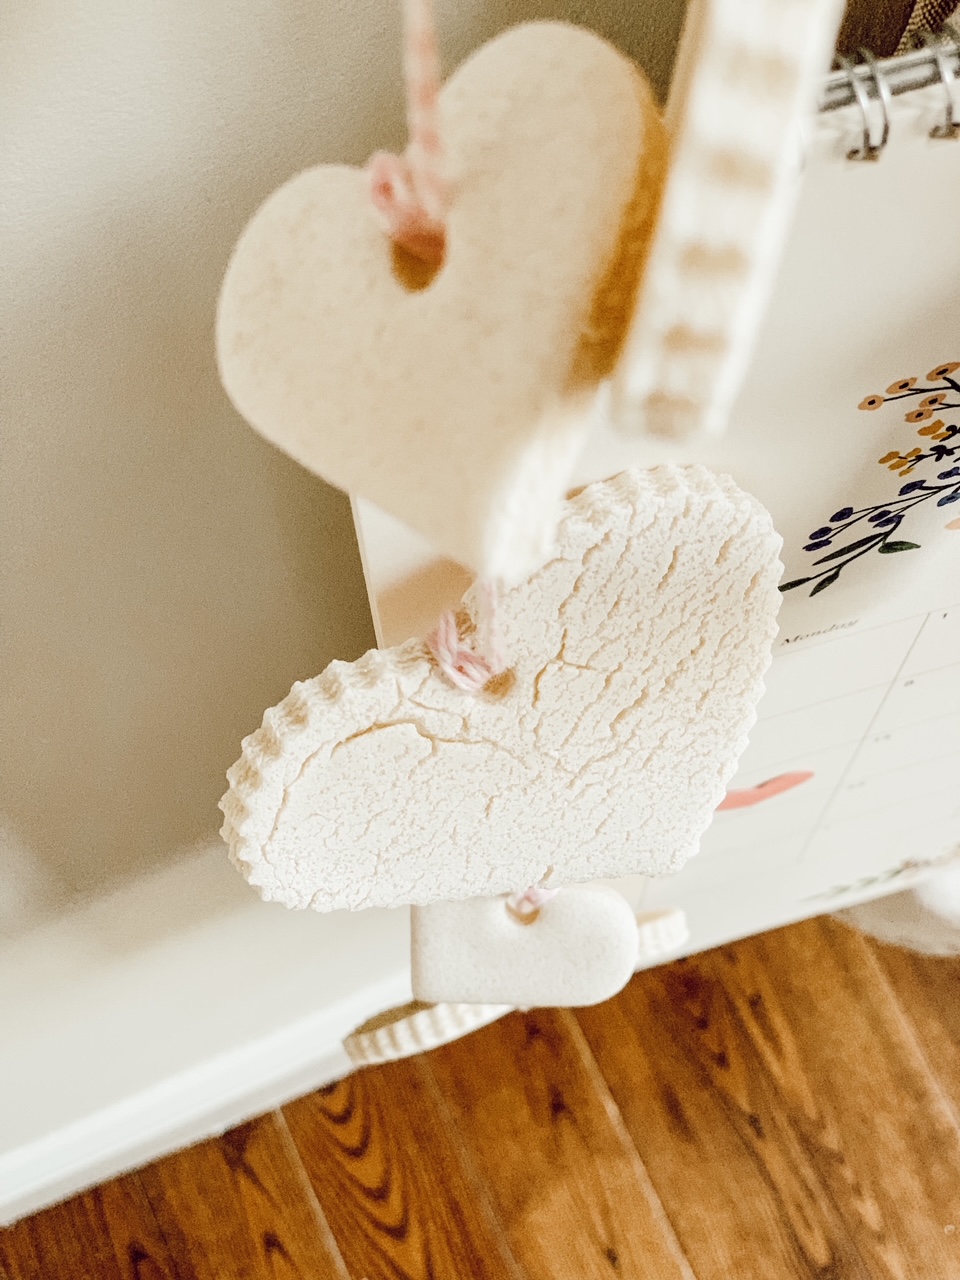
Once your ornaments are dry and cooled, add your ribbon for hanging. I decided to make 2 garlands with my ornaments. One garland with the large and small heart shaped ornaments alternating, and the other with just the small heart ornaments.
For the alternating garland, I spaced the ornaments about 2″ apart, and for the small heart garland I spaced the ornaments about 1″ apart. Leave enough ribbon on both ends of your garland to be able to hang your garland from a hook or pin.
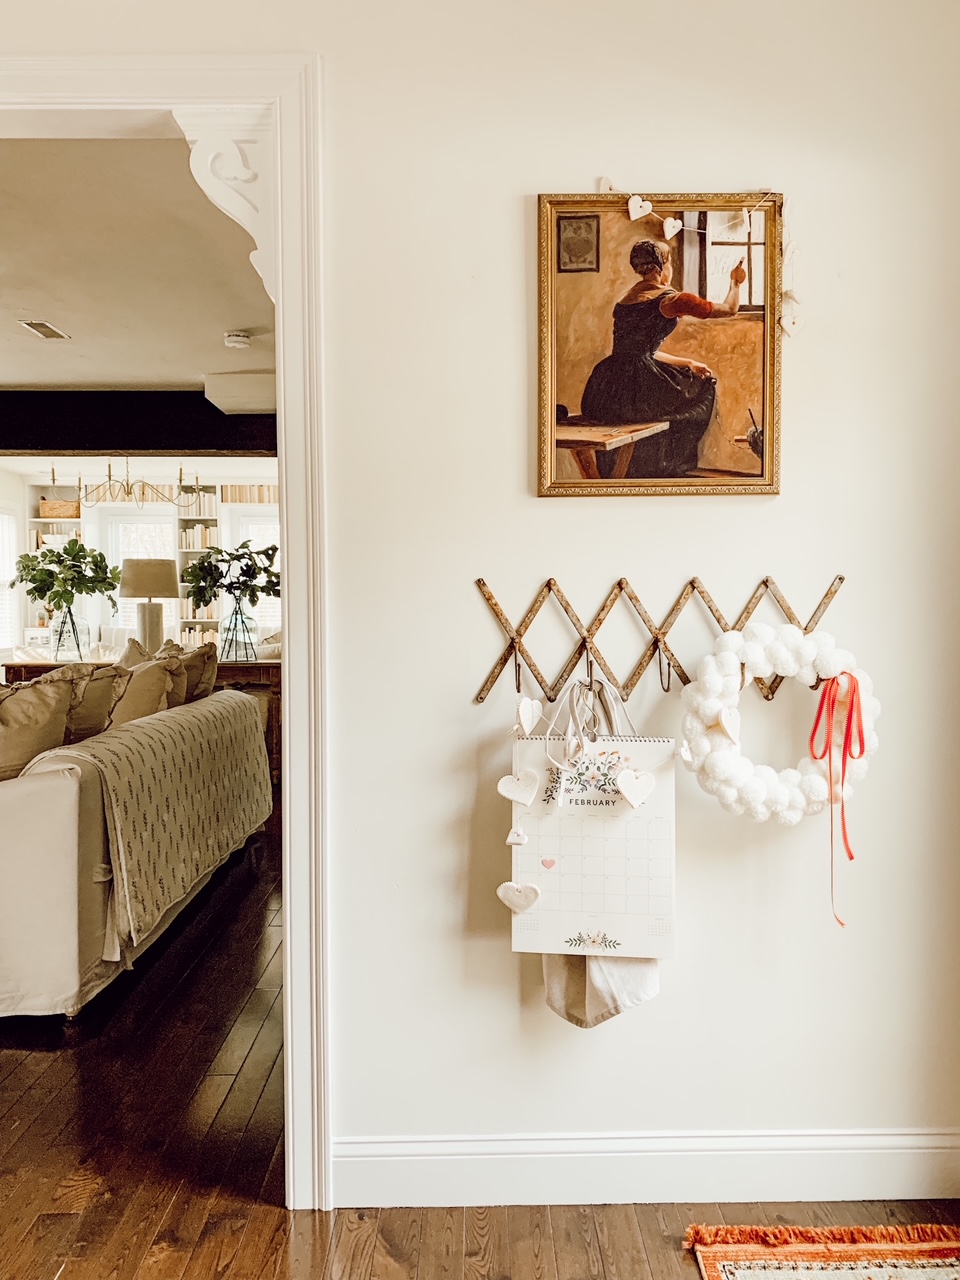
I draped our salt dough valentine garland on our accordion hanger as well as on the framed vintage valentine print. I love the organic, whimsical touch these garlands add to our home. Your garland could be hung from a shelf, a mantle, on hooks in an entryway, or keep them as ornaments and hang from a valentine tree!
Other Salt Dough Ornament Ideas
-Add food coloring to your dough to change the natural color. Pink or red ornaments would be adorable for Valentine’s Day!
-Add glitter for sparkly ornaments.
-Add essential oils for fragrant ornaments.
-Paint your ornaments. Once your dough is cooled, use acrylic paints to add color or designs to your ornaments.
-Press a thumbprint or other shape into the dough before baking. How cute would a child’s handprint or fingerprint be!
-Use your salt dough ornaments as gift tags.
Shop Our Home
Links to products featured in this post can be found in our Shop Our Home page. I hope this page makes shopping our home a little easier for you! I earn a small commission when you make a purchase from one of our LTK links. Your support helps me continue to create meaningful content for you!
I look forward to sharing more of my home with you and inspiring you to have a well loved home! Follow me on Facebook, Instagram, Pinterest, and LIKEtoKNOW.it.
Heidi
Did you enjoy this post?
PIN it for later!


Thank you so much Sharon! I am glad you found the blog and I hope I can continue to inspire you. Enjoy your weekend!
I love the little heart garland but I have to tell you I am so loving you lovely home! It is beautiful and so to my style. BTW, I too love wrapping Christmas gifts (or any gift for that matter). So happy I just found your blog and will be following along to see what other things you have planned for us. Have a blessed day, Sharon
Thank you so much Corine!
Heidi, they turned out adorable, I’m going to try some. If I do I’ll tag you on IG. Thank you for the inspiration.
Corine
Thank you Brittany!
Heidi they turned out so good! 🙂 What a fun Valentine’s day project!!
Thank you Stacey! I’m so glad I tried them, I will definitely be making them at Christmas too!
These are adorable! I made salt dough ornaments once, back when my son was a baby. I need to try again! Really love the garland idea too!